August 14, 2020 - Categories IT/Software Projects
Categories: it/software projects , i’m not an authority on this - take my explanation with a grain of skepticism
and do your own research.
i’ve been working on going over some of the fundamentals of computer science
recently since i don’t have a traditional computer science education.
pass-by-value recently came up, and i thought it would be a quick foray to
properly learn the difference between pass-by-value and pass-by-reference.
surely something so fundamental must have clear answers, right?
and then it turned into a huge fucking rabbit hole, with lots of dissenting
views, and very confusing discussions. just google it, check out some of the
stackoverflow articles. there’s a lot of content, but it’s not very clear.
in the abstract, the concepts are simple. in the context of python and ruby,
it’s a confusing mess.
so that’s what this post is about - trying to clarify the
differences between the two and define what “pass-reference-by-value” actually
means.
quick, naive explanation
the tl;dr version of pass-by-value vs pass-by-reference is simple - pass by
value means the value of a function parameter gets copied into the body of a
function, but it’s not the same object in memory as the original parameter. you
can’t mutate or change whatever you passed into the function, because your
function doesn’t actually know about the original “thing” - it only has a copy
of the value of the “thing.”
pass-by-reference is the opposite. when you invoke a function with a parameter,
the function body is referring to the same object in memory as the original.
any mutations of the object inside the function body will be persisted outside
of the function body.
we can see an example of pass-by-value with a little ruby:
my_string = 'foo'
puts "my_string is '#{my_string}'" # my_string is 'foo'
def mutate(some_string)
some_string = 'not foo'
puts "string inside function is '#{some_string}'"
end
mutate(my_string) # string inside function is 'not foo'
puts "my_string is still '#{my_string}'" # my_string is still 'foo'
you can do the same thing in python, java, or any other pass-by-value language
and get the same result. and it makes perfect sense - inside the function,
some_string simply has the value of foo, so if we assign it to something
else it doesn’t affect my_string elsewhere in the function.
a contradicting example
let’s do one more simple example in ruby, to build confidence in our newfound
understanding.
my_string = 'foo'
puts "my_string is '#{my_string}'" # my_string is 'foo'
def mutate(some_string)
some_string.upcase!
puts "string inside function is '#{some_string}'"
end
mutate(my_string) # string inside function is 'foo'
puts "my_string is now '#{my_string}'" # my_string is now 'foo'
confused? yeah, me too. this confusion is what spurred my research. we know
ruby uses pass-by-value, we just empirically demonstrated that as fact - so how
is it possible that we could mutate an object inside of a function and have
that change persist outside of the function?
for anyone who uses ruby or python, they might argue that it behaves
like pass-by-reference. other people would explain the behavior by saying ruby
and python are “pass-reference-by-value” or “pass-object-by-value” but what
exactly does that mean?
more layers to the cake
it turns out that there are really two layers to this behavior, and everything
makes a lot more sense once you are familiar with them.
a language can support pass-by-reference or pass-by-value semantics, or both.
for example, c# supports both
on top of that, the type of parameters you pass into a function can be a
value type or a reference type, regardless of whether pass-by-value or
pass-by-reference semantics are used. this is what makes classifying languages
so confusing - a language that uses pass-by-value semantics and reference types
appears to behave like pass-by-reference.
let’s go back to our ruby examples. ruby is always pass-by-value. however we
saw earlier that it behaved like a pass-by-reference language. that’s because
the value of the my_string parameter is a reference to an object in
memory. the value is still being copied when the function is invoked (hence
pass-by-value), but the value is a reference to the same object in memory.
let’s do another quick example in ruby to demonstrate this:
my_string = 'foo'
puts "my_string is '#{my_string}'" # my_string is 'foo'
puts my_string.object_id # 60
def mutate(some_string)
puts some_string.object_id # 60
some_string.upcase!
# object_id will still be 60 - still referring to the same object in memory
puts some_string.object_id # 60
puts "string inside function is '#{some_string}'" # string inside function is 'foo'
# assigning a value to `some_string` creates a new object in memory, and the value
# is updated to reference that new object in memory. it did not change the original
# object in memory. because of this, the id will be different
some_string = 'not foo'
puts some_string.object_id # 80
end
mutate(my_string)
puts "my_string is now '#{my_string}'" # my_string is now 'foo'
for those who need visual help like me, here’s a series of diagrams explaining
the same concept. in each digram, the code will be on the left and a
model of the objects in memory will be on the right.
when we first initialize my_string with the value 'foo', a new object is
created in memory that holds the string foo.
when we invoke the mutate method and pass in my_string, a copy of
my_string is made. that copy has the variable name some_string, and the
value of the variable is the reference to the object in memory (not the
string foo). it’s a new variable inside of the function scope, but it refers
to the same object in memory.
if we mutate the object inside the function body, it affects the object
both inside and outside of the function scope.
now here’s where the difference between pass-reference-by-value and true
pass-by-reference is made clear. if ruby were pass-by-reference, we could
update my_string to refer to a new object in memory. but we can’t - we never
actually had my_string within the scope of our function, just a copy of that
variable that refers to the same object in memory. if we try to assign
some_string to a new object, it has no effect on my_string outside of the
function body. it just creates a new object in memory.
compared to languages with pointers
rust, golang, c, and c++ all support pointers. some people will say that this
means you can write functions with pass-by-value or pass-by-reference
semantics. don’t believe their lies - strictly speaking, these languages are
also pass-by-value.
in ruby and python, every variable is a reference to an object in memory. in
rust/golang/c++, both references and pointers are supported. however the
differences between pointers and references
is subtle, and don’t affect the examples we used in this post.
the eli5 version is that references are like “implicit pointers” and don’t
require extra syntax to de-reference them. we could implement the same
exercises above in any of these languages, using references or pointers, and
the behavior would be the same.
so the only real difference is that these languages require us to be explicit
about pointers/references, whereas ruby and python use references implicitly.
conclusion
in short, pass-reference-by-value is just pass-by-value with implicit
references. unless you’re using c#, perl, or some exotic language, you’re more
than likely using pass-by-value, either with explicit pointers/references
(golang, rust, c++) or implicit references (python, ruby).
i hope this helps demystify the nature of pass-reference-by-value for you and
spares you the stackoverflow rabbit hole. here are some links for content i
reviewed to learn about this, in case you want to do your own research:
is ruby pass by reference or pass by value?
my post is like the eli5 version of this post. what i didn’t understand was
that assignment was the key difference in behavior
stackoverflow - is ruby pass by reference or by value?
this answer in particular made
it more clear to me
c# vs python argument passing
value type and reference type
variable references and mutability in ruby

October 29, 2017 - Categories IT/Software Projects
Categories: it/software projects , it’s official! linkets has been formally published on the zendesk app marketplace - go check it out!
one of the coolest things about zendesk (both the
company and the software itself) is how developer-friendly it is. the api is
well documented and powerful, and they even provide an app framework
that allows you to develop “widgets” that are displayed in the standard zendesk
uis. full disclosure, i currently work at zendesk.
zendesk support has a ton of features, but doesn’t have the ability to link
related tickets. there is a linked ticket
app you can install for free, but this only allows you to create new tickets,
and only as a child ticket. want to link to an existing ticket? too bad. need
to support relationships other than parent/child? too bad. i want people to use
and love zendesk, so i decided to take a crack at my own version of the linked
ticket app. i titled my app “linkets.”
the concept for the app is simple. linked tickets are simply tickets with extra
metadata about one another. the zendesk api supports reading and writing tags
on tickets, and tags are an excellent way to store metadata. when you open a
ticket, the widget reads the tags, parses any tags that are specific to links,
looks up those related tickets and displays them in the widget.
users obviously need to be able to create new links. to do so, users can simply
search for tickets (using zendesk’s search api, which is a speedy, badass,
full-text search platform), click on the button to create the link, and then
choose how the two tickets are related. behind the scenes, this is another api
call that updates the current ticket and the linked ticket.
that’s it. linkets is very lightweight, won’t eat through your api limits, and
is easily modifiable/extensible. don’t like the built-in relationship types?
just modify the javascript for handling ‘relationship codes’
and the relationship codes set in the ui.
the app isn’t published on the zendesk app marketplace
yet, but in the meantime you can download the zip file from the github repo
and install it as a “private app”.
linkets on github
the zendesk developer docs are so good, i won’t bother walking through how to
write your own app. if you’re interested in writing your own app, check out the build your first support app walkthrough.
let me know if you end up using linkets, or if you’ve written your own custom app!
as always, i hope you found this useful.
May 21, 2017 - Categories IT/Software Projects
Categories: it/software projects , dec 28 2017 update openshift deprecated their original offering, so the api backend is completely dead. all functionality in the single page app (besides the auth0 integration) is now broken.
about a year ago, i had a use case for a simple redirect. i just needed to
redirect developers from an old jenkins dns record (that pointed to an instance
that was destroyed) to a new dns record (pointing to the new, running jenkins
instance). now this is a trivial task if you want to run nginx or apache, but
becomes more challenging if you want to avoid that overhead. i tried hosting a
simple javascript redirect using s3, but the bucket obviously didn’t match my
dns name, so that didn’t work. route53 doesn’t support http redirects. i was at
a loss - how could something so trivial require a whole web server to
accomplish?
i started looking into 3rd party services that could do this, mostly out of
curiosity. i stumbled across 301redirect.it and
easyredir. 301redirect.it is free, but
easyredir.com charges between $10 and $80 per month. i’m sure their service
is awesome, but that was a big enough price tag that i started thinking it
might be worthwhile to try to compete in the same market. especially since dns
redirection is so easy.
this is probably the most feature complete software project i’ve ever done.
it’s a “full saas platform,” meaning it has proper authentication (via
auth0), billing capabilities (via stripe)
, and is totally self-service for customers to consume. it should
be a turnkey cash cow.
but like most of my projects, i did effectively zero promotion or sales work, so of
course it has zero customers (not just zero paying customers - zero customers
period). before i sunset the project forever, i wanted to do this blog post
and put the site up for sale on flippa.
before we breakdown the architecture and application, check out the walkthrough
video or check out the site for yourself:
dnsreroute
architecture
this architecture is not ideal, so before you “principal architect” types try to
mouth off in the comments, know that i’m quite aware of its design flaws.
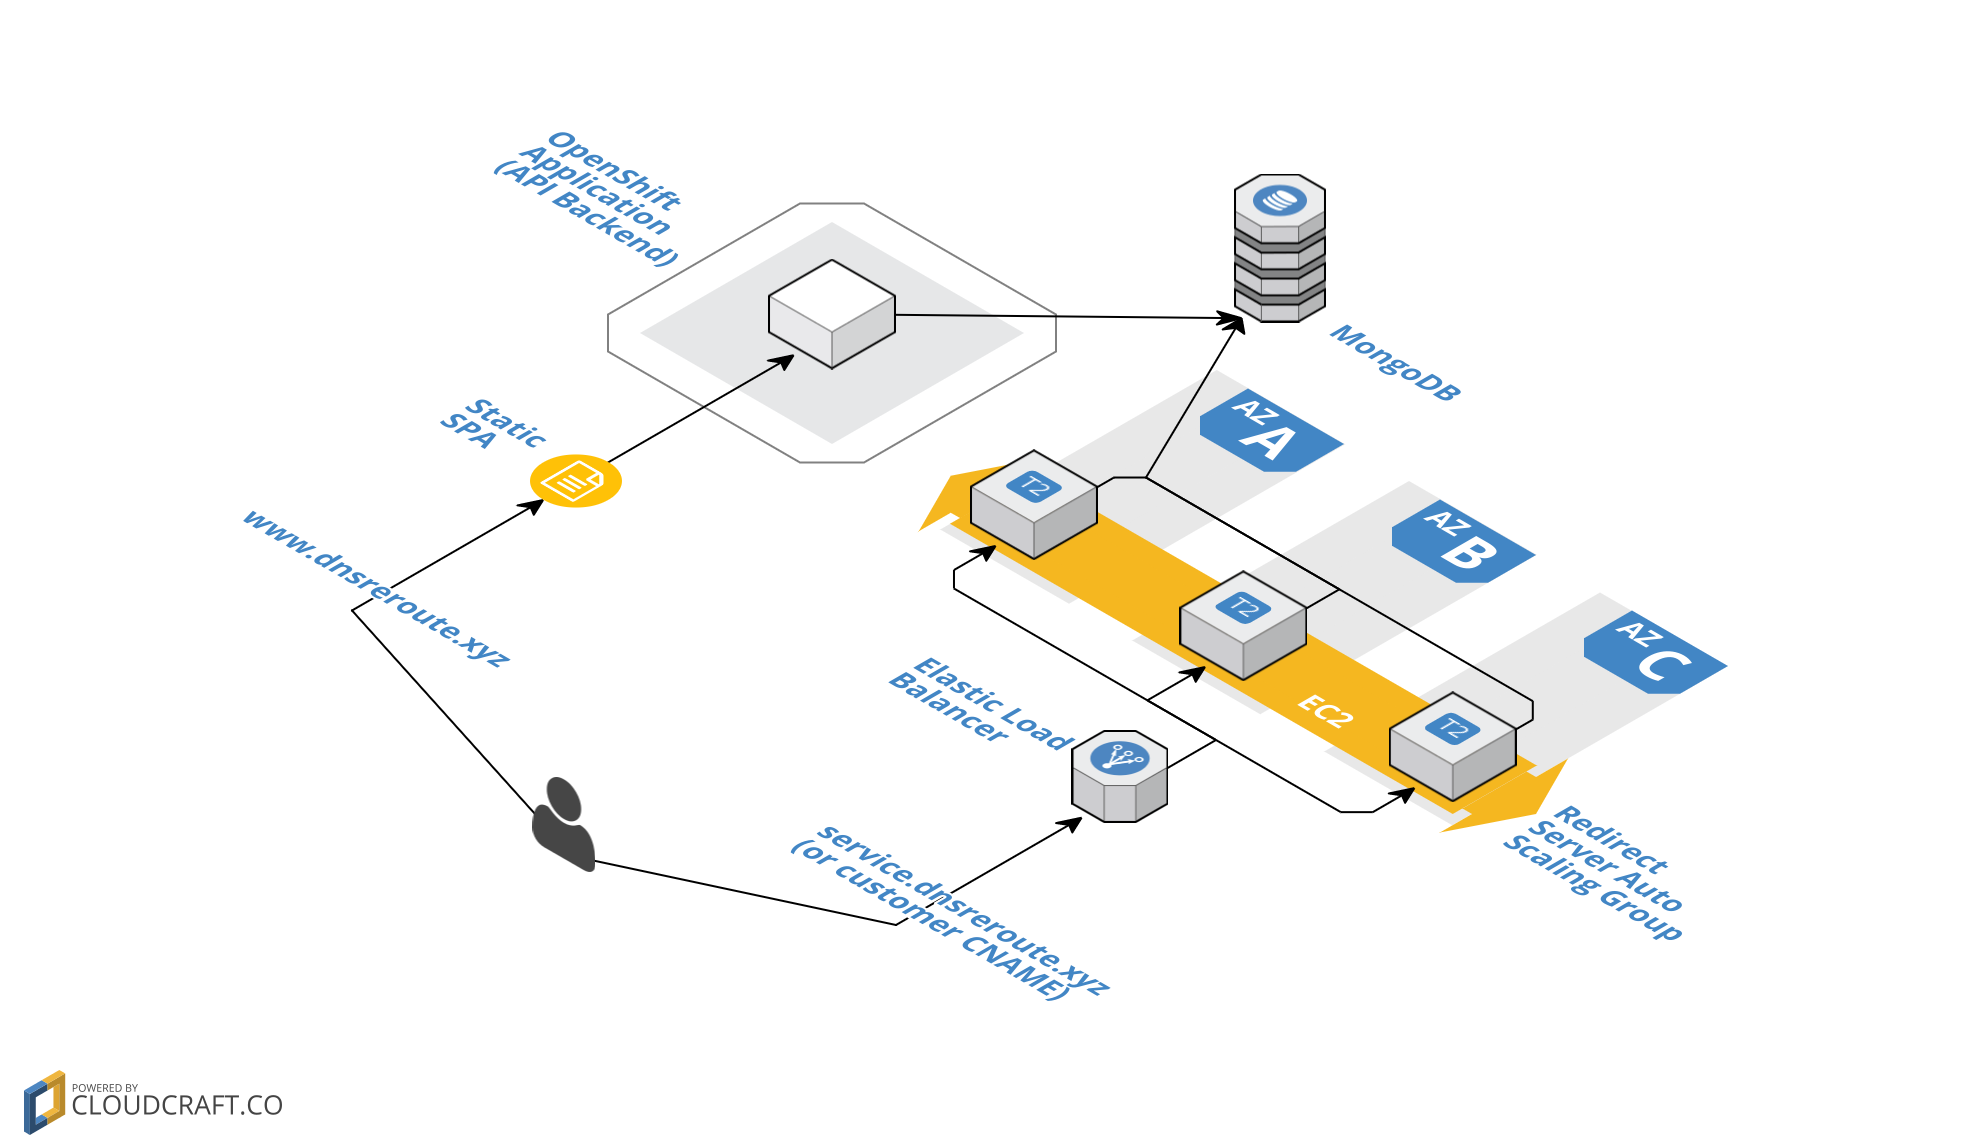
at a high level, dnsreroute is comprised of four components:
restful api backend built on flask running on openshift
“dumb” redirect servers running flask, in an autoscaling group, behind an elb
in aws
a mongodb instance running on mlab with a public
endpoint. both the restful api backend and the “dumb” redirect servers read
from this db.
a static, single page app (spa) using jquery and hosted on github pages.
in case that doesn’t make any sense, here’s a sexy diagram to help you
understand:
let’s do an example walkthrough. let’s pretend we are “blacklanternstudio” and
we sell our product on etsy, at https://www.etsy.com/shop/blacklanternstudio.
we want to capture more traffic and retain more brand identity, so we want
www.blacklanternstudio.com to redirect to https://www.etsy.com/shop/blacklanternstudio.
to do this, we would browse to www.dnsreroute.xyz,
which takes you to the static front-end site. from here we would create an
account and then create a “route” to handle our redirect, including what
incoming dns names to expect (inbound routes), and where to redirect that
traffic (outbound routes). all of the actions in the ui are making api calls to
the flask backend, which then writes that data to the database. finally, we
would log into our dns system and create a cname record, pointing www.blacklanternstudio.com
to service.dnsreroute.xyz. now when our customers browse to
www.blacklanternstudio.com, they are actually being sent to dnsreroute’s
redirect hosts. the redirect hosts are running some fairly simple flask code,
basically inspecting the host header to get the inbound dns name, looking up
the “route” associated with that inbound dns name in the database, and
redirecting the user’s browser to the outbound dns name.
originally i was going to host everything on openshift to keep things simple,
but using custom and un-predictable customer cnames wouldn’t work. in addition,
moving the actual redirect work to a separate stack allows the two components
to scale independently and prevents bad code/failed deploys to the api layer
(where more complex logic resides, more likely to break) from affecting the
redirect layer (less complex, less likely to break).
third party services
auth0
setting up authentication with auth0 was a little tricky at first, but it has
been bulletproof ever since. auth0 provides a
clean flask example
that is easy to integrate with your flask implementation. if i’m being honest,
i think i re-used their authentication wrapper line for line. most of the time
i spent on auth0 setup didn’t involve any code, but rather all of the ancillary
pieces like ssl certificates, setting up the callback uri, registering domains for
cross origin requests (cors) in auth0’s web ui, etc.
stripe
stripe makes handling subscriptions and one-time payments in your web application
fun. they abstract all of the difficult parts of payment processing and record
keeping, you just have to write your app to consume their apis for creating new
customers and looking up existing subscriptions. i really like stripe because
their ‘sandbox’ or development support is significantly easier than paypal. with
stripe, you simply change which api client keys you are using, and you can use any
fake credit card number to test your app. with paypal, you have to set up a sandbox,
you have to set up sandbox payer/payee accounts, and have to use certain credit
card numbers.
tl;dr stripe is awesome for payment processing.
database design
when i first started this project, it had a much smaller scope. based solely
on storing route information, i decided a nosql database like mongodb would be
a perfect fit. unfortunately, as i added features like user management,
organizations, and subscriptions, i had to build relations between my
tables/collections. so i’ve effectively created a relational db on top of a
non-relational db, which is a little embarrassing to say the least.
dnsreroute uses four collections (like tables, if you’re not familiar):
orgs - comprised of an id, orgname, and subscription
users - comprised of an id, username (used for display purposes), useremail
(used for auth purposes), and orgid as a “foreign key”
routes - comprised of an id, incomingroute, outgoingroute, type (301 vs 302
redirect), and orgid as a “foreign key”
subscriptions - comprised of an id, subscriptionname (matches the subscription
name in stripe), title (for display purposes), and some boilerplate html
describing the subscription, so it can be consumed consistently in the ui
for the handful of people out there who can read an er diagram and appreciate
them, here it is:
static spa front-end
the front-end is made with dashgum, a pre-made dashboard template built using
bootstrap that i found on colorlib.
all of the logic is written in straight javascript and jquery, nothing fancy
like angular or react. a true front-end developer would probably be appalled
with my code, but it works and i was able to knock out a prototype very quickly.
the page itself is actually hosted on github pages in a public repo, so the
all of the code is available for you to peruse if you’re interested:
static spa repo
api backend
the api backend is a flask app running on openshift.
i chose openshift for this project as openshift will allow you to keep a certain
number of free apps running 24/7, so long as you have a credit card on file. this
is in contrast to heroku (which i also love) that puts your “dynos” to sleep when
they become inactive.
the api backend can be hit at https://dnsrerouteprod-dnsreroute.rhcloud.com.
you can browse through the swagger api doc
to get a feel for the routes. note that you won’t be able to send any api calls
via the swagger doc unless the saml bearer token set. if you open the swagger
doc from the dnsreroute dashboard (by clicking on the “api playground” link in the left sidebar), it will set your saml bearer token for you.
as for the code, all of the relevant logic is contained in flaskapp.py:
import os
from datetime import datetime
from urlparse import urlparse
from flask import flask, request, flash, url_for, redirect, \
render_template, abort, send_from_directory, jsonify, _request_ctx_stack
import jwt
import requests
import base64
from functools import wraps
from werkzeug.local import localproxy
from flask.ext.cors import cors, cross_origin
import pymongo
from pymongo import mongoclient, indexmodel, ascending, descending, errors
from bson.json_util import dumps
import json
from bson.objectid import objectid
import stripe
env = os.environ
client_id = os.environ['auth0_client_id']
client_secret = os.environ["auth0_client_secret"]
stripe.api_key = os.environ["stripe_api_key"]
requestoremail = ""
app = flask(__name__)
app.config.from_pyfile('flaskapp.cfg')
cors(app)
# format error response and append status code.
def handle_error(error, status_code):
resp = jsonify(error)
resp.status_code = status_code
return resp
def requires_auth(f):
@wraps(f)
def decorated(*args, **kwargs):
auth = request.headers.get('authorization', none)
if not auth:
return handle_error({'code': 'authorization_header_missing', 'description': 'authorization header is expected'}, 401)
parts = auth.split()
if parts[0].lower() != 'bearer':
return handle_error({'code': 'invalid_header', 'description': 'authorization header must start with bearer'}, 401)
elif len(parts) == 1:
return handle_error({'code': 'invalid_header', 'description': 'token not found'}, 401)
elif len(parts) > 2:
return handle_error({'code': 'invalid_header', 'description': 'authorization header must be bearer + \s + token'}, 401)
# this is the bearer token
token = parts[1]
try:
payload = jwt.decode(
token,
base64.b64decode(client_secret.replace("_","/").replace("-","+")),
audience=client_id
)
except jwt.expiredsignature:
return handle_error({'code': 'token_expired', 'description': 'token is expired'}, 401)
except jwt.invalidaudienceerror:
return handle_error({'code': 'invalid_audience', 'description': 'incorrect audience, expected: ' + client_id}, 401)
except jwt.decodeerror:
return handle_error({'code': 'token_invalid_signature', 'description': 'token signature is invalid'}, 401)
except exception:
return handle_error({'code': 'invalid_header', 'description':'unable to parse authentication token.'}, 400)
endpoint = "https://alexdglover.auth0.com/tokeninfo"
headers = {"authorization":"bearer " + token}
data = {"id_token": token}
global requestoremail
try:
requestoremail = requests.post(endpoint,data=data,headers=headers).json()['email']
except exception as e:
return handle_error({'code': 'failed_user_lookup', 'description': 'unable to look up user with that token'})
_request_ctx_stack.top.current_user = user = payload
return f(*args, **kwargs)
return decorated
def connect():
connection = mongoclient(os.environ['openshift_mongodb_db_url'],int(os.environ['openshift_mongodb_db_port']))
handle = connection["dnsreroute"]
handle.authenticate(os.environ['openshift_mongodb_db_username'],os.environ['openshift_mongodb_db_password'])
return handle
def initializedb():
handle.routes.create_index( [ ("incomingroute", ascending)], unique=true )
handle.users.create_index( [ ("useremail", ascending)], unique=true )
handle = connect()
initializedb()
# sets response headers for all requests received. this is needed to allow
# pre-flight options requests to get the information they need to do puts
# and deletes
@app.after_request
def after_request(response):
response.headers['access-control-allow-origin'] = request.headers.get('origin','*')
response.headers.add('access-control-allow-headers', 'content-type,authorization')
response.headers.add('access-control-allow-methods', 'put,post,options,delete,get')
return response
# controllers api
@app.route("/")
def home():
host = request.headers['host']
host = host.split(':')[0]
if host != 'service.dnsreroute.xyz':
route = handle.routes.find_one({'incomingroute': host})
if route:
outgoingroute = route['outgoingroute']
if route['type'] == "301":
return redirect(outgoingroute, 301)
elif route['type'] == "302":
return redirect(outgoingroute)
else:
return '{"message": "error - not able to determine redirect type"}'
else:
return '{"message": "could not find a matching route"}', 404
else:
return "the host header is {hostheader}.this is the unsecured home page".format(hostheader=request.headers['host'])
@app.route("/ping",host="*")
def ping():
return "all good. you don't need to be authenticated to call this"
@app.route("/secured/ping")
@requires_auth
def securedping():
return "all good. you only get this message if you're authenticated"
###################################
### route uris
###################################
@app.route("/routes/byuseremail/<useremail>", methods=['get'])
@requires_auth
def getroutesbyuseremail(useremail):
orgid = handle.users.find_one({"useremail": useremail})['orgid']
print 'orgid is {orgid}'.format(orgid=orgid)
routes = handle.routes.find({"orgid": objectid(orgid)})
if routes:
return dumps(routes)
else:
message = {"message": "no routes found with that orgid"}
return jsonify(message), 404
@app.route("/routes/byorg/<orgid>", methods=['get'])
@requires_auth
def getroutesbyorgid(orgid):
orgid = validateobjectid(orgid)
if not orgid:
message = {"message": "invalid org id, uanble to convert to objectid. must be a 12-byte input or a 24-character hex string"}
return jsonify(message), 400
routes = handle.routes.find({"orgid": orgid})
if routes:
return dumps(routes)
else:
message = {"message": "no routes found with that orgid"}
return jsonify(message), 404
@app.route("/routes", methods=['post'])
@requires_auth
def addroute():
if isauthorized(requestoremail, 'addroute'):
try:
handle.routes.insert({"orgid": objectid(request.values['orgid']), "type": request.values['type'],
"incomingroute": request.values['incomingroute'], "outgoingroute": request.values['outgoingroute']})
return '{"message": "successfully added route"}'
except pymongo.errors.duplicatekeyerror:
errordict = {"message": "failed to add route - that incoming dns name is already in use"}
return jsonify(errordict), 400
except exception as e:
errordict = {"message": "failed to add route. error message: {error}".format(error=e)}
return jsonify(errordict), 400
else:
# not authorized
errordict = {"message": "you are not authorized to add another route!"}
return jsonify(errordict), 403
@app.route("/routes/<incomingroute>", methods=['delete'])
@requires_auth
def deleteroute(incomingroute):
# validate incomingroute is valid first
route = handle.routes.find_one({"incomingroute": incomingroute})
if route:
if isauthorized(requestoremail, 'deleteroute', incomingroute):
try:
result = handle.routes.remove({"incomingroute": incomingroute})
return '{"message": "successfully deleted route"}'
except exception as e:
errordict = {"message": "failed to delete route. error message: {error}".format(error=e)}
return jsonify(errordict), 400
else:
# not authorized
errordict = {"message": "you are not authorized to delete that route!"}
return jsonify(errordict), 403
# if the route targeted for deletion wasn't found, return a 200 with explanation
else:
message = {"message": "route doesn't exist, but that's ok! http delete is an idempotent operation dude"}
return jsonify(message)
###################################
### end of route uris
###################################
###################################
### user uris
###################################
@app.route("/users")
@requires_auth
def getusers():
actor = handle.users.find_one({"useremail": requestoremail})
users = handle.users.find({"orgid": objectid(actor['orgid'])})
if users:
return dumps(users)
else:
message = {"message": "no users found"}
return jsonify(message), 404
@app.route("/users/byorg/<orgid>")
@requires_auth
def getusersbyorg(orgid):
orgid = validateobjectid(orgid)
if not orgid:
message = {"message": "invalid org id, uanble to convert to objectid. must be a 12-byte input or a 24-character hex string"}
return jsonify(message), 400
users = handle.users.find({"orgid": orgid})
if users:
return dumps(users)
else:
message = {"message": "no users found with that org id"}
return jsonify(message), 404
@app.route("/users/<useremail>", methods=['get'])
@requires_auth
def getuserbyemail(useremail):
user = handle.users.find_one({"useremail": useremail})
if user:
user['_id'] = str(user['_id'])
user['orgid'] = str(user['orgid'])
return dumps(user)
else:
message = {"message": "no user found with that email address"}
return jsonify(message), 404
@app.route("/users/<useremail>", methods=['put'])
@requires_auth
def updateuser(useremail):
if requestoremail == useremail:
user = handle.users.find_one({"useremail": useremail})
if user:
result = handle.users.update_one( { "useremail": useremail },
{
"$set": {
# "useremail": useremail,
"username": request.values['username'],
"orgid": objectid(request.values['orgid'])
}
}
)
message = {"message": "user updated successfully"}
return jsonify(message)
else:
message = {"message": "no user found with that email address"}
return jsonify(message), 404
else:
message = {"message": "you are not authorized to update that user. you may only update your own user information"}
return jsonify(message), 403
@app.route("/users", methods=['post'])
@requires_auth
def adduser():
if isauthorized(requestoremail, 'adduser', request.values['orgid']):
try:
handle.users.insert({"useremail":request.values['useremail'], "username":request.values['username'], "orgid": objectid(request.values['orgid']) })
message = {"message": "successfully added user"}
return jsonify(message)
except pymongo.errors.duplicatekeyerror:
errordict = {"message": "user with that email already exists"}
return jsonify(errordict), 409
except exception as e:
errordict = {"message": "failed to add user. error message: {error}".format(error=e)}
return jsonify(errordict), 400
else:
# not authorized
errordict = {"message": "you are not authorized to add another user!"}
return jsonify(errordict), 403
@app.route("/users/register", methods=['post'])
@requires_auth
def registernewuser():
try:
orgid = handle.orgs.insert({"orgname": request.values['useremail'], "subscription": "freetier"})
handle.users.insert({"useremail":request.values['useremail'], "username":request.values['username'], "orgid": objectid(orgid) })
message = {"message": "successfully registered user"}
return jsonify(message)
except pymongo.errors.duplicatekeyerror:
errordict = {"message": "user with that email already exists"}
return jsonify(errordict), 409
except exception as e:
errordict = {"message": "failed to add user. error message: {error}".format(error=e)}
return jsonify(errordict), 400
@app.route("/users/<useremail>", methods=['delete'])
@requires_auth
def deleteuser(useremail):
targetuser = handle.users.find_one({"useremail": useremail})
if targetuser:
if isauthorized(requestoremail, 'deleteuser', useremail):
try:
result = handle.users.remove({"useremail": useremail})
message = {"message": "successfully deleted user"}
return jsonify(message)
except exception as e:
errordict = {"message": "failed to delete user. error message: {error}".format(error=e)}
return jsonify(errordict), 400
else:
# not authorized
errordict = {"message": "you are not authorized to delete that user!"}
return jsonify(errordict), 403
# if the user targeted for deletion wasn't found, return a 200 with explanation
else:
message = {"message": "user doesn't exist, but that's ok! http delete is an idempotent operation dude"}
return jsonify(message)
###################################
### end of user uris
###################################
###################################
### org uris
###################################
@app.route("/orgs", methods=['post'])
@requires_auth
def addorg():
try:
orgid = handle.orgs.insert({"orgname": request.values['useremail'], "subscription": "freetier"})
return '{"message": "successfully added org"}'
except pymongo.errors.duplicatekeyerror:
errordict = {"message": "org already exists"}
return jsonify(errordict), 400
except exception as e:
errordict = {"message": "failed to add org. error message: {error}".format(error=e)}
return jsonify(errordict), 400
@app.route("/orgs/<orgid>", methods=['put'])
@requires_auth
def updateorg(orgid):
orgid = validateobjectid(orgid)
if not orgid:
message = {"message": "invalid org id, uanble to convert to objectid. must be a 12-byte input or a 24-character hex string"}
return jsonify(message), 400
try:
org = handle.orgs.find_one( {"_id": orgid} )
if org:
result = handle.orgs.update_one( {"_id": orgid},
{
"$set": {
"orgname": request.values['orgname']
}
}
)
message = {"message": "org updated successfully"}
return jsonify(message)
else:
message = {"message": "no org with that id"}
return jsonify(message), 404
except exception as e:
errordict = {"message": "failed to update org. error message: {error}".format(error=e)}
return jsonify(errordict), 400
@app.route("/orgs/<orgid>", methods=['get'])
@requires_auth
def getorg(orgid):
orgid = validateobjectid(orgid)
if not orgid:
message = {"message": "invalid org id, uanble to convert to objectid. must be a 12-byte input or a 24-character hex string"}
return jsonify(message), 400
org = handle.orgs.find_one({"_id": orgid})
if org:
org['_id'] = str(org['_id'])
return dumps(org)
else:
message = {"message": "no org found with that orgid"}
return jsonify(message), 404
@app.route("/orgs/<orgid>", methods=['delete'])
@requires_auth
def deleteorg(orgid):
orgid = validateobjectid(orgid)
if not orgid:
message = {"message": "invalid org id, uanble to convert to objectid. must be a 12-byte input or a 24-character hex string"}
return jsonify(message), 400
org = handle.orgs.find_one({"_id": orgid})
if isauthorized(requestoremail, 'deleteorg', orgid):
# cancel stripe subscription
if 'subscriptionid' in org:
try:
subscriptionid = org['subscriptionid']
subscription = stripe.subscription.retrieve(subscriptionid)
subscription.delete()
except exception as e:
errordict = {"message": "error occurred while updating existing subscription. error message: {error}".format(error=e)}
return jsonify(errordict), 400
# delete all associated user accounts
handle.users.remove({"orgid": orgid})
# delete all associated routes
handle.routes.remove({"orgid": orgid})
try:
result = handle.orgs.remove({"_id": orgid})
return '{"message": "successfully deleted org"}'
except exception as e:
errordict = {"message": "failed to delete org. error message: {error}".format(error=e)}
return jsonify(errordict), 400
else:
# not authorized
errordict = {"message": "you are not authorized to delete that org!"}
return jsonify(errordict), 403
@app.route("/orgs/<orgid>/subscription", methods=['put'])
@requires_auth
def addsubscriptiontoorg(orgid):
orgid = validateobjectid(orgid)
if not orgid:
message = {"message": "invalid org id, uanble to convert to objectid. must be a 12-byte input or a 24-character hex string"}
return jsonify(message), 400
# check org for existing customer id
try:
org = handle.orgs.find_one( {"_id": orgid} )
if org:
print "org is:"
print org
if 'subscriptionid' in org:
try:
subscriptionid = org['subscriptionid']
subscription = stripe.subscription.retrieve(subscriptionid)
subscription.plan = request.values['subscription']
subscription.save()
except exception as e:
errordict = {"message": "error occurred while updating existing subscription. error message: {error}".format(error=e)}
return jsonify(errordict), 400
result = handle.orgs.update_one( {"_id": orgid},
{
"$set": {
"subscription": request.values['subscription']
}
}
)
message = {"message": "org updated with subscription successfully"}
return jsonify(message)
else:
try:
stripecustomer = stripe.customer.create(
source=request.values['tokenid'], # obtained from stripe.js
plan=request.values['subscription'],
email=request.values['useremail']
)
print "stripecustomer is:"
print stripecustomer
subscriptionid = stripecustomer.subscriptions.data[0].id
except exception as e:
errordict = {"message": "error occurred while creating new user and subscription. error message: {error}".format(error=e)}
return jsonify(errordict), 400
result = handle.orgs.update_one( {"_id": orgid},
{
"$set": {
"subscription": request.values['subscription'],
"subscriptionid": subscriptionid
}
}
)
message = {"message": "org updated with subscription successfully"}
return jsonify(message)
else:
message = {"message": "no org with that id"}
return jsonify(message), 404
except exception as e:
errordict = {"message": "failed to update org. error message: {error}".format(error=e)}
return jsonify(errordict), 400
###################################
### end of org uris
###################################
###################################
### subscription uris
###################################
@app.route("/subscriptions/<subscriptionname>", methods=['get'])
@requires_auth
def getsubscription(subscriptionname):
subscription = handle.subscriptions.find_one({"subscriptionname": subscriptionname})
if subscription:
subscription['_id'] = str(subscription['_id'])
return dumps(subscription)
else:
message = {"message": "no subscription found with that subscriptionname"}
return jsonify(message), 404
###################################
### end of subscription uris
###################################
###################################
### non-uri functions
###################################
def validateobjectid(objectid):
try:
objectid = objectid(objectid)
return objectid
except:
return none
def isauthorized(actoremail, action, target=none):
actor = handle.users.find_one({"useremail": actoremail})
org = handle.orgs.find_one({"_id": objectid(actor['orgid'])})
print org
maxroutes = { 'freetier': 1, 'developertier': 10, 'enterprisetier': 100 }
if action == 'adduser':
if (org['subscription'] == 'developertier') or (org['subscription'] == 'enterprisetier'):
print 'subscription is not freetier, requesting user is authorized to add that user. checking target org'
if objectid(target) == actor['orgid']:
print 'target org matches requesting users org, request is authorized'
return true
else:
return true
else:
print 'subscription is freetier or some unhandled value, requesting user is not authorized to add target user'
return false
elif action == 'deleteuser':
targetuser = handle.users.find_one({"useremail": target})
if (org['subscription'] == 'developertier') or (org['subscription'] == 'enterprisetier'):
if actoremail != target:
if actor['orgid'] == targetuser['orgid']:
print 'subscription is not freetier, the user is not deleting themself, and this user is part of the same org. requesting user is authorized to delete target user'
return true
else:
print 'subscription is not freetier, the user is not deleting themself, but the user is not part of the same org. requesting user is not authorized to delete target user'
return false
else:
print 'subscription is not freetier, but the user is attempting to delete themself. requesting user is not authorized to delete target user'
return false
else:
print 'subscription is freetier or some unhandled value, requesting user is not authorized to delete target user'
return false
elif action == 'addroute':
routecount = handle.routes.find({"orgid": org['_id']}).count()
if routecount < maxroutes[org['subscription']]:
print 'current routecount is less than maxroutes, requesting user is authorized to create target route'
return true
else:
print 'current routecount is equal to or greater than maxroutes, requesting user is not authorized to create target route'
return false
elif action == 'deleteroute':
targetroute = handle.routes.find_one({"incomingroute": target})
if org['_id'] == targetroute['orgid']:
print 'user is trying to delete a route that is owned by their org, requesting user is authorized to delete target route'
return true
else:
print 'user is trying to delete a route that is not owned by their org, requesting user is not authorized to delete target route'
return false
elif action == 'deleteorg':
targetorg = handle.orgs.find_one({"_id": objectid(target)})
if org['_id'] == targetorg['_id']:
print 'user is trying to delete their own org, requesting user is authorized to delete target org'
return true
else:
print 'user is trying to delete some other org, requesting user is not authorized to delete target org'
return false
else:
print 'unable to determine action, requesting user is not authorized'
return false
###################################
### end of non-uri functions
###################################
if __name__ == '__main__':
app.run(app.config['ip'], app.config['port'])
if you want to see the rest of the files or fork my repo, you can find it on
github:
flask backend repo
redirecting backend
the “dumb” redirect hosts are running a stripped down, simpler version of the
flask app used by the api backend. the redirect hosts are part of an auto-scaling
group with an elastic load balancer distributing requests. the configuration of
the hosts is all done through a userdata script, which makes auto-scaling simple
and removes the need for configuration management tools.
in my haste, i lumped together all of the code for the redirecting app and the
cloudformation code into one repo. check out the repo here:
redirecting backend repo
the flask app for handling redirects is pretty straightforward. all of the
relevant logic is written in the redirectorapp.py file:
import os
from flask import flask, request, flash, url_for, redirect, \
render_template, abort, send_from_directory, jsonify, _request_ctx_stack
import requests
from werkzeug.local import localproxy
from flask.ext.cors import cors, cross_origin
import pymongo
from pymongo import mongoclient, indexmodel, ascending, descending, errors
app = flask(__name__)
app.config.from_pyfile('flaskapp.cfg')
cors(app)
def connect():
print os.environ['openshift_mongodb_db_url']
print int(os.environ['openshift_mongodb_db_port'])
print os.environ['openshift_mongodb_db_username']
print os.environ['openshift_mongodb_db_password']
connection = mongoclient(os.environ['openshift_mongodb_db_url'],int(os.environ['openshift_mongodb_db_port']))
handle = connection["dnsreroute"]
handle.authenticate(os.environ['openshift_mongodb_db_username'],os.environ['openshift_mongodb_db_password'])
return handle
handle = connect()
# controllers api
@app.route("/")
def home():
host = request.headers['host']
host = host.split(':')[0]
if host != 'service.dnsreroute.xyz':
route = handle.routes.find_one({'incomingroute': host})
if route:
outgoingroute = route['outgoingroute']
if route['type'] == "301":
return redirect(outgoingroute, 301)
elif route['type'] == "302":
return redirect(outgoingroute)
else:
return '{"message": "error - not able to determine redirect type"}'
else:
return '{"message": "could not find a matching route"}', 404
else:
return "the host header is {hostheader}.this is the unsecured home page".format(hostheader=request.headers['host'])
# controllers api
@app.route("/health")
def healthcheck():
return '{"message": "system ok!"}'
if __name__ == '__main__':
app.run(app.config['ip'], app.config['port'])
one implementation note - i was originally using the eventlet gunicorn worker
type, but as i was writing this blog post and testing things were still working
i discovered that my instances were no longer bootstrapping successfully. turns
out it was some gunicorn/eventlet/monotonic error throwing a runtimeerror of
no suitable implementation for this system. rather than go down that rabbit
hole, i just switched the worker type to gevent and moved on.
conclusion
i’ll be leaving dnsreroute running at least until july 2017, after which my 12 month
free trial of aws expires. if i haven’t stirred up any interest or customers by
then, i’ll terminate the redirecting hosts, but keep the api backend and front-end
running for reference purposes.
i had a lot of fun writing this app, and i’m proud of it in spite of its flaws
and lack of use. i hope you were able to cherry pick some code or ideas from
this post, or some inspiration if nothing else.
thanks for stopping by.
May 11, 2017 - Categories How-to Guides,Utilities And Other Useful Things,IT/Software Projects
Categories: how-to guides,utilities and other useful things,it/software projects , in my new job at zendesk, i deal with a lot of ruby
projects that leverage bundler for dependency management.
specifically, right now i’m working with
sparkleformation,
stack_master, and
aws-vault. with that toolset, each
command starts with a staggering 43 static characters that don’t change
between commands, like this:
aws-vault exec <aws profile> -- bundle exec stack_master apply \
<region or alias> <stack name> -c <stack_master config file>
that’s way too long to type out every time i need to act on a stack. initially i
tried to solve this by setting an alias in my bash profile to abstract the
stack_master command:
alias sm=”bundle exec stack_master”
one problem with this approach - if you use a command or binary that spawns a
new shell (like aws-vault does), your bash_profile is ignored and your aliases
don’t work, defeating the entire purpose.
fortunately this is an easy problem to solve. because the default path is the
same for all shells, we can recreate our alias as a script and place it in
/usr/local/bin (or any other directory in the default path). we can also
leverage bash’s $@ variable, which captures all positional arguments that come
after a script is invoked.
#!/bin/bash
bundle exec stack_master “$@”
once i created /usr/local/bin/sm and populated it with those lines, executing
sm behaved exactly as the original alias, but was also compatible with
aws-vault.
for those of you using the same toolset of aws-vault, stack_master, and
sparkleformation, i further condensed my command. note that this only works if
your aws-vault profile, region alias, and stack_master config files share the
same name.
#!/bin/bash
# example command for reference
# aws-vault exec dev -- bundle exec stack_master apply dev stack_name -c dev.yml
aws-vault exec $1 -- bundle exec stack_master $2 $1 $3 -c $1.yml
i put the above code in /usr/local/bin/zsm, so now my stack commands
are clean and short:
zsm dev apply my_stack
as always, i hope you found this useful.
March 11, 2017 - Categories How-to Guides,Utilities And Other Useful Things,IT/Software Projects
Categories: how-to guides,utilities and other useful things,it/software projects , this one’s a short read, as most of the code and the concept was adopted from
the jquery raptorize plugin.
basically, i was admiring the raptorize plug-in and thought how funny it would be
to have dennis nedry pop up and deliver his famous line, “ah ah ah, you didn’t
say the magic word!” whenever you had a failed login. thanks to the jquery raptorize
plugin, the majority of the work was done. i just needed a picture of dennis nedry,
an mp3 file for the audio, and tweak the code slightly. then i put together a
fake login page to demo the whole thing.
demo
github repo
this was a quick 1-2 hour kind of project that i did a long time ago and just never
wrote a blog post for it. hoping you got a quick laugh out of this post, let me
know if any of you actually deploy it somewhere!
March 4, 2017 - Categories IT/Software Projects,How-to Guides
Categories: it/software projects,how-to guides , wordpress has served me well over the years, but it’s time for me to move on. my blog first started with wordpress.com hosting, but i didn’t like that i was hosting wp’s ads, a custom domain was an up-charge, and they limit which themes and plugins i could use. so i migrated to a self-hosted wordpress instance, allowing me to serve google ads, add membership functionality, and allow people to subscribe to my site by email.
i’ve had some issues with 1and1 hosting over the years (downtime, charges for php support, non-refundable contracts), and i’ve come to realize i don’t need most of the plugins. i don’t make enough money to justify the ads, and a lot of the site’s visitors are friends and family anyway. i only have a few members/subscribers, so i don’t really need membership functionality either. on top of that, 1and1 isn’t free - i’m literally paying for a hosting service i don’t like, to host functionality i don’t need.
with all of that in mind, blogging with jekyll and hosting on github seemed like a no-brainer. hosting is free, it’s faster and more secure than wp, and i get to enjoy hacking on a new tool set. but before i made the switch, i wanted to make sure jekyll could do everything i wanted with a blogging platform.
tl;dr - i’m ditching wordpress hosted on 1and1, and i’m moving to jekyll hosted on github.
reproducing features in jekyll
out of the box, jekyll is a great blogging platform and meets the majority of my use cases. that said, there a few features of my wordpress blog that jekyll doesn’t include, and i didn’t want to lose as part of the transition.
featured image functionality - basically, i can set an image for a post, and it shows up in any list of posts, as well as the first image you see when you open a specific blog post.
jetpack site statistics - part of the satisfaction of blogging is seeing how much traffic you get. wordpress does a great job with their jetpack plugin, which allows you to get fairly substantial analytics in a simple and consumable dashboard.
social media integration - when i publish a post, wordpress shares it to twitter, facebook, and linkedin automatically. there are also sharing buttons appended to every post.
retaining permalinks for seo and backlinks - seo is not very important for my humble blog, but i hate when i try to browse to some personal blog only to get a 404 or weird redirect. with that in mind, jekyll needs to support my existing permalink structure (e.g. alexdglover.com/my-post-title)
search - users should be able to find content based on query text.
the rest of this post will cover how i modified jekyll and the minimal mistakes theme for my blog.
featured image functionality
fortunately, implementing the “featured image” was fairly easy with the minimal mistakes theme. the theme itself is supposed to offer it out-of-the-box, but either i’m doing something wrong or misunderstanding the theme documentation. in theory, you only need to set “teaser” property in the header section of your posts’ front matter, like this:
---
title: "hello world"
date: 2016-11-17 16:16:01 -0600
categories: jekyll category1 category2
header:
teaser: https://i0.wp.com/alexdglover.com/wp-content/uploads/2017/01/anim-3.gif
---
and here's the body of your blog post.
for some reason, that didn't work for me using the stock home page. after doing some digging, i narrowed the so-called issue to a "grid" conditional in _includes/archive-single.html:
{% if include.type == "grid" and teaser %}
<div class="archive__item-teaser">
<img src=
{% if teaser contains "://" %}
"{{ teaser }}"
{% else %}
"{{ teaser | prepend: "/images/" | prepend: base_path }}"
{% endif %}
alt="">
</div>
{% endif %}
well, i couldn't figure out where the include.type was supposed to be set, but who cares! the best thing about jekyll is you have total control and it's easy to modify. i have no plans to use this "grid" functionality, so i just removed it from the conditional. now the teaser is displayed on the home page (and in any page using the archive layout).
site analytics and stats
jekyll supports google analytics, injecting your tracking id into every page on your behalf. google analytics is a little overkill for a personal blog and i personally dislike the dashboard/interface, but there aren’t that many site analytics platforms out there that are free and feature-rich. so i’m going down the path of least resistance on this one. i just need to take my existing ga tracking id, and put in the _config.yml file:
# analytics
analytics:
provider : "google"
google:
tracking_id : "ga-my-tracking-id-1234556789"
posting to social media
i’ve seen plenty of other jekyll users create a simple integration to social media sites using the built-in rss feed from jekyll and ifttt, so i won’t beat that dead horse. the most interesting implementation i’ve seen done was by eduardo boucas, so i’ll direct you to his site for an example.
retaining permalinks
fortunately, when i set up my self-hosted wordpress site i had the foresight to choose a sane and practical permalink structure. all of my permalinks are just the post title, but url encoded (99% of the time this just means spaces are replaced by hyphens, and all words are downcased). i can maintain all of my permalinks and not lose any seo “juice” by using that setting the same permalink pattern in the _config.yml of my new jekyll blog:
# outputting
permalink: /:title/
easy.
search
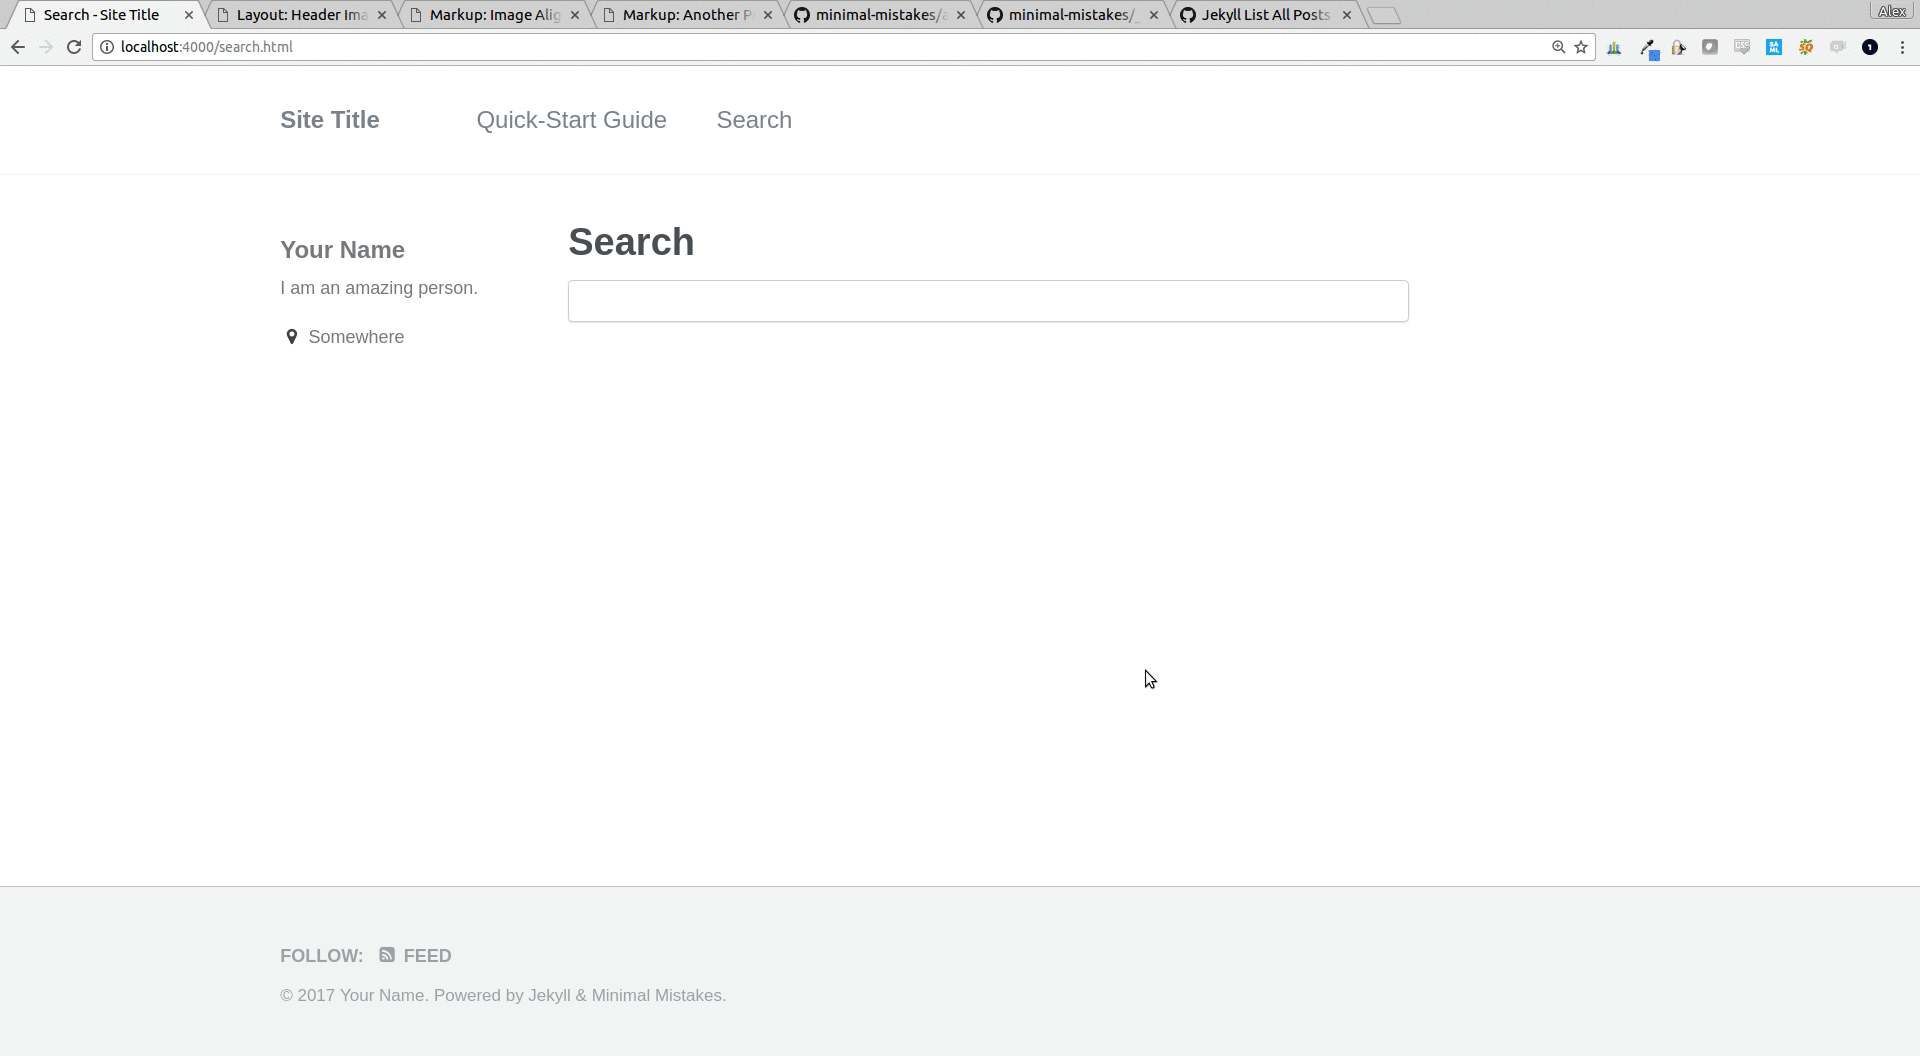
search functionality was an interesting problem, but i knew right away how i wanted to solve it. in short, because jekyll is a static site generator, there is no server-side code that can process search queries. it all needs to be handled in html and javascript.
this is a trivial limitation, considering how small my site is and how “cheap” it is to send a few extra kilobytes of html text to the end user. with that in mind, a search solution is fairly easy. in my initial implementation, i set up a separate search page (rather than try to do an _includes/search.html that i could embed in other pages or sidebars). the search page is populated with an html input field, followed by every single post in the blog wrapped in div tags with style="display: none;" . at this point, the dom of the page becomes our search “database,” and we just need to write some javascript to un-hide our divs based on the search query. this gives us the power to search not only post titles, but also the actual content of the post bodies.
---
title: search
permalink: search.html
---
<script>
function getsearchresults(val) {
console.log("hiding all elements");
$( ".result" ).hide();
$( ".postcontent" ).hide();
$( ".searchresultsnippet " ).hide();
if(val.length > 2){
// downcase query val for case-insensitive search
val = val.tolowercase();
// show any results based on post title matching query
$( "div[id*='" + val + "' i]" ).filter( ".result").show();
// show any results where query matches part of the post content
$( "div:contains('" + val + "')" ).filter( ".result").show();
// for each result based on post content, extract the surrounding text
// and display it in the search results, bolding the search term
$( "div:contains('" + val + "')" ).filter( ".result").each( function( index ) {
var posttext = $( this ).find( ".postcontent" ).text();
var resultposition = posttext.indexof(val);
if(resultposition > -1){
var snippet = "..." + posttext.substring( resultposition-30, resultposition+30 ) + "...";
snippet = snippet.replace(val, "<strong>" + val + "</strong>");
$( this ).find( ".searchresultsnippet" ).show().html(snippet);
}
});
} // end of input length check
} // end of getsearchresults
</script>
<input type="text" onkeyup="getsearchresults(this.value)">
<div id="results">
{% for post in site.posts %}
<div id="{{ post.title }}" class="result" style="display: none;">
<h3><a href="{{ post.url }}">{{ post.title }}</a></h3>
{% if post.header.teaser %}
<a href="{{ post.url }}"><img src="{{ post.header.teaser }}" style="width: 150px;" class="align-left" /></a>
{% endif %}
<p><small><strong>{{ post.date | date: "%b %e, %y" }}</strong> - <strong>categories</strong> {{ post.categories | join:',' }} </small></p>
<div class="postcontent" style="display:none;">{{ post.content }}</div>
<div id="searchresult{{ post.url }}" class="searchresultsnippet" style="display:none;"></div>
</div>
{% endfor %}
</div>
and here’s the end result:
it even looks good on mobile-friendly display port sizes:
conclusion
well i’m sold! after testing my minor customizations, i’m ready to make the switch to github pages using jekyll and the minimal mistakes theme. i’ll be sure to post again to describe any lessons learned from the actual migration, as well as any future customizations i make. if any of you have jekyll tips and tricks to share, send ‘em my way!

February 16, 2017 - Categories How-to Guides
Categories: how-to guides , i did it. the one universal rule when it comes to source control/git, and i broke it. i committed my oauth key for my youpassbutter slack app to github. thankfully it was only a personal project, and not anything more important than that. either way, i got a little spooked and wanted to go through the process of removing sensitive data from github as a learning opportunity.
before we get started on the walk-through, there are two things i’d like to mention upfront:
because of the distributed nature of git, if someone cloned or forked your repo while it contained sensitive data, that data is compromised. there is no way to delete your data out of someone else’s repo
i will be following github’s published process using the ‘git filter-branch’ command. i’m mostly documenting this for my own future reference, and as a quasi-punishment for myself to emphasize the importance of not committing keys in the future (i could write “don’t commit keys to github” 1000 times on a blackboard, but this seems more productive)
process
if you don’t already have the repo cloned locally, do that first, then ‘cd’ into your repo directory.
in my case, the sensitive data was in the ‘app.rb’ file in the root of my project repo. before you execute this next command, be aware that it will delete the local copy of the file along with updating all of the commits in your commit history. you probably want to save a copy of your file somewhere before running this. with that in mind, let’s execute the ‘git filter-branch’ command and look at the output:
[alexdglover@host:~/documents/workspace/rick-and-morty-bot] $ git filter-branch --force --index-filter \
> 'git rm --cached --ignore-unmatch app.rb' \
> --prune-empty --tag-name-filter cat -- --all
rewrite c6a89ccf770fe1745259af4dd5c1de740a8c2a1e (1/75) (0 seconds passed, remaining 0 predicted) rm 'app.rb'
rewrite 17e90caa961fa7b801701abfbae9ce0c34a2a9d1 (2/75) (0 seconds passed, remaining 0 predicted) rm 'app.rb'
rewrite ec633eb63f1c7eead43157e100006029cf8029a6 (3/75) (0 seconds passed, remaining 0 predicted) rm 'app.rb'
...
rewrite c4d38d45a710b7e87c2d75820fe65d204f9014e1 (39/75) (1 seconds passed, remaining 0 predicted) rm 'app.rb'
rewrite d2b25cdd3e6190b2d59c1239d5955245c76a173b (39/75) (1 seconds passed, remaining 0 predicted) rm 'app.rb'
rewrite c4570086709c08364d769bcb1818c0a2631ea111 (39/75) (1 seconds passed, remaining 0 predicted) rm 'app.rb'
ref 'refs/heads/master' was rewritten
ref 'refs/remotes/heroku/master' was rewritten
warning: ref 'refs/remotes/heroku/master' is unchanged
ref 'refs/remotes/origin/master' was rewritten
[alexdglover@host:~/documents/workspace/rick-and-morty-bot] $
the command is going through each commit in the commit history and deleting the file containing the sensitive data. so far, so good.
typically, in this step you’d create a .gitignore file, add the offending file containing sensitive data to the .gitignore, and then re-commit everything. in my case, i can’t add app.rb to .gitignore because it’s the bulk of my code. instead, let’s try removing the credentials manually (and replacing it with environment variable references), saving that file into our repo, re-committing app.rb, and see what happens.
[alexdglover@mobile1:~/documents/workspace/rick-and-morty-bot]$ vim app.rb # i re-created the app.rb file without the sensitive data
[alexdglover@mobile1:~/documents/workspace/rick-and-morty-bot]$ git status
on branch master
your branch is up-to-date with 'origin/master'.
untracked files:
(use "git add <file>..." to include in what will be committed)
app.rb
nothing added to commit but untracked files present (use "git add" to track)
[alexdglover@mobile1:~/documents/workspace/rick-and-morty-bot]$ git add app.rb
[alexdglover@mobile1:~/documents/workspace/rick-and-morty-bot]$ git commit -m 'adds app.rb back into repo after removing secrets'
[master 346e3e5] adds app.rb back into repo after removing secrets
1 file changed, 202 insertions(+)
create mode 100644 app.rb
[alexdglover@mobile1:~/documents/workspace/rick-and-morty-bot]$ git push
you can see that git thinks app.rb is a completely new file, and is unaware that it ever existed. another good sign. my ‘git push’ had a minor merge conflict with my github upstream repo, but was trivial. now i’ve strayed slightly from github’s instructions, let’s move on to the last step and see if this works.
finally, we need to execute ‘git push origin –force –all’ to overwrite our github repository. let’s give it a try:
[alexdglover@mobile1:~/documents/workspace/rick-and-morty-bot] $ git push origin --force --all
everything up-to-date
well… that was a little anti-climactic. i’m assuming my earlier push already overwrote github. let’s take a look in github’s web ui and see if we can find any trace of our sensitive data.
excellent! i don’t see the slack client id and secret in the code any more, and the commit history for that file only shows our most recent commit!
my repo is very simple and didn’t use any other tags or branches. if you committed a secret/key/password to your repo and you do use tags, you’ll also need to execute ‘git push origin –force –tags’ to overwrite all of the tagged commits.
post cleanup process
if you’re working with other developers, be sure to ask them to rebase (not merge) their local repos after you’ve cleaned up the sensitive data, otherwise they may re-introduce bad code or commit history containing the bad code. if you haven’t done so already, this would also be a good time to change any credentials that you think may have been compromised. in my case, i simply needed to generate a new oauth client secret for my slack app.
i hope this was a helpful demonstration, and remember…
don't put credentials into source control
February 4, 2017 - Categories IT/Software Projects,How-to Guides
Categories: it/software projects,how-to guides , tl;dr section
just looking for the app? just click the "add to slack" button to install the youpassbutter bot
prefer to just go straight to the source? check out the code on github.
where we left off
if you haven't ready it already, check out part 1 to get the context behind the app and the initial implementation.
in this post, we'll
re-structure our slash commands and routes to get more functionality
handle our second requirement, namely generating dynamic memes and posting them back to slack
package our slash commands as a slack app, including the oauth configuration needed for the "add to slack" button
re-structuring our commands
in part 1, we had a one-to-one mapping from our slash commands to our api endpoints. this made our app very clean and simple, but has one serious drawback; slack only allows up to 25 slash commands per 'app.' we haven't even implemented our meme generation feature yet, so this is a dealbreaker for us.
let's consolidate our image-specific slash commands into one image-fetching slash command, and we'll pass a second argument to the command to specify which image we want to return.
since we're consolidating the slash commands, we'll also need to consolidate our api endpoints to match. fortunately, this is very easy. all of our sinatra routes are basically key-value pairs, where the key is the route (e.g. /you-pass-butter) and the value is the url to the image (e.g. https://media.giphy.com/whatever.gif). because of this, we can consolidate all of our routes into a hash and write a single route to dynamically fetch and return the correct image.
command_image_mapping = {
"nobody-exists-on-purpose" => "http://cdn.smosh.com/sites/default/files/2015/12/rickmorty15.jpg",
"wriggety-wriggety-wrecked-son" => "http://www.reactiongifs.us/wp-content/uploads/2016/02/riggity_wrecked_son_rick_morty.gif",
"planning-for-failure" => "http://2.media.dorkly.cvcdn.com/78/27/5e7374300a84037f2bdbc061f2e69211.jpg",
###
# several lines removed for brevity
###
"not-today" => "http://i.imgur.com/kxhrcc5.gif"
}
post '/images' do
image_response command_image_mapping[params['text']]
end
but what if our users send an invalid argument to the slash command? we should give a helpful response to the user, listing all of the valid arguments they could use with the slash command. we can do this by simply joining all of the keys of the hash, and returning that as part of a helpful error message.
command_image_mapping = {
"nobody-exists-on-purpose" => "http://cdn.smosh.com/sites/default/files/2015/12/rickmorty15.jpg",
"wriggety-wriggety-wrecked-son" => "http://www.reactiongifs.us/wp-content/uploads/2016/02/riggity_wrecked_son_rick_morty.gif",
"planning-for-failure" => "http://2.media.dorkly.cvcdn.com/78/27/5e7374300a84037f2bdbc061f2e69211.jpg",
###
# several lines removed for brevity
###
"not-today" => "http://i.imgur.com/kxhrcc5.gif"
}
post '/images' do
if command_image_mapping.key?(params['text'])
image_response command_image_mapping[params['text']]
else
images = command_image_mapping.keys.sort.join(",\n ")
string_as_json_response "cannot find that image #{params['text']}. full list of images:\n #{images}"
end
end
let's add one more affordance for our users. let's add a second slash command, (/rm-list-images) and a corresdonding api route (/images/all) that just returns the full list of possible images.
post '/images/all' do
images = command_image_mapping.keys.sort.join(",\n ")
string_as_json_response "full list of images:\n #{images}"
end
just for reference, here are what the two slash commands look like in the slack ui:
perfect, so our original image commands still work and we've made room for some new commands through our refactor.
dynamic memes
images are all well and good, but we can do better. let's add a feature to generate dynamic memes, so you can apply rick and morty humor to your 9-to-5.
i used the memegenerator.net api and i highly recommend it. it's free and the authentication is dirt simple (albeit with a cleartext password). all you need to do is sign up for an account on the meme generator homepage.
in their api documentation, you'll notice that meme templates are referred to as 'generators' while an instance of a particular meme (with custom text) is just referred to as an instance. now we could use the api to look up the generator id based on the name of the meme, but people have used all sorts of garbage names like 'rick sanchez123.' instead, i found a few memes i wanted to support in the meme generator ui, looked up the generator id for that specific meme, and recorded it in a ruby hash.
command_meme_mapping = {
"tiny-rick" => {
"generatorid": 5200542,
"displayname": "tiny rick"
},
"get-schwifty" => {
"generatorid": 5841203,
"displayname": "rick sanchez schwifty"
},
"rick-shrug" => {
"generatorid": 5733231,
"displayname": "rick sanchez123"
},
"rick-scolding-morty" => {
"generatorid": 6223262,
"displayname": "rick sanchezzz"
},
"way-up-your-butt" => {
"generatorid": 6063115,
"displayname": "rick sanchez 2"
},
"get-your-shit-together" => {
"generatorid": 6168409,
"displayname": "mortygetyourshittogether"
},
"rick-and-morty-couch" => {
"generatorid": 4875756,
"displayname": "rick and morty couch"
},
"i-just-got-bored" => {
"generatorid": 4229669,
"displayname": "rick and morty - i'm bored"
},
"show-me-what-you-got" => {
"generatorid": 6873210,
"displayname": "show me what you gott"
},
"bird-person" => {
"generatorid": 3687578,
"displayname": "bird person rick and morty"
},
"look-morty" => {
"generatorid": 5932800,
"displayname": "grandpa rick"
}
}
in addition to the key, i also retained the original display name for reference later.
generating a meme is fairly trivial. you just need to make an http get request to
http://version1.api.memegenerator.net/" +
"instance_create?username=#{meme_generator_username}" +
"&password=#{meme_generator_password}&languagecode=en&" +
"generatorid=#{generator_id}&text0=#{text0}&text1=#{text1}"
where the generatorid is the id of the meme you want to use, text0 is the top line of text, and text1 is the bottom line of text. to illustrate:
ok, so now we just need another api route and slash command to handle generating these memes on the fly. for our slash command, let's plan on sending those 3 pieces of information as a text argument. because we'll be sending arbitrary strings of text for our dank memes, let's use '; ' (read: semi-colon, space) to separate those elements (e.g. "meme id; top text; bottom text").
the other thing we have to consider before writing any code is timeouts. slash commands must get a valid http response within three seconds, or they will throw a timeout error. we can't assume the meme generator's api or our app will be able to reliably return an image in three seconds. instead of responding to the original http request, our app will make an asynchronous request to the 'response_url' provided in the slack payload once the meme generation completes.
with that in mind, let's start with building the api route in sinatra:
post '/memes' do
# grab the entire text from the slash command and split the meme,
# top text, and bottom text from the text argument from slack
text_params = params['text'].split('; ')
# grab the response url from the slack http call. this is the
# slack endpoint we'll post the result to
response_url = params['response_url']
# if the meme name arg is found in the meme hash...
if command_meme_mapping.key?(text_params[0])
generator_id = command_meme_mapping[text_params[0]][:generatorid]
text0 = uri.encode(text_params[1])
text1 = uri.encode(text_params[2])
# generate memes
response = httparty.get("http://version1.api.memegenerator.net/" +
"instance_create?username=#{meme_generator_username}" +
"&password=#{meme_generator_password}&languagecode=en&" +
"generatorid=#{generator_id}&text0=#{text0}&text1=#{text1}")
if response['success']
post_image_to_response_url response_url, response['result']['instanceimageurl']
status 200
else
string_as_json_response "error generating meme"
end
# if the meme is not found, return an error message and
# include full list of available memes
else
memes = command_meme_mapping.keys.sort.join(",\n ")
string_as_json_response "cannot find that meme #{text_params[0]}. full list of available memes:\n #{memes}"
end
end
new users may not know all of the meme options available, so let's also throw in an api route to list all of the available memes.
post '/memes/all' do
memes = command_meme_mapping.keys.sort.join(",\n ")
string_as_json_response "full list of memes:\n #{memes}"
end
finally, let's create a slash command for each of those endpoints in the slack app management console:
before we can test these new commands, we need to set the meme_generator_username and meme_generator_password variables in a safe and secure way. first, let's set them as environment variables. in heroku, this is as simple as executing:
[user@host ~]$ heroku config:set meme_generator_username=my_username
[user@host ~]$ heroku config:set meme_generator_password=my_password
now you can refer directly to those environment variables in-line, like this:
response = httparty.get("http://version1.api.memegenerator.net/" +
"instance_create?username=#{env['meme_generator_username']}" +
"&password=#{env['meme_generator_password']}&languagecode=...
excellent, now we can test our command. let's look at the gif demo one more time to see it in action:
oauth and "publishing"
in order to publish our slash command app on slack's marketplace or share it with the "add to slack" button, our application needs to have an oauth endpoint that initiates the user authentication to their team, thus authorizing our application to be installed into their slack team.
in more complex applications (like real time chat bots) we need to store information sent to us in the oauth request from slack. in our simple app, we just need to respond to the oauth request by posting to slack's /api/oauth endpoint.
let's start be defining our oauth endpoint in slack. let's go back to https://api.slack.com/apps, drill into our app by clicking the app name, and then click the "oauth & permissions" on the left. next, let's define our redirect url as 'https://your-domain/oauth' and save.
next, let's click on the basic information tab, and capture the 'client id' and 'client secret':
don't be an idiot and commit these to git like i did. keep these out of your repo, or put them in an environment variable file and add it to your .gitignore. if someone captured your client id and secret, they could impersonate your application and wreak havoc.
once we've got our redirect url set up and gathered our oauth client keys, we can construct an easy /oauth route in our sinatra app. our route should trigger a post to the slack /api/oauth endpoint. if that post gets an http 200 response, let's just post some simple html to show the app was successfully installed. if not, let's dump the response.body to determine the cause of the failure.
get '/oauth' do
response = httparty.post("https://slack.com/api/oauth.access?client_id=#{env['slack_client_id']}&client_secret=#{env['slack_client_secret']}&code=#{params['code']}")
responsebody = json.parse(response.body)
if responsebody['ok'] == true
"<h1>you've just installed the youpassbutter slack bot! let's get riggety wrecked!!!</h1>"
else
response.body
end
end
much like before with our meme generator credentials, we have to set these slack client credentials as environment variables so they can be securely consumed by our app without being in source control (git).
[user@host ~]$ heroku config:set slack_client_id=1234567890
[user@host ~]$ heroku config:set slack_client_secret=0987654321
alright, now that we have our oauth endpoint set up, let's focus on packaging our app.
in order for people to install our app, we need to use either the "add to slack" button or publish it on the slack app directory. to get published to the app directory, your app has to be approved by slack, you have to provide a landing page for the app, and you need some basic customer support mechanisms in place, etc. in short, it's a non-trivial effort.
instead, we can just create the "add to slack" button. the process is much simpler and there's less overhead. hell, the code is even generated for you automatically just by browsing to https://api.slack.com/docs/slack-button (assuming you're already logged in). let's do that now. scroll down to the "add the slack button" section, select your slash command app in the dropdown in the top right, and then check only the 'commands' checkbox:
once you've got the html copied, you can drop it into your blog, emails, or a landing page you maintain for the app. here's the add to slack button for the youpassbutter app:
here's a quick demo of a user clicking the button, authenticating to their slack team, and getting a successful response from our /oauth endpoint:
now obviously our confirmation page is a little plain to say the least, but whatever, it works!
conclusion
that's it for our youpassbutter slack bot. it fetches images/gifs, generates memes, and can be easily installed by any slack team. now for a celebratory demo gif:
23-jun-2017 update
i got a friendly email from someone in australia who wanted to use the youpassbutter
bot (which is awesome, love hearing from people who use my code/apps), but the
“add to slack” button wasn’t working. it would just throw a json response
in the body complaining about an invalid_client_id (which absolutely wasn’t the
problem, because the client id is immutable for an app and i didn’t change the code).
so i started to dig in, reproduced the error, but there was a separate url in the
“your apps” page on slack’s site that worked fine.
so after a few minutes of “wtf?” and verifying it worked a few times, i dug into the
anchor tag behind the link. oddly enough, it was the exact same url from my “add
to slack” button except it included another url parameter, install_redirect=general.
as a quick experiment, i updated my “add to slack” button and it started working!
i opened a support case with slack to find out why this change happened, i’ll let
all of you know if/when i hear back.
in the meantime, be wary of this issue and let me know if you find it mentioned
in the documentation anywhere.
02-sep-2017 update
the issue mentioned in the earlier update was entirely my fault, no issue with slack
or heroku. the whole install_redirect things was a red herring. in an effort to
better format my code and comply with rubocop, i accidentally introduced additional
whitespace. when my heroku app tried to authenticate to slack, it
was posting to https://slack.com/api/oauth.access?client_id= 1229... instead of
https://slack.com/api/oauth.access?client_id=1229.... you can see the issue here:
https://github.com/alexdglover/you-pass-butter-bot/commit/cc0318b0e5563b4d454e785978953d00cd451987#diff-cc95738088603531796e0d0f246a5d77l97
unfortunately right after i solved that issue, i discovered that memegenerator.net
has changed their api such that they do not return a full url to the generated image,
breaking the meme generation capability. i’m hoping to contact them and find a solution
or have them update their api. until then, i’m disabling the meme generator commands.
please let me know if you have any other issues with the bot!
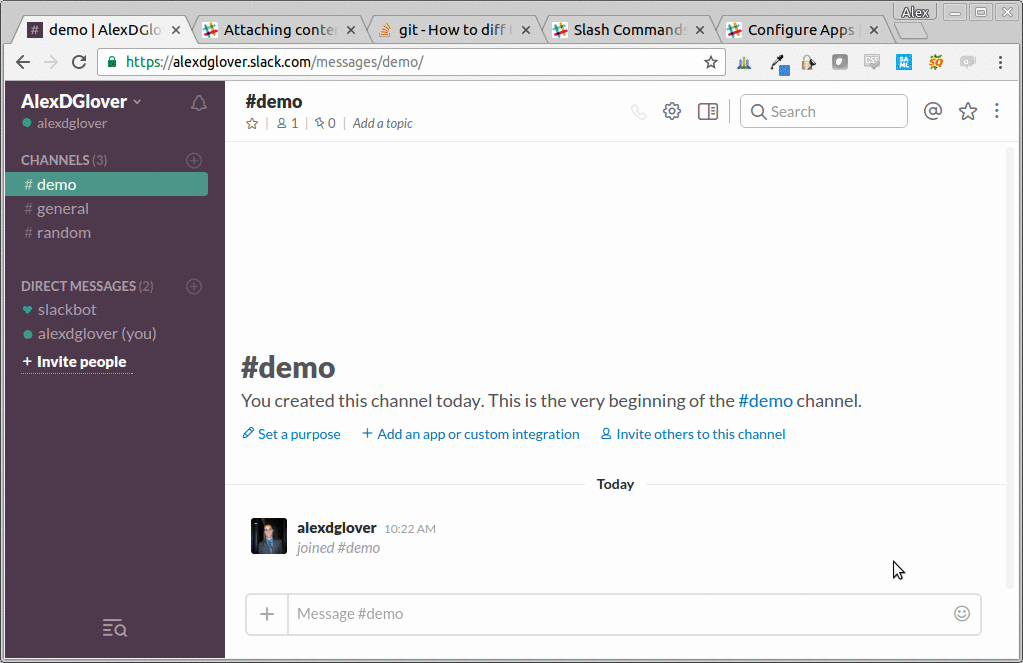
January 7, 2017 - Categories IT/Software Projects,How-to Guides
Categories: it/software projects,how-to guides , tl;dr section
just looking for the app? just click the "add to slack" button to install the youpassbutter bot
don't care about the context, just looking for a general guide to building a slack bot with ruby and sinatra? skip down to the "implementation" section.
prefer to just go straight to the source? check out the code on github.
background/context
i've wanted to build a slack bot for a while now, but didn't have any ideas for what the bot should do. then it hit me - a rick and morty bot for getting funny quotes and memes posted to slack. and what robot better represents rick and morty then the butter-passing robot rick built
i'm also starting a new job in a few days, and so i was looking for an excuse to write something in ruby.
finally, like all of my projects, this took a couple of iterations before i was really happy with it, so this post will come in a few parts.
requirements
as a user, i want to be able to summon a pre-defined rick and morty image or gif
as a user, i want to be able to summon a dynamically generated rick and morty meme with slash command inputs being used to generate meme
mechanics
slack bots (and chat bots in general) can be very complex, but they don't have to be. with slack, the simplest implementation imo is the "slash command" bots. these aren't really "bots" per se, but rather a few pre-defined slash commands that call out to a web service endpoint and get a response. when someone installs this "bot" it just makes the slash commands available to their team.
behind the scenes, these slash commands are associated with a url endpoint, e.g. https://my.web.service.com/route. when you execute a slash command, slack makes a get or a post to that url endpoint including a payload that includes, among other things, any arguments that were passed to the slack command.
for example, let's assume our slack app has "/foo" defined as a slash command that is associated with https://my.web.service.com/foo. if a user executes "/foo bar" from the "general" channel, slack will make a post request to https://my.web.service.com/foo with the following payload:
token=gikuvanzqihg97atvdxqgjto
team_id=t0001
team_domain=example
channel_id=c2147483705
channel_name=general
user_id=u2147483697
user_name=alex
command=/foo
text=bar
response_url=https://hooks.slack.com/commands/1234/5678
now, if you just want to make an http request and not get any result back (i.e. kicking off a job), you could simply define the slash command and be done with it (assuming the receiving endpoint was already set up).
for all other use cases, your endpoint needs to either
return relevant data in the response body within 3 seconds of the initial request or
make a delayed response by posting to the response_url in the initial request
for our youpassbutter bot, we'll use both of these approaches. we can use the immediate response approach for any existing images or gifs. for the generated memes, we need to use the delayed response approach because of the latency of generating a new meme each time.
implementation
this is a fairly easy project - we just need to deploy a web service that can take post and some arguments, and either respond immediately or make a post request to a slack endpoint. as i mentioned, i wanted to brush up on my ruby so i decided to use sinatra for this project.
i have built slack bots previously, but never in ruby. to get myself grounded, i took a look at this tutorial to get started: https://www.sitepoint.com/building-a-slackbot-with-ruby-and-sinatra/ (plus i like to give credit to the other blogs/sites that inspire and teach me).
i started by writing a very simple sinatra app, just to smoke test that everything was working.
here's the directory structure of the application:
rick-and-morty-bot/
|--app.rb
|--config.ru
|--gemfile
to start, the gemfile just contained the 'sinatra' and 'json' gems:
source 'https://rubygems.org'
gem 'sinatra'
gem 'json'
the config.ru is very barebones, just enough to deploy the app to heroku:
require './app'
run sinatra::application
and finally, our initial app.rb:
require 'sinatra'
require 'json'
set :protection, :except => [:json_csrf] # this is a sinatra setting i needed to address 40x errors
################################################
# generic routes
################################################
get '/' do
string_as_json_response "hello world"
end
################################################
# image related routes
################################################
post '/you-pass-butter' do
image_responpse "https://media.giphy.com/media/fsn4wjcqwlbts/giphy.gif"
end
################################################
# utility functions
# these functions handle generic formatting of the response body
# to return to slack
################################################
def image_response url
message = {
:response_type => "in_channel",
:attachments => [
{ :image_url => url }
]
}
hash_as_json_response message
end
def hash_as_json_response message
content_type :json
message.to_json
end
def string_as_json_response message
content_type :json
{ :text => message }.to_json
end
that's it, super simple. if our sinatra app receives a post request at '/you-pass-butter' then our web service will return a json response that includes the gif attachment:
{
"response_type": "in_channel",
"attachments": [
{ "image_url": "https://media.giphy.com/media/fsn4wjcqwlbts/giphy.gif" }
]
}
the "response_type": "in_channel" tells slack that this message should be shown to everyone in the channel, not just the user who executed the slack command. on that note, this is probably a good time to link to some of slack's documentation and resources:
slash command bot overview
attaching content and links to messages
basic message formatting
message formatting "playground" (useful for verifying the syntax/structure of your json response)
at this point, we can deploy our app to heroku and smoke test it. by curl'ing that endpoint, we can verify that the app is working correctly. adding new routes is super simple, we just follow the same pattern for our "/you-pass-butter" route and provide a different image url to the image_response method. let's add a few more routes:
require 'sinatra'
require 'json'
set :protection, :except => [:json_csrf] # this is a sinatra setting i needed to address 40x errors
################################################
# generic routes
################################################
get '/' do
string_as_json_response "hello world"
end
################################################
# image related routes
################################################
post '/you-pass-butter' do
image_responpse "https://media.giphy.com/media/fsn4wjcqwlbts/giphy.gif"
end
post '/wriggety-wriggety-wrecked-son' do
image_response "http://www.reactiongifs.us/wp-content/uploads/2016/02/riggity_wrecked_son_rick_morty.gif"
end
post '/planning-for-failure' do
image_response "http://2.media.dorkly.cvcdn.com/78/27/5e7374300a84037f2bdbc061f2e69211.jpg"
end
post '/where-are-my-testicles-summer' do
image_response "http://i.imgur.com/xocpvum.png"
end
post '/the-answer-is-dont-think-about-it' do
image_response "http://i.imgur.com/l88mbul.jpg"
end
post '/its-getting-weird' do
image_response "https://i.imgur.com/bblnvgu.jpg"
end
post '/i-just-wanna-die' do
image_response "http://i.imgur.com/ckmvrq8.jpg"
end
post '/wubalubadubdub' do
image_response "http://i.imgur.com/fub72fv.png"
end
################################################
# utility functions
# these functions handle generic formatting of the response body
# to return to slack
################################################
def image_response url
message = {
:response_type => "in_channel",
:attachments => [
{ :image_url => url }
]
}
hash_as_json_response message
end
def hash_as_json_response message
content_type :json
message.to_json
end
def string_as_json_response message
content_type :json
{ :text => message }.to_json
end
now that we have our web service up and running, we just need to create the integration on the slack side. if you're just creating slash commands for your team, this is super easy and you don't have to create a true slack "app." just log on to your slack team, click on the dropdown next to your name, choose "apps & integrations," then search for "slash commands" (assuming you don't already have this app installed).
once you pull up the slash commands app, click on "add configuration." from there, you can provide whatever keyword you want for your slash command, then click "add slash command integration." on the next screen, provide the command name you want to use, and hit "add slash command integration."
on the next screen, there is a bunch of useful information about slash commands at the top, followed by configuration elements for our slash command. let's change our command name to /you-pass-butter, and we'll set the url to our application endpoint. in my case, that endpoint is https://rick-and-morty-bot.herokuapp.com/you-pass-butter. also note that you can use get or post, but this only applies to custom slash commands you set up as part of your slack 'team.' if you want to publish your slash command as an app, you need to use post. in our case, we don't care which team the request is originating from, so we can ignore the token. you can also provide help text along with your slack command if you so choose.
that's it! now you should be able to go to your slack channel and execute '/you-pass-butter' and get the image returned!
awesome!
part 2
in part 2, we'll cover
handling our second requirement, namely generating dynamic memes and posting them back to slack
packaging our slash commands as a slack app, including the oauth configuration needed for the "add to slack" button
re-structuring our slash commands and routes to get more functionality
stay tuned!

October 22, 2015 - Categories How-to Guides
Categories: how-to guides , i've been using aws codedeploy for some time now and it's really an awesome service. if you're hosting your application in aws and not using codedeploy you're missing out.
if you want to use codedeploy yet but you just don't know how, check out my in-depth aws codedeploy course.
i had been successfully using codedeploy for an app at work for a few months when i was told we had to switch to using linux ami's that were 'hardened' to meet cis benchmarks for security. no problem right? i redeployed the app stack with the cis-hardened ami and worked through a few bugs that came out of it.
however, when i went tried to execute my codedeploy deployment it died with an error claiming that it couldn't access the "patch.sh" file due to permissions. i logged on to the instance, cd'd into the codedeploy directory, and didn't notice anything obviously wrong with the permissions.
i took a look at the appspec.yml to see what might be different about this one script that was failing. here's a mock-up of the appspec.yml similar to the one i was using:
version: 0.0
os: linux
hooks:
beforeinstall:
- source: scripts/deregister-from-elb.sh
timeout: 1200
- source: scripts/stop-app.sh
timeout: 1200
afterinstall
- source: scripts/patch.sh
timeout: 600
runas: ec2-user
- source: scripts/start-app.sh
timeout: 600
runas: ec2-user
- source: scripts/register-with-elb.sh
timeout: 1200
that's it - patch.sh is the first script executed as ec2-user. but this revision worked before, what changed?
one of the many changes required to meet the cis benchmarks includes changing the umask so "that files created by daemons will not be readable, writable or executable by any other than the group and owner of the daemon process..." because the codedeploy daemon runs as root, any files created (including every file and script that is part of your codedeploy revision) are owned by root:root with permissions 750. so any script being called by a user that's not root (or in the root group) can't execute the scripts.
to workaround this, you can simply add another script to update the permissions of the codedeploy deployment-root before you execute any scripts as a non-root user.
here's the updated appspec.yml:
version: 0.0
os: linux
hooks:
beforeinstall:
- source: scripts/update-deployment-root-perms.sh
timeout: 60
- source: scripts/deregister-from-elb.sh
timeout: 1200
- source: scripts/stop-app.sh
timeout: 1200
afterinstall
- source: scripts/patch.sh
timeout: 600
runas: ec2-user
- source: scripts/start-app.sh
timeout: 600
runas: ec2-user
- source: scripts/register-with-elb.sh
timeout: 1200
and the update-deployment-root-perms.sh script:
#!/bin/bash
echo "here's some meaningful message before we attempt to update the permissions of the deployment-root directory and all child files and folders"
chmod -r 755 /opt/codedeploy-agent/deployment-root
echo "here's some meaningful message to confirm the script successfully executed the chmod command"
that's it - a simple solution for an obscure problem.
as always, i hope this post has been helpful and let me know if you have any questions.
August 23, 2015 - Categories Electronics Projects,How-to Guides
Categories: electronics projects,how-to guides , here's a quick and easy project you can do with minimal hardware components. i call this project/device "buzzword" but it's basically the same game and concept as catch phrase. in catch phrase, you have a device that shows you random words. you can say anything to help your team guess the word as long as you don't say any part of the "catch phrase" itself, say "it rhymes with ____ ," or otherwise cheat. once your team correctly guesses the word, you pass the device to the opposing team. this goes on until you run out of time. whichever team is holding the device when time is up loses.
my game is very similar, except teams compete by seeing how many points they can get rather than simply whoever is holding the device at the end of the round. in addition, since you are providing your own list of words for the game in the code, you can update it once you get bored with the words or add new pop culture references.
here's a quick demo:
or for those who don't want to wait for a video to load, here are a few screenshots that should give you an idea of how it works.
here's the initial startup screen
once you click the button to start, a 60 second timer starts and you're shown the first word. the list of words is shuffled every time the game starts. at this point, if you're holding the device, you can pass if it's too hard, or start throwing out clues. if someone guesses correctly, you hit the +1 button which will increment your team's score and load up the next buzzword for the next player
this continues...
until finally you run out of time and you get your final score
components needed
arduino uno
arduino uno compatible 2.8" tft touch shield v2.0 from seeedstudio (you could use other boards but may need different libraries)
9v battery power pack with dc male barrel connection
construction/assembly
this one's going to be really simple. the trickiest part is going to be loading the libraries before you upload your sketch.
connect the tft touch shield to the arduino. it only goes on one way, so you can't really mess this up. if it doesn't slip into place immediately, check that the pins are lining up and bend them as necessary. if all of the pins line up well, don't be afraid to use a little force.
download the relevant libraries and my sketch
seeedstudio touchscreen library
the buzzword sketch (includes additional libraries)
connect the arduino uno to your computer with the usb cable.
open the arduino ide. if you don't have it already, download it and install before proceeding.
add the seeed-studio touch_screen_driver and the tftv2_touch_shield-text_direction libraries
in the arduino ide menu, go to sketch --> import library... --> add library...
find the touch_screen_driver-master library you downloaded earlier in the file system browser and select it. the directory should contain seeedtouchscreen.cpp file, a seeedtouchscreen.h file, and a keywords.txt file at a minimum.
repeat the above steps for the tftv2_touch_sheild-text_direction library
open the buzzword sketch and the font.c file
in the arduino ide menu, go to file --> open...
find the buzzword.ino file in the buzzword directory and select it. the main editor window in the arduino ide should now be populated with the code
in the arduino ide menu, go to sketch --> add file...
find the font.c in the root of the buzzword directory and select it. a second tab should pop up and be populated with some text.
compile the code to verify
click on the buzzword tab in the arduino ide
click the icon in the top left with a checkmark symbol - this will compile the code and verify there are no compilation issues.
if all is well at this point, upload to your arduino by clicking the icon in the top left with a right arrow icon. this will re-compile the code and attempt to write it to the arduino itself. the screen should light up and display the start button, and should be ready to rock at this point.
if the device is working as expected, go ahead and disconnect the usb, plug in the battery pack, and secure the battery pack (two-sided tape or zip ties are good temporary solutions).
play buzzword!
July 12, 2015 - Categories Electronics Projects,How-to Guides
Categories: electronics projects,how-to guides , a couple years ago i built a novelty lock box that used an arduino and an accelerometer so that you had to tilt the box in the correct sequence to unlock it. the prototype was pretty rough, so i eventually refined the design and built a mark ii version of it.
this project is my third iteration of the novelty lockbox. the majority of the design has remain unchanged, except for this project i used a "flame sensor" instead of an accelerometer. instead of tilting the box in a particular sequence, the only way to open the box is to use an open flame as the "key." here's a quick video to demonstrate the finished product:
component list
a 3-5.5v "flame sensor"
an arduino uno (or materials to build your own breakout board)
a dc power supply with both 5v and 12v output (i used an old molex power supply)
a single relay
a 12v door latch
testing
before you do anything with the box, we want to test and calibrate the flame sensor. i followed this instructable to get acquainted with the flame sensor and what kind of values it returns. note that the author is mapping the full range of values (0-1024) to just 4 values to match his sketch. start by modifying this block:
void loop() {
// read the sensor on analog a0:
int sensorreading = analogread(a0);
// map the sensor range (four options):
// ex: 'long int map(long int, long int, long int, long int, long int)'
int range = map(sensorreading, sensormin, sensormax, 0, 3);
by adding a line for logging the raw sensor reading, like this:
void loop() {
// read the sensor on analog a0:
int sensorreading = analogread(a0);
serial.println(sensorreading);
// map the sensor range (four options):
// ex: 'long int map(long int, long int, long int, long int, long int)'
int range = map(sensorreading, sensormin, sensormax, 0, 3);
now you can wire up the sensor, upload your sketch, and experiment with what kind of values you get with an open flame at different distances.
one quick clarification - i refer to this device as a "flame sensor" because that's how its marketed, but in reality it's just a photoresistor that has a filtering film around it that only allows infrared light to pass through. the voltage in the photoresistor circuit will change with the amount of light, and the arduino analog pin will convert that voltage value to an integer between 0 and 1024. this means any infrared light will affect the sensor, including sunlight, tv remotes that use infrared, even something that is very hot could theoretically give off enough infrared to affect the sensor. if you're getting strange values while testing your sensor, be sure that you don't have another source of infrared throwing you off.
once you're confident your sensor works and you have some idea of what values it returns, you're ready to build out the lock box components.
assembly
note: to save on cost, i've been building arduino compatible breadboards using standalone atmega328 chips. the instructions will still work for an arduino uno, but the pictures won't be as helpful. check out arduino project 4: tilt to unlock to see pictures for a similar assembly using an arduino uno.
connect the 5v and ground pins (may be marked as '+' and 'g') on your flame sensor to the corresponding pins on the arduino or bread board. connect the a0 pin (the analog pin) on the flame sensor to the analog input 0 pin on the arduino (green wire in the photo below, pin 23 on an atmega328). use male-to-female jumper wires to make this easier.
connect the 5v and ground pins (may be marked as 'vcc' and 'gnd') on the relay to the corresponding pins on the arduino or bread board. connect the 'in' pin to digital pin 8 (yellow wire in the photo above, pin 14 on an atmega328). the digital pin will close the relay when voltage is applied, closing the circuit for our door latch and opening the lock. use male-to-female jumper wires to make this easier.
the door latch has two wires, they are arbitrary (either one can be powered or ground). connect one of them to the ground wire from the power supply. connect the other wire to the normally open ('no') socket on the relay. connect the 12v wire from the power supply to the always-closed or common socket on the relay (it's almost always the middle one). here's a closeup of the wiring from arduino project 4:
so our project should be all wired up and ready for a smoke test. go ahead and connect the power and make sure nothing starts smoking or getting too hot.
if you're still reading that means nothing melted or started smoking, which is great. at this point we're ready to upload a sketch and test. go ahead and download the sketch and upload it to your arduino. if all goes well, the door latch should open when you provide the infrared light. here's a quick test video:
now we're ready to assemble the box.
drill a hole in the back of the cigar box just big enough to run your power supply wires through, including the insulation. run your wire through and let it hang outside of the box for later (this will also prevent you from locking yourself out of the box by accident).
remember how i mentioned other sources of infrared can interfere with your sensor? we can limit this effect by "tunneling" or narrowing the sensor's field of view. start off by drilling a small hole in your cigar box. a 1/4" inch drillbit should work well for this. make sure your hole placement lines up with a reasonable place to mount your flame sensor inside of the box. to be discreet, i drilled my hole on the bottom left of the "face" of the cigar box and mounted the sensor using double sided tape.
if you're starting with a "clam-shell" style box (cigar boxes work great), you can follow my solution for the door latch. secure the 12v door latch to the top of the cigar box with 1/4" screws. next, take a sawtooth picture hangar and nail it into place so it lines up with the 12v door latch. obviously hammering inside of a cigar box can be difficult - you can also use a pair of pliers to squeeze the nail into place.
at this point, things are going to start getting tight so go ahead and re-wire everything outside of the box. once you're finished, mount your arduino (or breadboard) and relay inside of the box. try to keep all of these components mounted off to one side to save as much usable space as possible.
i mounted all of my components to the side of the cigar box. make sure your 12v door latch won't hit your other components when you close the box.
that's it, your lock box is complete! as always i hope you enjoyed the post and i look forward to seeing what you build!
github repo
February 23, 2015 - Categories IT/Software Projects,How-to Guides
Categories: it/software projects,how-to guides , so in part 1 we built the core classes for our app and we exposed those classes as a restful web service in part 2. now, we'll build a ui and wrap up the project.
feel free to check out the application first or pull up the source in another window.
demo
github repo
the fat free framework configuration allows you to specify a document root for the front-end pages. by default, this is set to the 'ui' directory in the root of the f3 directory structure. this will be our working directory for building the ui. the f3 package will have a few pages, css, and images in the 'ui' directory, you can delete them all if you want (i kept the welcome.htm file just out of convenience).
now i'm not a good ui developer, so i tend to use the bootstrap framework (v2.3.2) for the front-end of my applications. go ahead and download the bootstrap package and unzip it in the 'ui' directory. the 'ui' directory structure should look like this:
ui/
js/
bootstrap.js
bootstrap.min.js
jquery.js
css/
base.css
bootstrap-responsive.css
bootstrap-responsive.min.css
bootstrap.css
bootstrap.min.css
theme.css
img/
glyphicons-halflings-white.png
glyphicons-halflings.png
welcome.htm (from the f3 package)
now we have the components that we need to start building pages. let's start by building a layout.htm file - this will be the base html file (with a common header, footer, styles and script tags) that will be populated with content for each page. these types of pages/files are referred to as templates.
again... i'm a terrible ui developer so i blatantly 'borrowed' the majority of this page from one of the bootstrap examples.
<html lang="en">
<head>
<meta charset="utf-8">
<title>shareyoursalary.info</title>
<meta name="viewport" content="width=device-width, initial-scale=1.0">
<meta name="description" content="">
<meta name="author" content="">
<script src="/ui/js/jquery.js"></script>
<script src="/ui/js/bootstrap.js"></script>
<script type="text/javascript">
$(document).ready(function(){
$('[data-toggle="popover"]').popover({
placement : 'top'
});
});
</script>
<!-- le styles -->
<link href="/ui/css/bootstrap.css" rel="stylesheet">
<style type="text/css">
body {
padding-top: 20px;
padding-bottom: 60px;
}
/* custom container */
.container {
margin: 0 auto;
max-width: 1000px;
}
.container > hr {
margin: 60px 0;
}
/* main marketing message and sign up button */
.jumbotron {
margin: 80px 0;
text-align: center;
}
.jumbotron h1 {
font-size: 100px;
line-height: 1;
}
.jumbotron .lead {
font-size: 24px;
line-height: 1.25;
}
.jumbotron .btn {
font-size: 21px;
padding: 14px 24px;
}
/* supporting marketing content */
.marketing {
margin: 60px 0;
}
.marketing p + h4 {
margin-top: 28px;
}
/* customize the navbar links to be fill the entire space of the .navbar */
.navbar .navbar-inner {
padding: 0;
}
.navbar .nav {
margin: 0;
display: table;
width: 100%;
}
.navbar .nav li {
display: table-cell;
width: 1%;
float: none;
}
.navbar .nav li a {
font-weight: bold;
text-align: center;
border-left: 1px solid rgba(255,255,255,.75);
border-right: 1px solid rgba(0,0,0,.1);
}
.navbar .nav li:first-child a {
border-left: 0;
border-radius: 3px 0 0 3px;
}
.navbar .nav li:last-child a {
border-right: 0;
border-radius: 0 3px 3px 0;
}
</style>
<link href="/ui/css/bootstrap-responsive.css" rel="stylesheet">
<!-- html5 shim, for ie6-8 support of html5 elements -->
<!--[if lt ie 9]>
<script src="ui/js/html5shiv.js"></script>
<![endif]-->
<!-- fav and touch icons -->
<link rel="apple-touch-icon-precomposed" sizes="144x144" href="/ui/ico/apple-touch-icon-144-precomposed.png">
<link rel="apple-touch-icon-precomposed" sizes="114x114" href="/ui/ico/apple-touch-icon-114-precomposed.png">
<link rel="apple-touch-icon-precomposed" sizes="72x72" href="/ui/ico/apple-touch-icon-72-precomposed.png">
<link rel="apple-touch-icon-precomposed" href="/ui/ico/apple-touch-icon-57-precomposed.png">
<link rel="shortcut icon" href="/ui/ico/favicon.png">
</head>
<body>
<div class="container">
<div class="masthead">
<h1 class="muted">shareyoursalary</h1>
<div class="navbar">
<div class="navbar-inner">
<div class="container">
<ul class="nav">
<li class="active"><a href="/">home</a></li>
<li><a href="/swagger/dist/index.html">api documentation</a></li>
<li><a href="https://github.com/alexdglover/shareyoursalary">github project</a></li>
</ul>
</div>
</div>
</div><!-- /.navbar -->
</div>
<!-- put content here -->
<?php echo $this->render(base::instance()->get('content')); ?>
<hr>
<div class="footer">
<p>© alexdglover 2014</p>
</div>
</div> <!-- /container -->
<!-- le javascript
================================================== -->
<!-- placed at the end of the document so the pages load faster -->
<script src="/ui/js/jquery.js"></script>
<script src="/ui/js/bootstrap.js"></script>
</body>
</html>
now the important piece we've added here is between the 'masthead' and 'footer' divs:
<!-- put content here -->
<?php echo $this->render(base::instance()->get('content')); ?>
now we can just set the 'content' variable in our f3 code to populate the body of the template and we will get consistent and clean looking pages. that's the whole purpose of templates and template engines - build a solid base page (or pages) and just populate the contents dynamically. this makes for great code re-use and you don't have to propagate changes across dozens of files.
static pages
for populating the content with a static page, we don't really need a controller class, we just need f3's routing functionality to set the 'content' variable to a static html file. the shareyoursalary app home page is going to be static, so let's use that as an example.
for the home page, we'll want a simple explanation of what the site/app does and an entry form for users to create a new survey. our entry form will post values to the api using jquery and route us to a result page if it's successful. remember, we don't have to worry about javascript or css references because our layout.htm already includes all of that. let's take a look at the home page (welcome.htm):
<div class="row">
<div class="span5">
<h2>share your salary!</h2>
<p>have you ever worried that your colleagues, doing the same job, make more money than you? according to a recent glassdoor survey, 39% of americans feel they're underpaid.</p>
<p>or maybe you're curious how you rank compared to your high school class?</p>
<p>maybe someone on your team is getting underpaid, but you're not comfortable talking about salaries.</p>
<p>then create a free, anonymous salary survey!</p>
</div>
<div class="span5">
<form>
<fieldset>
<legend>create a survey</legend>
<label>survey name</label>
<input class="input-xlarge" name="surveyname" type="text" placeholder="employer, team name, or totally arbitratry" />
<label>currency</label>
<select class="input-medium" name="currency">
<option value="" disabled="">select currency</option>
<option value="aud">australian dollar</option>
<option value="brl">brazilian real </option>
<option value="cad">canadian dollar</option>
<option value="czk">czech koruna</option>
<option value="dkk">danish krone</option>
<option value="eur">euro</option>
<option value="hkd">hong kong dollar</option>
<option value="huf">hungarian forint </option>
<option value="ils">israeli new sheqel</option>
<option value="jpy">japanese yen</option>
<option value="myr">malaysian ringgit</option>
<option value="mxn">mexican peso</option>
<option value="nok">norwegian krone</option>
<option value="nzd">new zealand dollar</option>
<option value="php">philippine peso</option>
<option value="pln">polish zloty</option>
<option value="gbp">pound sterling</option>
<option value="sgd">singapore dollar</option>
<option value="sek">swedish krona</option>
<option value="chf">swiss franc</option>
<option value="twd">taiwan new dollar</option>
<option value="thb">thai baht</option>
<option value="try">turkish lira</option>
<option value="usd" selected="yes">u.s. dollar</option>
</select>
<label>period</label>
<select class="input-medium" name="period">
<option value="per year">per year</option>
<option value="per hour">per hour</option>
</select>
<label>minimum number of responses <i class="icon-question-sign" data-toggle="popover" data-placement="top" title="miniumum number of responses" data-content="in order to ensure anonymity, salary survey results won't be published until a minimum number of salary responses are submitted. set this to '0' if you don't care about anonymity."></i></label>
<input class="input-mini" name="minentries" type="number" value=5 />
<p><input id="submit" type="submit" class="btn btn-success" value="submit" /></p>
</fieldset>
</form>
</div>
</div>
<script>
$( "form" ).on( "submit", function( event ) {
event.preventdefault();
var datastring = $( "form" ).serialize();
$.ajax({
type: "post",
url: "/api/v1/survey/addsurvey",
data: datastring,
datatype: "json",
success: function(data) {
window.location.href = "/thanks/" + data.urlname;
},
error: function(){
alert('oops... something went wrong. please try again.');
}
});
});
</script>
perfect. the default index.php that's included in the f3 package will include a route for "get /" that we can use. this section should already exist in the index.php if you're using the default file that came with the f3 zip file, but just confirm that these lines exist in your index.php:
$f3->route('get /',
function($f3) {
...
// lots of default f3 code
...
$f3->set('content','welcome.htm');
echo view::instance()->render('layout.htm');
}
);
if you want to use a different file name for your home page (instead of welcome.htm) just change it in this line of the index.php file. now if we browse to our site, we should see our home page:
now we can partially test this form if we want. if we submit a survey and the api processes it successfully, we'll get routed to a page that doesn't exist yet (that's ok, that's expected behavior). but how do we know the submission worked? we can go back to our api test page we created in part 2 and execute a getbyname api call.
if we tried to create a survey called 'demo' then all we need to do is execute the /survey/getbyname/{name} api with that value. you can do this in swagger, or since it's just a get request, you can do it directly in your browser. just browse to /api/v1/survey/getbyname/demo and you should see the json response.
ok, at this point we should have a static home page and a working form. next, we'll have to create dynamic pages for each survey that's created.
dynamic pages
for populating dynamic content, you can write your logic directly in f3's index.php, abstract it into individual classes, or you can do what i did and consolidate it all into one pagegenerator class. this will simplify our f3 routes (more on this later) and manage all of our dynamic views in one place.
for this project, we need 3 pages or views (excluding the static home page):
a page users hit after creating a survey. we'll call this 'thanks' as we'll be thanking users for creating a survey and enable them to invite others to participate
a page for users who've been invited to participate in an existing survey. we'll call this 'addresponse' because ultimately that's the only purpose for this page
a page for users (both invitees and the original survey creator) to review the results of the survey. we'll call this 'report'
first, let's construct our controller that will get all of the relevant variables for these pages and then set the content. let's review the code:
<?php
class pagegenerator {
// instantiate variables
var $surveyname;
var $currency;
var $period;
var $minentries;
private $db;
// construct the pagegenerator object with a database object
public function __construct(){
$this->db = new database();
}
// utility function to convert survey names to a url-friendly name
private function convertnametourlname($string) {
//lower case everything
$string = strtolower($string);
//make alphanumeric (removes all other characters)
$string = preg_replace("/[^a-z0-9_\s-]/", "", $string);
//clean up multiple dashes or whitespaces
$string = preg_replace("/[\s-]+/", " ", $string);
//convert whitespaces and underscore to dash
$string = preg_replace("/[\s_]/", "-", $string);
return $string;
}
// function for populating the 'thanks' page (after a user creates a survey). this collects all of the relevant survey information into the 'survey' json object and sets the 'content' variable to the code in the thanks.htm file
public function thanks($f3,$args){
$surveys = $this->db->get_collection('surveys');
// convert name to url friendly name
$urlname = $this->convertnametourlname($args['name']);
$query = array('urlname' => $urlname);
$cursor = $surveys->find($query);
foreach ($cursor as $doc){
$f3->set('survey',$doc);
}
$f3->set('content','thanks.htm');
echo view::instance()->render('layout.htm');
}
// function for populating the 'addresponse' page (the page invited users see). this collects all of the relevant survey information into the 'survey' json object and sets the 'content' variable to the code in the addresponse.htm file
public function addresponse($f3,$args){
$surveys = $this->db->get_collection('surveys');
// convert name to url friendly name
$urlname = $this->convertnametourlname($args['name']);
$query = array('urlname' => $urlname);
$cursor = $surveys->find($query);
foreach ($cursor as $doc){
$f3->set('survey',$doc);
}
$f3->set('content','addresponse.htm');
echo view::instance()->render('layout.htm');
}
// function for populating the 'report' page. this collects all of the relevant survey information into the 'survey' json object and sets the 'content' variable to the code in the report.htm file
public function report($f3,$args){
$surveys = $this->db->get_collection('surveys');
// convert name to url friendly name
$urlname = $this->convertnametourlname($args['name']);
$query = array('urlname' => $urlname);
$cursor = $surveys->find($query);
foreach ($cursor as $doc)
{
if (count($doc['responses']) < $doc['minentries'])
{
$f3->set('minentriesmet', false);
}
else
{
asort($doc['responses']);
$f3->set('minentriesmet', true);
$averagesalary = round((array_sum($doc['responses']))/(count($doc['responses'])),2);
$f3->set('averagesalary',$averagesalary);
$percentdeltas = [];
foreach($doc['responses'] as $response)
{
array_push($percentdeltas, (round((($response-$averagesalary)/$averagesalary),2) ) );
}
asort($percentdeltas);
$f3->set('percentdeltas',$percentdeltas);
// median code borrowed from http://www.mdj.us/web-development/php-programming/calculating-the-median-average-values-of-an-array-with-php/
sort($doc['responses']);
$count = count($doc['responses']); //total numbers in array
$middleval = floor(($count-1)/2); // find the middle value, or the lowest middle value
if($count % 2) { // odd number, middle is the median
$median = $doc['responses'][$middleval];
} else { // even number, calculate avg of 2 medians
$low = $doc['responses'][$middleval];
$high = $doc['responses'][$middleval+1];
$median = (($low+$high)/2);
}
$f3->set('median',$median);
} //end of minentriesmet==true block
$f3->set('survey',$doc);
}
$f3->set('content','report.htm');
echo view::instance()->render('layout.htm');
}
}
?>
as you can see, the functions follow a very similar pattern - we get a survey name input (via f3's $args variable), grab the relevant survey data from the db, set one (or more) json objects to be consumed in the page, and set the 'content' variable to the appropriate page. from inside of the view, we'll grab the individual elements out of the array and use it in the display or javascript.
now for the views. let's walk through the app as a user would, just for intuitiveness. our user has created a survey successfully, so let's thank them for creating it and show them the details of the survey so they can confirm everything is right. let's also add a mechanism for the user to invite their friends and colleagues through social media. our survey creator might also be participating, so let's enable them to add a response right away as well. finally, we need to provide a link to the survey report where users can view the results. remember, our pagegenerator controller is going to pass us all of the data we need in one array object titled $survey. let's take a look at the html:
<h2>thanks for creating a survey!</h1>
<div class="row">
<div class="span5">
<legend>survey details</legend>
<p><strong>survey name</strong><br /><?php echo $survey['name']; ?></p>
<p><strong>salary currency</strong><br /><?php echo $survey['currency']; ?></p>
<p><strong>salary period</strong><br /><?php echo $survey['period']; ?></p>
<p><strong>minimum number of responses before results published</strong><br /><?php echo $survey['minentries']; ?></p>
<p><strong>current number of responses</strong><br /><?php echo count($survey['responses']); ?></p>
</div>
<div class="span5">
<legend>next steps</legend>
<ol>
<li>invite others to participate by sharing<br />
<a target="_blank" href="<?php echo "http://www.facebook.com/sharer/sharer.php?u=" . "http://$_server[http_host]" . "/addresponse/" . $survey['urlname']; ?>"><img src="/ui/img/facebook_001.jpg" style="width:32px; height:32px;" /></a>
<a target="_blank" href="<?php echo "https://twitter.com/intent/tweet?text=how%20much%20do%20you%20make%3f&url=" . "http://$_server[http_host]" . "/addresponse/" . $survey['urlname']; ?>"><img src="/ui/img/twitter_001.jpg" style="width:32px; height:32px;" /></a>
<a target="_blank" href="<?php echo "http://www.linkedin.com/sharearticle?mini=true&url=" . "http://$_server[http_host]" . "/addresponse/" . $survey['urlname'] . "&title=salary%20survey"; ?>"><img src="/ui/img/linkedin_001.jpg" style="width:32px; height:32px;" /></a>
<a href="<?php echo "http://pinterest.com/pin/create/button/?url=" . "http://$_server[http_host]" . "/addresponse/" . $survey['urlname']; ?>" class="pin-it-button" count-layout="horizontal"><img src="/ui/img/pinterest_001.jpg" style="width:32px; height:32px;" /></a>
<br />
or by sending them this link:<br /><a href="<?php echo "http://$_server[http_host]" . "/addresponse/" . $survey['urlname']; ?>"><?php echo "http://$_server[http_host]" . "/addresponse/" . $survey['urlname']; ?></a></li>
<li>enter your salary<br />
<form>
<div class="input-append">
<input name="response" type="text" pattern="[1-9]{1}[0-9]*\.?[0-9]{0,2}" placeholder="enter your salary" />
<span class="add-on"><?php echo $survey['currency'] ?> <?php echo $survey['period'] ?></span>
</div>
<input id="submit" type="submit" class="btn btn-success" value="submit" />
</form>
</li>
<li>
once the minimum number of entries are met, see the salary analysis report here: <a href="<?php echo "http://$_server[http_host]" . "/report/" . $survey['urlname']; ?>"><?php echo "http://$_server[http_host]" . "/report/" . $survey['urlname']; ?></a>
</li>
</ol>
</div>
</div>
<script>
$( "form" ).on( "submit", function( event ) {
event.preventdefault();
var datastring = $( "form" ).serialize();
$.ajax({
type: "post",
url: "/api/v1/survey/addresponse/<?php echo $survey['urlname'] ?>",
data: datastring,
datatype: "json",
success: function(data) {
alert("thanks! you've successfully entered your salary information.");
},
error: function(){
alert('oops... something wrong');
}
});
});
</script>
one point of interest - you may have noticed the "pattern" property set on the one ofthe html inputs. this is a regular expression that tells the input field what valuesare allowed. let's examine this pattern by breaking it up:
pattern="[1-9]{1}[0-9]*\.?[0-9]{0,2}"
[1-9]{1} - this means we want one and only one character, and it has to be a digit 1-9. this prevents users from submitting a value that starts with a leading zero.
[0-9]* - this means any character 0-9, an unlimited number of times.
\.? - this means we're expecting zero or one period. this allows our users to enter a decimal point if they want, but at most one.
[0-9]{0,2} - this means we'll accept zero, one, or two of any characters between 0 and 9.
what this all boils down to is a user can enter any number with no decimal places, a single decimal place, or two decimal places, and nothing else. no symbols, letters, or illegitimate formats. this ensures we have clean valid numbers to do mathematical operations on later for the 'report' page.
the 'addresponse' page is simpler and re-uses a lot of the same code as the 'thanks' page, so let's jut jump right into it.
<h2>you've been invited!</h1>
<div class="row">
<div class="span5">
<legend>wait, what's going on?</legend>
<p>you've been invited to participate in an anonymous survey about salaries. someone has already created the survey and invited you and others to participate. your salary information is totally anonymous - no login or email address is required. to ensure anonymity, the results of the survey aren't published until a minimum number of responses are made (see below).</p>
<p><strong>survey name</strong><br /><?php echo $survey['name']; ?></p>
<p><strong>minimum number of responses before results published</strong><br /><?php echo $survey['minentries']; ?></p>
<p><strong>current number of responses</strong><br /><?php echo count($survey['responses']); ?>
</div>
<div class="span5">
<legend>next steps</legend>
<ol>
<li>enter your salary<br />
<form>
<div class="input-append">
<input name="response" type="text" pattern="[1-9]{1}[0-9]*\.?[0-9]{0,2}" placeholder="enter your salary" />
<span class="add-on"><?php echo $survey['currency'] ?> <?php echo $survey['period'] ?></span>
</div>
<p><input id="submit" type="submit" class="btn btn-success" value="submit" /></p>
</form>
</li>
<li>
once the minimum number of entries are met, see the salary analysis report here: <a href="<?php echo "http://$_server[http_host]" . "/report/" . $survey['urlname']; ?>"><?php echo "http://$_server[http_host]" . "/report/" . $survey['urlname']; ?></a>
</li>
</ol>
</div>
</div>
<script>
$( "form" ).on( "submit", function( event ) {
event.preventdefault();
var datastring = $( "form" ).serialize();
$.ajax({
type: "post",
url: "/api/v1/survey/addresponse/<?php echo $survey['urlname'] ?>",
data: datastring,
datatype: "json",
success: function(data) {
alert("thanks! you've successfully entered your salary information.");
},
error: function(){
alert('oops... something wrong');
}
});
});
</script>
easy right? ok, the last page is the 'report' page where we'll give some basic statistics from the survey results and a nice little chart. the statistics are pretty easy to calculate, and for the chart we'll use google charts api via javascript. let's take a look.
<h2>salary analysis for survey '<?php echo $survey['name']; ?>'</h1>
<div class="row">
<?php if($minentriesmet) { ?>
<div class="span5">
<legend>survey details</legend>
<p><strong>survey name</strong><br /><?php echo $survey['name']; ?></p>
<p><strong>average salary</strong><br /><?php echo $averagesalary ?> <?php echo $survey['currency']; ?> <?php echo $survey['period']; ?></p>
<p><strong>median salary</strong><br /><?php echo $median ?> <?php echo $survey['currency']; ?> <?php echo $survey['period']; ?></p>
<!--<p><strong>salary currency</strong><br /><?php echo $survey['currency']; ?></p>
<p><strong>salary period</strong><br /><?php echo $survey['period']; ?></p>-->
<p><strong>minimum number of responses before results published</strong><br /><?php echo $survey['minentries']; ?></p>
<p><strong>current number of responses</strong><br /><?php echo count($survey['responses']); ?>
</div>
<div class="span5">
<legend>relative salary comparison</legend>
<div id="chart_div" style="width: 100%; height: 300px;"></div>
</div>
<?php } else { ?>
<div class="span12">
uh oh, minimum number of responses haven't been met yet. minimum number of responses is <?php echo $survey['minentries']; ?> and there have been <?php echo count($survey['responses']); ?> responses so far.<br /><br />no report data available.
</div>
<?php } ?>
</div>
<script type="text/javascript" src="https://www.google.com/jsapi?autoload={'modules':[{'name':'visualization','version':'1','packages':['corechart']}]}"></script>
<!--<div id="chart_div" style="width: 100%; height: 500px;"></div>-->
<script>
google.setonloadcallback(drawchart);
function drawchart() {
var datatable = new google.visualization.datatable();
datatable.addcolumn('number', 'salary');
datatable.addcolumn('number', '% delta');
<?php for($i=0; $i < count($survey['responses']); $i++){
echo 'datatable.addrow(['. $survey['responses'][$i]. ',' . $percentdeltas[$i] . ']);';
};?>
var formatter = new google.visualization.numberformat({
fractiondigits: 2,
prefix: '$'
});
formatter.format(datatable, 0); // apply formatter to salary column.
var formatter = new google.visualization.numberformat({
fractiondigits: 2,
pattern: '###%'
});
formatter.format(datatable, 1); // apply formatter to percent delta column.
var options = {
title: 'salary comparison',
haxis: {title: 'salary', minvalue: 0, maxvalue: 10, format: '$#'},
vaxis: {title: 'percent above/below average', minvalue: -1, maxvalue: 1, format: '#%'},
legend: 'none'
};
var chart = new google.visualization.scatterchart(document.getelementbyid('chart_div'));
chart.draw(datatable, options);
}
</script>
ok, so theoretically our pagecontroller and our four views should all be working at this point, we just need to add routes to our index.php for these pages. much like our api routes, we'll specify a url that includes variables in the url string itself. let's create a route for each of our three new views:
// page generator - class of functions for populating pages
$f3->route('get /thanks/@name','pagegenerator->thanks');
$f3->route('get /report/@name','pagegenerator->report');
$f3->route('get /addresponse/@name','pagegenerator->addresponse');
since these are normal web pages, we'll use the default get method. next we specify the path including the variable prefixed with the @ sign, and finally we tell f3 which class and function to map the route to (in the format of classname->functionname). now we can hit those urls with 'demo' as the name argument and we should see the pages populated with the details of the 'demo' survey object.
that's it - we now have a full working application including an api and a very decent user interface (it's even mobile friendly, thanks to bootstrap).
deployment notes and 'cloudiness'
this is already an insanely long write-up for this project, but i want to push through to make a couple important comments.
before your f3 app is live in production, we need to make one more small change. by default, f3 will log error output directly to the browser. this is great for debugging, but unfortunately it can spit out sensitive information, like the username and password for our mongodb. to disable this level of error logging, simply modify the 'debug' f3 variable to 0, like this:
$f3->set('debug',0);
simple.
deployment with openshift is trivial, as you're really doing continuous delivery - every time you push your code, openshift redeploys your environment with the new code. if you haven't been doing this along the way, you just need 3 commands to deploy your code:
# execute this from within your openshift project directory
git add -a # add all changes to the git index
git commit -m 'add your commit message'
git push
done. you can now hit the app by browsing to your openshift-generated dns name. adding your own custom dns name is easy, and i'll cover that in a separate post.
as for cloudiness - the application might not be that complex and my object-oriented skills are garbage, but from an infrastructure/hosting perspective, it's the holy grail. here's why:
the app doesn't care about dns names. you can hit the app at http://shareyoursalary.alexdglover.com or http://shareyoursalary-alexdglover.rhcloud.com, or even http://www.shareyoursalary.gq/ and the app works perfectly. you can deploy it anywhere, change dns names whenever, you can give customers/users their own custom 'vanity' urls, and the app will give consistent results. it's extremely flexible and portable.
there are no sessions to worry about, making load-balancing extremely easy.
since all of the app functionality is api based, we can scale the application horizontally just by adding more php instances behind the load balancer.
by using a nosql database (mongodb), the database layer can also be scaled horizontally.
all of the code is deployment agnostic - since we're using environment variables for the database connection details, this same source can be deployed to development, qa, and production environments without any changes.
there are no high-cost or proprietary application components. you can run this app in any cloud hosting environment, on a number of operating systems, using off-the-shelf images/services in many cases.
the deployment is as easy as putting the contents of our project directory in the document root of the apache/php servers. there's no configuration necessary.there is no db schema to set up as part of the app deployment - the application will create the collection (read: table) on the fly and start inserting records.
in short, it should be very easy for anybody with minimal cloud automation training to deploy this application in a highly available and scalable model. specifically, the app can handle instance failures in any tier and can scale horizontally to support hundreds of thousands of concurrent users without human intervention or configuration. with all of the advancements in cloud and automation, this should be the de facto standard for all but the largest and most complex apps.
as always, i hope this post has been helpful and let me know if you have any questions.

January 29, 2015 - Categories IT/Software Projects,How-to Guides
Categories: it/software projects,how-to guides , in part 1, i covered the core classes for the share your salary application. these classes covered my model and controllers in my quasi-mvc application. now we're ready to expose those controller functions via a restful api.
for this project, i used the fat free framework for both api routes and web page templating. to start, i simply downloaded and unzipped the f3 package and added the contents to my shareyoursalary app directory. next, i created a "classes" folder and added the php class files i created in part 1. at this point, my folder structure looked like this:
shareyoursalary/
classes/
database.php
survey.php
config.ini
lib/
.htaccess
index.php
readme.md
ui/
css/
images/
layout.htm
userref.htm
welcome.htm
now to create the api functionality, i created routes in f3. f3 makes it really easy to make http method-specific routes that then map to pages, classes, or specific functions. in my case, i wanted to create routes for the various functions i created in the survey class. to do this, we'll need to edit the index.php file in the root of the f3 directory. i left the existing code as-is, and added the following lines:
$f3->route('get /api/v1/survey/getbyname/@name','survey->getbyname');
$f3->route('post /api/v1/survey/addresponse/@name','survey->addresponse');
$f3->route('post /api/v1/survey/addsurvey','survey->addsurvey');
as you can see, the route syntax is:
'method /url/path/@parameter', 'class->functionname'.
restful apis should use certain methods based on what you're doing to the object (e.g. if you're reading an object, use get, if you're creating an object, use post). here's a quick breakdown for reference:
get - reading an object
post - creating a new object (or overwriting an entire object)
put - updating attributes of an existing object (this should be an idempotent operation)
delete - i'll give you three guesses.
there are other methods, but these are the four main methods you'll encounter with apis.
back to the f3 routes - you'll notice the @parameters in the url. this tells f3 to pick up this portion of the url and set it as a variable. you can then reference these parameters/variables in templates:
echo $f3->get('params.parametername');
or you can use them inside of your classes/functions:
// remember the route from index.php:
// $f3->route('get /api/v1/survey/getbyname/@name','survey->getbyname');
public function getbyname($f3,$args) {
...
$urlname = $this->convertnametourlname($args['name']);
...
ok, so now i can hit http://shareyoursalary-alexdglover.rhcloud.com/api/v1/survey/getbyname/test in a browser, and i'll get some json output in response (unless 'test' doesn't exist, in which case i'll get an http 200 ok response but no output).
what about the other two routes? if you try to hit them in a browser, you'll get a nasty http 405 error - method not allowed. remember, a browser by default is getting web pages, and f3 enforces the http method you've assigned. so how are we going to test our api routes? we could install some browser plugin or execute curl commands against it... but let's do something friendly for our api consumers, let's make it easy for people to explore the api. enter swagger ui.
i already gave an overview of swagger ui in part 1, now for the implementation details. to start, i downloaded the swagger ui package, unzipped it the root of the project directory and renamed the directory 'swagger' leaving our new file structure like this:
shareyoursalary/
classes/
database.php
survey.php
config.ini
lib/
.htaccess
index.php
swagger/
bin/
dist/
lib/
src/
...
readme.md
ui/
css/
images/
layout.htm
userref.htm
welcome.htm
since swagger won't be managed by f3's template engine, i kept it outside of the ui directory. to make the swagger web pages available, i add a new route in the f3 index.php file:
route('get /swagger/',
function($f3) {
echo f3::serve('/swagger/dist/index.html');
}
);
now we can browse to /swagger/dist/index.html and we should see the swagger ui page with the petstore example. we're off to a good start.
next, we need to modify /swagger/dist/index.html to refer to our new api json document (which we haven't created yet). on line 31, we need to provide the full url path to the json file:
url = window.location.protocol + "//" + window.location.host + "/swagger/dist/shareyoursalary.json";
note that this url variable will work regardless of what dns name the app is using (more on this later). alright, now we'll create the shareyoursalary.json file to describe the api. let's take a look at a few snippets and then break each one down:
{
"swagger": "2.0",
"info": {
"version": "0.0.1",
"title": "share your salary"
},
"basepath": "/api/v1",
...
pretty easy right? just providing some version numbers, a title, and a base path. the base path is the most important piece here - this will be pre-pended to all of the other api urls/path. next, let's take a look at the first path:
"paths": {
"/survey/getbyname/{name}": {
"get": {
"description": "gets `survey` objects.\nrequired query param of **name** will be used as search criteria.\nshould only return one object.\nif minimum entries haven't been met, responses will not be included in return data.\n",
"parameters": [
{
"name": "name",
"in": "path",
"description": "name of survey",
"required": true,
"type": "string",
"format": "string"
}
],
"responses": {
"200": {
"description": "successful response",
"schema": {
"title": "surveyjson",
"type": "array",
"items": {
"title": "survey",
"type": "object",
"properties": {
"name": {
"type": "string"
},
"currency": {
"type": "string"
},
"period": {
"type": "string"
},
"minentries": {
"type": "number"
}
}
}
}
}
}
}
}
}
...
each path is identified by a key, which is the actual url/path ("/survey/getbyname/{name}" in this example). each url can have multiple functions based on what http method is used, so we'll provide a description, parameters, and a response definition for each method. in this example, we are only dealing with get. the parameter attributes are fairly straightforward except for the "in" attribute - the "in" attribute defines how the parameters are passed to this api. apis can have parameter values passed in one of two ways:
as part of the url path (e.g. /object/function/value)
as a query parameter (e.g. /object/function?parameter=value)
when passing a path parameter, we also need to add it to the routes inside of {curly braces}, like /survey/getbyname/{name}. finally, we define an expected response, which is straightforward. my entire "shareyoursalary.json" file is available on github if you would like more example code. now that we completed our json document describing our api, we can simply browse to the swagger ui page and see all of the documentation as well as a working api client. take a minute to check it out and fire off some api requests: http://shareyoursalary-alexdglover.rhcloud.com/swagger/dist/index.html.
let's switch gears for a second, move away from the technical how-to and go over a few api philosophies and best practices.
include a version in your api paths (you'll notice i used /api/v1/ in my base path). if you ever need to change the api in some way that's not backward compatible, you'll want to create a separate api route for the new version. this allows you to host two apis, giving your downstream users the chance to re-write their code and switch to your new api before you kill the previous version.
use the built-in http methods and responses appropriately. this will make your api easier for you and your users to consume and debug. for example, throw an http 405 error if someone sends a post request to an api that only allows get. if you threw an http 500 error instead, people will wonder if there's a runtime error on the server rather than a mistake on their end. on that note, use http 500 sparingly - this should only be thrown if you can't catch/handle an error appropriately, or it should be accompanied with some useful error text.
make your api fun and easy to use. you want to encourage exploration and experimentation so other developers will build awesome applications on top of your already awesome api. you can accomplish this by using tools like swagger and adding related calls to your api responses (i.e. if someone hits /invoice/123, send a "related objects" attribute in the response with routes to /invoice/122, /invoice/124, and /purchaseorder/123 - that way the the user is encouraged to traverse or "walk" your api)
awesome - now we have a working api service, our api is documented, and we can test it directly in case our ajax-based ui has issues later.
in part 3, we'll build a front-end (using jquery, bootstrap, f3, and google charts) that consumes our api service, set up dns names, and review the application overall.
January 23, 2015 - Categories IT/Software Projects,How-to Guides
Categories: it/software projects,how-to guides , in a previous project, i built "who's that person in that thing?," a javascript web app that called the movie db's api to find common actors given two movies. that was fun, but i still wanted to build an api service myself and i wanted to experiment with some new tools. but first i needed a project idea as an excuse to use them.
project idea/application premise/the excuse
people are funny about money, especially about their salary. with most people, it's a taboo to talk about it. but everyone's been curious at some point to know how they compare to their peers. some people fear they are getting paid less to do the same work as others, and sometimes that fear is founded in fact. the "share your salary" app is an anonymous salary survey tool to address these kinds of use cases.
before we get into any of the tools or how-to, feel free to check out the application first or look over the source.
demo
github repo
new tools
openshift
well i started to write this section, turned out to be about a thousand words... so i moved it to it's own separate post. in short, openshift is a paas hosting service. openshift hosts the entire share your salary app, including a mongodb container, an haproxy load balancer, and apache/php containers in an auto-scaling group.
mongodb
mongodb is a highly scalable nosql database. mongodb is a document database and uses javascript object notation (json) to represent those documents. i really like json, but php doesn't 'speak' json natively, which makes using mongodb a little less intuitive. i wrote a separate mongodb and php primer post to go over some of the basics.
i used mongodb as the backend for the "share your salary" app.
fat free framework
fat free framework (or f3 for short) is a tiny php framework (it's only ~65 kb in total) that provides url routing, caching, page templating, and built-in database support for mysql, sqlite, mssql/sybase, postgresql, mongodb and f3's proprietary flat-file db called jig.
i used f3 for both templating web front-end as well as the api.
swagger ui
swagger ui is a must if you are building a restful api service - it acts as both a documentation method and a test bed. as the developer, you complete a json file that describes your api routes, methods, parameters, etc. swagger ui transforms that json into a web page and api client that uses javascript to send http get/post/put/delete requests to your api service and displays the results. check out the swagger petstore demo.
retrospective
i would normally title this section "how-to" or something along those lines, but trying to remember all of the steps i went through after the fact is difficult. i tend to get caught up in a project and document afterwards (shame on me).
that said, i'll try to break down the highlights and lessons learned from this project.
the 'database' class
a quick disclaimer - i have a hard time thinking in object-oriented terms, i generally write functional programs. i tried to push myself to write more object-oriented with some simple classes to represent objects but i'm sure i botched it. any criticisms or corrections are welcome.
now, with any good oo program, you'll want to create a database class that can be instantiated by other classes. this allows you to write the basic database code once and re-use it elsewhere, instead of having a separate set of database connection code in every class that needs it.
let's go over the code with some extra comments:
<?php
// here we are defining a constant variable, openshift_db with the name
// of the mongodb database we'll be connecting to, 'shareyoursalary'
define("openshift_db", "shareyoursalary");
class database{
// here we define the constructor that will be called each time the
// database class is instantiated. in this case, we're just going
// to call the get_db_connection() function
function __construct(){
$this->get_db_connection();
}
// since i used openshift for this project, all of the database
// connection information was abstracted to environment variables.
// ultimately, we are constructing a mongoclient class object and
// returning it to whatever called this function
function get_db_connection() {
$host = $_env["openshift_mongodb_db_host"];
$user = $_env["openshift_mongodb_db_username"];
$passwd = $_env["openshift_mongodb_db_password"];
$port = $_env["openshift_mongodb_db_port"];
$uri = "mongodb://" . $user . ":" . $passwd . "@" . $host . ":" . $port;
$mongo = new mongoclient($uri);
return $mongo;
}
// returns a database object based on a database name input parameter ($dbname)
function get_database($dbname) {
$conn = $this->get_db_connection();
return $conn->$dbname;
}
// returns a collection object based on a collection name input ($collection)
function get_collection($collection) {
$db = $this->get_database(openshift_db);
return $db->$collection;
}
}
?>
this class is pretty straightforward and does little in the way of error handling. basically we're just connecting to the database and abstracting some basic mongodb functions to make them available as class functions.
the 'survey' class
the survey object is the only real object in this program from an object-oriented programming perspective. this object (the survey) is the core of the application, and so most of the relevant data exists as properties of this class.
let's walk through the source with some comments:
<?php
class survey {
// class properties are defined here. these should probably be all marked as private varaiables
var $surveyname; // human-readable survey name
var $urlname; // url-friendly version of the surveyname property
var $currency; // the currency that this survey is based on, e.g. usd
var $period; // the period that the survey is based on, e.g. per hour or per year
var $minentries; // the minimum number of entries needed before the results are published. this ensures anonymity
private $db; // property to hold the database object
// this is the constructor function. it instantiates the database class and sets it to the local db property
public function __construct(){
$this->db = new database();
}
// simple getter functions for each of the properties. these aren't actually used anywhere, but i created them as a standard practice
public function get_name(){
return $this->surveyname;
}
public function get_url_name(){
return $this->urlname;
}
public function get_currency(){
return $this->currency;
}
public function get_period(){
return $this->period;
}
public function get_minentries(){
return $this->minentries;
}
// this function will take the human-readable name as an input, then convert and return the url-friendly version
private function convertnametourlname($string) {
//lower case everything
$string = strtolower($string);
//make alphanumeric (removes all other characters)
$string = preg_replace("/[^a-z0-9_\s-]/", "", $string);
//clean up multiple dashes or whitespaces
$string = preg_replace("/[\s-]+/", " ", $string);
//convert whitespaces and underscore to dash
$string = preg_replace("/[\s_]/", "-", $string);
return $string;
}
// this function finds a given survey in the database based on the surveyname
// passed as an input parameter. the surveyname will be sent as part of
// the $args parameter (sent as part of a url path parameter via f3).
// if found, the survey will be echo'd in json format (this
// allows it to be consumed as an api)
public function getbyname($f3,$args) {
$surveys = $this->db->get_collection('surveys');
// convert name to url friendly name
$urlname = $this->convertnametourlname($args['name']);
$query = array('urlname' => $urlname);
$cursor = $surveys->find($query);
foreach ($cursor as $doc){
if(count($doc['responses']) < $doc['minentries'])
{
for($i=0; $i < (count($doc['responses'])); $i++)
{
$doc['responses'][$i] = '0';
}
echo json_encode($doc);
}
else {
echo json_encode($doc);
}
}
}
// the addsurvey function takes http parameters (the $_request variables) as
// inputs and creates the new survey entry in the database. once created, the
// function attempts to find the survey and echo it in json format (this allows it to be consumed as an api)
public function addsurvey($f3,$args) {
// get surveys collection
$surveys = $this->db->get_collection('surveys');
$surveyname = $_request['surveyname'];
// convert name to url friendly name
$urlname = $this->convertnametourlname($surveyname);
$currency = $_request['currency'];
$period = $_request['period'];
$minentries = $_request['minentries'];
// insert new data sent via api call
$surveys->insert(array('name' => $surveyname, 'urlname' => $urlname, 'currency' => $currency, 'period'=>$period, 'minentries'=>$minentries, 'responses'=>(array())));
// build a query object, basically a single item array with the name of the new survey input value
$query = array('urlname' => $urlname);
// attempt to find the survey we just created
$cursor = $surveys->find($query);
// for each object that matches the query, echo the data as json
foreach ($cursor as $doc){
echo json_encode($doc);
}
}
// the addresponse function takes a survey name (as a url parameter passed via f3)
// and a response input (via http query parameters, the $_request variable below).
// it uses the survey name to find the survey in the database and then updates the
// embedded response array with the response value sent. once updated, the function
// returns the newly updated survey in json format
public function addresponse($f3,$args) {
$surveys = $this->db->get_collection('surveys');
$response = $_request["response"];
// convert name to url friendly name
$urlname = $this->convertnametourlname($args['name']);
$surveys->update(array('urlname' => $urlname),array('$push' => array('responses' => $response)));
$query = array('urlname' => $urlname);
$cursor = $surveys->find($query);
foreach ($cursor as $doc){
echo json_encode($doc);
}
}
}
?>
looking back, this survey class contains aspects of both a model and a controller. in a proper mvc project, this probably should have been split into two classes, a 'survey' object (with just the basic properties and getters/setters) and a 'surveycontroller' (with the addsurvey and addresponse).
these classes might seem a bit abstract right now, but it'll make more sense once i explain the api routes in f3.
at 1400+ words, this is a good place to take a break. check out part 2 for the pagegenerator class, the f3 routes, and a how-to for swagger ui.
January 8, 2015 - Categories IT/Software Projects,How-to Guides
Categories: it/software projects,how-to guides , i recently used mongodb in the share your salary app and had a few hiccups as i tried to blunder my way through learning how to use it. mongodb, like many nosql document databases, uses javascript object notation or json to represent the objects/documents. json is great, especially when you're using javascript in conjunction. php, however, doesn't 'speak' json natively; it uses arrays instead, and this makes for some less than intuitive interactions. this post will go over some of the basic crud operations using php against a mongodb.
connecting
connecting is pretty straight-forward:
$host = your.mongodb.host.com;
$user = username;
$passwd = sup3rs3cr3tpassword;
$port = 27017; // 27017 is the default port
$uri = "mongodb://" . $user . ":" . $passwd . "@" . $host . ":" . $port;
$mongo = new mongo($uri);
if you're using openshift, you can simply use the relevant environment variables:
$host = $_env["openshift_mongodb_db_host"];
$user = $_env["openshift_mongodb_db_username"];
$passwd = $_env["openshift_mongodb_db_password"];
$port = $_env["openshift_mongodb_db_port"];
$uri = "mongodb://" . $user . ":" . $passwd . "@" . $host . ":" . $port;
$mongo = new mongoclient($uri);
reading a 'table'
in nosql document databases, an individual document is analogous to a record in a traditional relational sql database. similarly, a collection is analogous to a table.
before we can fetch a collection, we have to specify which database we want to work with. after all, one mongodb instance can host multiple databases.
database_name;
$collection = $db->selectcollection("collection_name");
or if you want to save some typing:
selectcollection("database_name", "collection_name");
now that you have a collection object, you can query it, iterate through it, etc.
querying documents
when querying mongodb, a cursor object is returned. this cursor must be iterated to get to the actual data in the records returned.
to get all documents in a collection, just call the find() method:
$cursor = $mongo->database_name->collection_name->find();
this is similar to a "select * from table_name" query in a relational sql database.
to query with specific criteria, you'll need to construct an array of the key-value pair you want to query on. let's assume we had a few json documents with the following structure:
{ "name": "alex", "age": 28, "computers": ["laptop","desktop","vm"] },
{ "name": "whoever", "age": 35, "computers": ["laptop","desktop"] }
to search the "name" keys for the value "alex" you'll need to create an array with that key-value pair, then execute the find method with that query.
$query = array('name' => 'alex');
$cursor = $collection->find($query);
or, more succinctly:
cursor = $collection->find(array('name' => 'alex'));
this is similar to a "select * from table_name where name='alex' " query in a relational sql database.
but what if you wanted something less specific, like all documents where the 'name' value started with 'a' ? in a relational sql query, you would used the like operator and wildcards (%). with mongodb, you just use regular expressions in your query. so, to get all documents where the 'name' value started with 'a' you would execute:
$query = array('name' => array('$regex' => new mongoregex("/^a.*/")));
$cursor = $collection->find($query);
if you're not familiar with regular expressions, spend some time at regex101. super useful, pretty easy to learn.
if you want to return a single result array instead of a cursor, use the findone() method.
inserting a new document
inserting a new row/document is really easy. since the collection (and all of mongodb for that matter) doesn't have any schema or structure to enforce, you can insert any array into any collection, so long as it's a valid array.
$collection->insert(array('name' => 'bob','age' => 40 ));
$collection->insert(array('someunrelatedkey' => 'someunrelatedvalue'));
you can also inserted nested arrays (which will become nested objects in json):
$collection->insert(array('name' => 'bob','age' => 40,
'computers' =>(array('laptop','desktop')) ));
updating an existing document
updating a document is where mongodb shows it's flexibility as a nosql database. it's also the trickiest of the crud operations. the basic structure with psuedo-code is as follows:
$collection->update(search_criteria,
array('$set' => array("key => "value") ));
here's an example with legitimate values:
$collection->update(array("name" => "alex"),
array('$set' => array("name" => "bob")));
this query is equivalent to "update collection set name='bob' where name='alex';" in traditional sql.
notice the $set argument - without this, mongodb will replace the entire document with the array you passed instead of trying to update a particular element. there are several update operators for mongodb that can be very helpful. for example, let's assume we had the following document object:
{ "name": "bob", "age": 35, "computers": ["laptop","desktop"] }
notice that we have a nested array of "computers" with two values. if we wanted to add another element to the "computers" array, we'd have to fetch the entire document, strip out the nested array object, add our new element, then use the $set operator to update the array in the document.
fortunately, mongodb provides a special update operator for this use case, $push. let's pretend we want to update bob's record in the database and give him a vm.
$collection->update(array('name' => 'bob'),
array('$push' => array('computers' => 'vm')));
awesome.
this was a pretty elementary tutorial on mongodb, but i'm hoping it either helped one of you get started or inspired someone to use mongodb in their project. everything i covered in this post and much more can be found by perusing the mongo book at php.net and mongodb's reference.
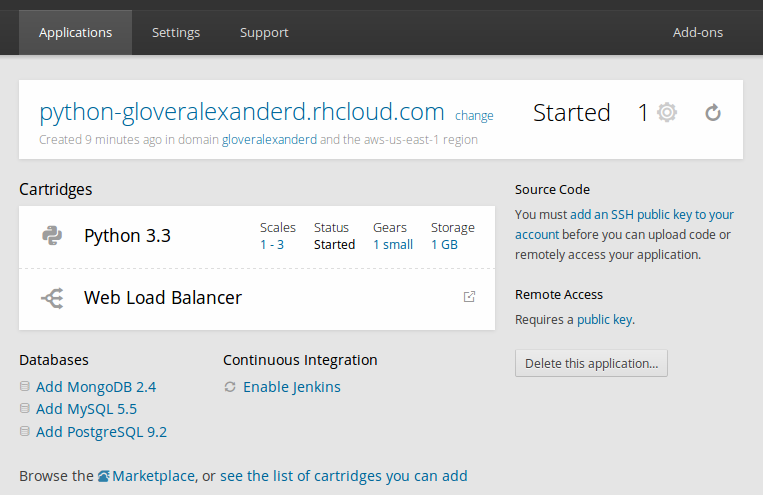
January 3, 2015 - Categories How-to Guides,Utilities And Other Useful Things
Categories: how-to guides,utilities and other useful things , openshift is a platform-as-a-service offering provided by red hat. it's built on top of linux containers (which they refer to as 'gears') hosted in amazon's amazon web services (aws). they offer many different platforms such as php/apache, jboss, tomcat, nodejs, python, ruby-on-rails, and many more. openshift refers to these pre-built platforms as 'cartridges.'
beyond the platforms they offer, openshift also takes care of dns (you are given a *.rhcloud.com subdomain), load balancing via haproxy, and auto-scaling for your application. much like heroku, code deployment is as easy as executing a git push. all of these features, including 3 containers, are all free of charge.
red hat has done a good job making openshift "cloudy" - for example, database connection strings are handled by environment variables. this is cloud-friendly because:
your source code can now reference the environment variables instead of storing credentials in your source (preventing you from using public repositories) or having a separate private deployment repository with credentials that you have to manage.
your source code can now be deployed instantly in another openshift environment, no need to change credentials in the code.
you don't have to worry about passing credentials to new instances during auto-scaling, openshift takes care of it for you.
your application and operations folks can deploy and manage your application without them having access to the database credentials.
this is just one example but i think it does a good job illustrating the foresight red hat had when they built openshift.
if you're a developer and don't want to worry about the infrastructure details yet, openshift is really an amazing service. you can set up an application in just a few minutes, i'll show you how. let's get started.
initial setup
sign up for an account at http://www.openshift.com and verify your account once you receive the confirmation email.
when you verify your email, you'll get redirected to a welcome page that invites you to "create your first application now." go ahead and click on it.
find the type of application you want to deploy, either by browsing the available cartridges or searching. keep in mind, you can add additional cartridges (like jenkins or mysql) later, so don't freak out if you can't find an entire lamp stack or something. for this example, i'll choose the python 3.3 cartridge.
on the application configuration page, you'll be prompted to provide an application name (which will be pre-populated with the cartridge name) and a namespace name. heads up - the namespace you set now will be used for all future applications as well. think of it like a subdomain - use something appropriate like your user name or your organization's name. fear not, you can create custom dns cname records later if you need a sexier url.
if you already have code that you want to deploy in a git repository, you can provide a git url and openshift will automatically clone a copy and deploy it to your container. note - if your code relies on openshift environment variables for a database connection string, don't use this feature. wait until after you add all cartridges before deploying your code, otherwise those environment variables won't be set. if you're using a free account, you will only be able use the 'small' sized gears, but you can take advantage of auto-scaling. finally, choose which aws region you want to deploy to and click "create application."
there are a number of configuration options presented in the application summary page:
you can set the minimum and maximum number of containers as well as container size in your auto-scaling group by clicking the "1-3" under the "scales" column header. clicking on the gear size will take you to the same page.
if you upgraded beyond the free account, you can set how much local storage is presented to your container by clicking on the "1 gb" under the "storage" column header.
to see haproxy load balancer statistics, click the arrow icon on the web load balancer row.
you can add additional cartridges by clicking on the "add x" links at the bottom of the page. these cartridges will be bound to your application and restarted in conjunction with your application. if you add a database cartridge, connection string variables will be set as environment variables for your application to leverage. here's a list of relevant openshift environment variables.
you can add dns names by clicking "change" next to your *.rhcloud.com dns name.
that's it for deployment. at this point you'll want to install the openshift cli tools to deploy new code, check application logs, and manage application components.
deployment overview
once you have the openshift cli tools installed and configured, deploying code is extremely easy. to start, clone the git repository to your local filesystem. you can find the git url in your application configuration screen labelled "source code":
clone the repository:
git clone ssh://<random_hash>@appname-namespace.rhcloud.com/~/git/appname.git/
change to your newly created app directory:
cd appname/
add your files, make changes, hack away to your heart's content in this directory. once you're ready to re-deploy, add the files to the git index, make a commit, and push the latest source:
git add .
git commit -m 'this is my commit message'
git push
when you push new code, all application cartridges will be restarted and your new application should be available in a few seconds. if you need to add additional startup commands for your application, you can add additional action hooks.
that's it - you should now be able to create and deploy an application with openshift with ease.
are you using openshift, or some other paas offering? what are your thoughts?
December 2, 2014 - Categories How-to Guides,Utilities And Other Useful Things
Categories: how-to guides,utilities and other useful things , i recently got a membership to a site hosting a boatload of private label rights (plr) material (idplr.com). 99% of plr items are scams, garbage, or are outdated, but if you have the time or tools to dig through it you can find some gems. (just so we're clear, i'm not running any scams, i was just looking for some content for another project). anyway, i got access to the site that had thousands of zip files but obviously didn't want to download them one by one. administrator wouldn't give me any way to download the files in bulk either, so i was left with no choice but to automate...
this is one of those projects that can be done a dozen different ways. there's probably a real slick way to do this with one line of code, but this method worked for me.
step 1 - identify your targets
this was the most challenging part for me, until i got lucky and found a blog post on how to grab every link on a site using wget. i can't take any credit for this script, so i'll just share my slightly modified version:
mysite='http://www.idplr.com'
wget -nv -r --spider $mysite 2>&1 | egrep ' url:' | awk '{print $3}' | sed "s@url:${mysite}@@g" >> links.txt
this will create a file, links.txt, that contains every link found on the site you specified for your "mysite" variable. very powerful one-liner for sure. keep in mind it may take a very long time for this command to complete (about an hour in my case).
we don't want to download every file on the site, so we need to whittle down our list. in my case, all of the files i wanted to download were conveniently in a directory labeled "downloads" (albeit in several different child directories) so i used the following command to create a new file (downloads.txt) that contained only the links to the "downloads" directory.
less links.txt | grep downloads/ >> downloads.txt
the downloads.txt file looks like this:
...
/members/protect/new-rewrite?f=11&url=/downloads/ebooks/gold/affiliatefitnesscraze_rr.7594.zip&host=www.idplr.com&ssl=off
/members/protect/new-rewrite?f=11&url=/downloads/ebooks/gold/azonhairlossessentials_rr.7592.zip&host=www.idplr.com&ssl=off
/members/protect/new-rewrite?f=11&url=/downloads/ebooks/gold/azonhalloweenessential_rr.7591.zip&host=www.idplr.com&ssl=off
...
you'll see that the site scraper pulled the url of the redirect that is protecting the members-only files. we don't want the strings appended and pre-pended to the path, we just want the /downloads.../filename.zip. so let's use 'awk' to strip out all of that garbage and give us just the path to the files.
awk -f'&url=' '{print $2}' downloads.txt | awk -f'&host' '{print $1}' >> cleanlinks.txt
let's break down what the awk command does in this case. the -f flag allows you to set a delimiter, in this case '&url=', to break up the string. since that string only appears once per line, the line is broken into two strings - all of the characters leading up to the delimiter, and all of the characters after the delimiter, not including the delimiter. then we use '{print $2}' to print that second chunk of the string. so at this point we've stripped the string down to:
"/downloads/dirname/dirname/filename.zip.&host=www.idplr.com&ssl=off."
well we don't any of the garbage after the file name, so we'll pipe the output from the first awk command into a second awk command. again, we specify a delimiter (-f '&host') to split the string into two pieces, then print only the first half of the string ('{print $1}' above). the output now will be "/downloads/dirname/dirname/filename.zip" - perfect! finally, by using the ">>" redirection, the output from these commands will be written to a new file, cleanlinks.txt. target acquired.
step 2 - scripting the download with login parameters
just for a test, i tried to run 'wget' against one of my targets, and ended up with an html file. that's because the site was redirecting me to the log in screen, and wget followed the redirect and downloaded that page instead. same thing would happen in your browser; if you try to browse to that link without authenticating first, you get re-routed to the log in screen. no problem - we just need to figure out how the redirect and log in screens are working. i'm using the built-in console in chrome for this, but there are many tools out there for looking at http requests and responses. if you are following along word for word, pull up chrome, punch in the link for a protected file and let the browser get redirected to the log in screen. then press f12, or right click anywhere on the site and choose "inspect element." the console should pop up on the bottom of the browser window. click the network tab, and the record button (gray circle at the bottom, will turn red when clicked). for example:
the console will now record all http requests and their responses, even as you traverse to different pages (if you didn't click the "record" button, it only shows you current requests). now, log in using your credentials and watch all of the requests and responses fly past. the file should also started downloading - if not, go back, because the next part will be worthless if you didn't authenticate properly and get to the file you expected to. find the request on the left of the console labelled 'login' (this could obviously be different if you're downloading from a different site) and look at the request headers. under form data, click "view source".
the key information is highlighted in the red boxes. the request url is the url we sent our http request to. the form data is the username and password we entered, plus some hidden and generated fields that were in the form (check the w3schools page if you need more information on forms in html). now, to verify it works, try this wget command:
wget http://www.idplr.com/members/login -o <insert file name here> \
--post-data="amember_login=<your_username>&amember_pass=<your_password>&login_attempt_id=1384717099&amember_redirect_url=<link_to_the_file>
so for example, if i wanted to download "slipstreammarketing.2196.zip", my command would like this:
wget http://www.idplr.com/members/login -o slipstreammarketing.2196.zip \
--post-data="amember_login=alexdglover&amember_pass=e1zxxxxxxxxxxx&login_attempt_id=1384717099&amember_redirect_url=http://www.idplr.com/downloads/ebooks/free/slipstreammarketing.2196.zip"
now, if you've gotten this far and everything is working, the rest is cake.
step 3 - adding the loop
at this point, we have a text file that has a path to each file we want to download on each line (cleanlinks.txt), and a way to authenticate and download that file in one command (see step 2). we just need to write a bash script that executes that command for each line in the file. create a file with your favorite text editor, and enter the following code:
# execute the following code block for each line in the text file
while read line; do
# create a new variable, filename, to hold the actual filename instead of the full path (name.zip, instead of /path/to/file/name.zip)
filename=$(basename $line)
# echo the filename out to the terminal for debugging purposes
echo $filename
# echo out the path that wget will attempt to use to download a file
echo "attempting to download file at http://www.idplr.com$line"
# execute our wget one-liner, but this time with the filename and path to the file as variables ($filename and $line)
wget http://www.idplr.com/members/login -o $filename --post-data="amember_login=alexdglover&amember_pass=e1zxxxxxxxxxx4&login_attempt_id=1384717099&amember_redirect_url=http://www.idplr.com$line"
# end of the while loop, and setting the text file (cleanlinks.txt) that the loop should read
done < cleanlinks.txt
don't forget to save your new script file, and execute "chmod u+x scriptname.sh" to make it executable. be advised - the script will download files to the whatever directory you execute it from (if the script is in /home/alex/script.sh, but my current working directory is /home/alex/downloads/ and i execute the script, all of the downloads will end up in /home/alex/downloads/). once you're in the right directory, just execute the script, sit back, and relax.
July 28, 2014 - Categories IT/Software Projects
Categories: it/software projects , i've been looking for an api project for awhile now, either to write an api service or a client/app that consumes one. then i finally thought of a use case - an app that would allow you to find an actor based on two movies they've been in, using only javascript and apis. it took me awhile to find a movie api service that was free and suited my purposes, then i found themoviedb (which has a pretty sweet api actually and is free to use). check out the demo and grab the source from github if you want to do something similar.
demo
github repo
July 21, 2014 - Categories Utilities And Other Useful Things
Categories: utilities and other useful things ,
i'll keep this short since it's not a proper how-to post or lengthy tutorial. i recently discovered a resurgence in the concept of html resumes and was thoroughly impressed. as always, i recklessly decided i should take a stab at it myself even though i knew i was out of my depth. ended up with a half-decent html5/responsive/mobile-friendly resume using bootstrap 2.3 and wanted to share it with the masses. check out the demo and if you want to build on it, grab the source. enjoy.
demo
github repo
July 14, 2014 - Categories Questions for the Community,Utilities And Other Useful Things
Categories: questions for the community,utilities and other useful things , like many devops professionals before me, i needed a way to manage iptables programmatically through chef. before i realized that opscode had written a cookbook for just this, i had already spent some time building my own. the cookbook written by opscode is very clever and allows you to apply a set of iptables rules with a single line in another recipe. the only problem is that it is predicated on you creating 'templates' of iptables policies you want to apply in advance, and you can only apply those templates. you can't just supply a port number or part of a rule. additionally, their cookbook wasn't compatible with vagrant because of the ruby binary wasn't in the paths used in the cookbook.
short version - i wrote my own iptables cookbook and augmented the opscode iptables cookbook, and i wanted to share.
changes to the opscode cookbook
basically, the cookbook functionality is unchanged save for two parts. first, in addition to the previous method for invoking iptables, you can now invoke it by setting the ['iptables']['roles'] attribute to one or more roles (comma delimited). there is a new 'default.rb' attribute file and the default recipe has been modified slighly to support this. second, the default recipe has been modified to detect the path to the ruby binary so as to be compatible with vagrant boxes instead of being hardcoded.
you can check out all of the code on github.
my iptables cookbook
my requirements were a little less generic, and so my iptables cookbook is a little more isolated than the opscode version. specifically, i didn't want to affect any existing iptables rules or chains, so my cookbook injects new chains that should be specific for the servers application (hence app-input and app-output chains). unfortunately, today my cookbook only supports ports to be specified via attributes and only works on enterprise linux os's. having seen and played with opscode version, i'll have to refactor mine to support debian linux versions as well as non-attribute driven usage.
to see the full cookbook or to clone, check out the repo on github. otherwise the bulk of the logic is in the default recipe, which you can check out here:
# cookbook name: inline-iptables
# recipe: default
# author: alex d glover (alex@alexdglover.com)
# description: a recipe to manage iptables without impacting existing
# iptables rules or chains, and allowing individual
# inbound/outbound ports as well as port ranges to be
# managed with programmatic ease.
# dependencies: attributes/default.rb
# usage: set the ["inline-iptables"]["listen_ports"] and/or
# ["inline-iptables"]["outbound_ports"] attributes at the
# node or role level
# grab the comma separated list of ports that need to be open.
# keep in mind these attribute could be set by a role, recipe, or node override
listen_ports = node["inline-iptables"]["listen_ports"]
outbound_ports = node["inline-iptables"]["outbound_ports"]
# boolean variable to track if we a change has been made
iptables_modified = false
# debug friendly logging
chef::log.info <<-eos
entering ondemand_base::iptables_manager {
listen_ports = #{listen_ports}
outbound_ports = #{outbound_ports}
}
eos
# read the current iptables data
iptables_content = file.read("/etc/sysconfig/iptables")
# if the list of ports is the empty string, do nothing
unless listen_ports == ""
# we are creating a new iptables chain called app-input; if it already
# exists, don't create it again
unless iptables_content.include?(":app-input - [")
execute "create new input chain" do
command "iptables -n app-input;"
end
iptables_modified = true
end
# break our port list into an array
listen_ports_array = listen_ports.split(',')
# for each port that needs to be opened, insert the corresponding rule
# into our chain, but only if doesn't exist already
listen_ports_array.each do |port|
unless iptables_content.include?("-a app-input -p tcp -m tcp --dport #{port} -j accept")
execute "add input rule to iptables for port #{port}" do
command "iptables -i app-input -p tcp --dport #{port} -j accept"
end
iptables_modified = true
end
end
# connect our app-input chain to the generic input chain
unless iptables_content.include?("-a input -j app-input")
execute "connect app-input to input chain" do
command "iptables -i input -j app-input"
end
iptables_modified = true
end
# connect our app-input chain to the generic forward chain
unless iptables_content.include?("-a forward -j app-input")
execute "connect app-input to forward chain" do
command "iptables -i forward -j app-input"
end
iptables_modified = true
end
else
chef::log.info "no listen ports specified to be opened"
end
# if the list of ports is the empty string, do nothing
unless outbound_ports == ""
# we are creating a new iptables chain called app-output; if it already
# exists, don't create it again
unless iptables_content.include?(":app-output - [")
execute "create new output chain" do
command "iptables -n app-output;"
end
iptables_modified = true
end
# break our port list into an array
outbound_ports_array = outbound_ports.split(',')
# for each port that needs to be opened, insert the corresponding rule
# into our chain, but only if doesn't exist already
outbound_ports_array.each do |port|
execute "add input rule to iptables for port #{port}" do
command "iptables -i app-output -p tcp --dport #{port} -j accept"
only_if {!iptables_content.include?("-a app-output -p tcp -m tcp --dport #{port} -j accept")}
end
iptables_modified = true
end
# connect our app-output chain to the generic output chain
unless iptables_content.include?("-a output -j app-output")
execute "connect app-output to output chain" do
command "iptables -i output -j app-output"
end
iptables_modified = true
end
else
chef::log.info "no outbound ports specified to be opened"
end
if iptables_modified
execute "save updated iptables" do
command "/etc/init.d/iptables save"
end
service "iptables" do
action :restart
ignore_failure true
end
else
chef::log.info "no changes made, not restarting iptables"
end
would greatly appreciate any feedback/criticism from the chef community. thanks for reading.
June 16, 2014 - Categories IT/Software Projects,How-to Guides
Categories: it/software projects,how-to guides , i was recently working on a new html project when i came across the scrollspy feature in bootstrap's framework (v2.3). the feature looks really good on bootstrap's pages, i figured i'd use it in my project as well. i immediately had issues with the links aligning the content to the viewport and issues with the scrollspy highlighting the right link based on what content was in the viewport. this was all supposed to be out of the box functionality... after doing some research (read: googling), i came across a few bug tickets and workarounds, but no wholistic solutions to reproducing the functionality on bootstrap's site. so i decided to build it manually.
let's get started.
preparation
if you want to jump right into the project, you can download the starter kit (it's just boostrap 2.3, a modified hero unit example page, and a very slightly modified bootstrap css).
if you want to start from a 100% clean version of bootstrap 2.3, go download the source and extract it. keep your top-level folder name whatever you want it to be, but rename the 'bootstrap' folder assets (we are matching the existing folder structure in the source code we are going to borrow from one of their examples. feel free to build your folder structure however you see fit). create a sibling folder to contain your html files and create an index.html inside. finally, go download jquery, place it in your assets/js folder, and rename it 'jquery.js' (for simplicity). your folder structure should look like this:
toplevelfolder
├── assets/
│ ├── css/
│ │ ├── bootstrap.css
│ │ ├── bootstrap.min.css
│ ├── js/
│ │ ├── bootstrap.js
│ │ ├── bootstrap.min.js
│ │ ├── jquery.js
│ └── img/
│ ├── glyphicons-halflings.png
│ └── glyphicons-halflings-white.png
├── html/
│ ├── index.html
perfect. now browse to the hero example and steal borrow their source code (just right click anywhere, view source, ctrl+a ctrl+c) and paste it into your index.html file. we have to make a few minor changes here as well. scroll to the bottom of the code and replace this:
<!-- le javascript ================================================== -->
<!-- placed at the end of the document so the pages load faster -->
<script src="../assets/js/jquery.js"></script>
<script src="../assets/js/bootstrap-transition.js"></script>
<script src="../assets/js/bootstrap-alert.js"></script>
<script src="../assets/js/bootstrap-modal.js"></script>
<script src="../assets/js/bootstrap-dropdown.js"></script>
<script src="../assets/js/bootstrap-scrollspy.js"></script>
<script src="../assets/js/bootstrap-tab.js"></script>
<script src="../assets/js/bootstrap-tooltip.js"></script>
<script src="../assets/js/bootstrap-popover.js"></script>
<script src="../assets/js/bootstrap-button.js"></script>
<script src="../assets/js/bootstrap-collapse.js"></script>
<script src="../assets/js/bootstrap-carousel.js"></script>
<script src="../assets/js/bootstrap-typeahead.js"></script>
with this:
<!-- le javascript ================================================== -->
<!-- placed at the end of the document so the pages load faster -->
<script src="../assets/js/jquery.js"></script>
<script src="../assets/js/bootstrap.js"></script>
for sanity testing, open index.html in your browser - it should look like the original and function without errors.
now let's strip out the 3 sub-headings and replace them with a content area and a set of links in the sidebar.
replace this:
<div class="row">
<div class="span4">
<h2>heading</h2>
<p>donec id elit non mi porta gravida at eget metus. fusce dapibus, tellus ac cursus commodo, tortor mauris condimentum nibh, ut fermentum massa justo sit amet risus. etiam porta sem malesuada magna mollis euismod. donec sed odio dui. </p>
<p><a class="btn" href="#">view details »</a></p>
</div>
<div class="span4">
<h2>heading</h2>
<p>donec sed odio dui. cras justo odio, dapibus ac facilisis in, egestas eget quam. vestibulum id ligula porta felis euismod semper. fusce dapibus, tellus ac cursus commodo, tortor mauris condimentum nibh, ut fermentum massa justo sit amet risus.</p>
<p><a class="btn" href="#">view details »</a></p>
</div>
</div>
with this:
<div class="row">
<div class="span3 sidebar">
<ul class="nav nav-list nav-tabs nav-stacked sidebarnav affix-top" style="top:80px; width:255px;">
<li id="section1nav"><a href="#section1">section 1<i class="icon-chevron-right" style="float:right;"></i></a></li>
<li id="section2nav"><a href="#section2">section 2<i class="icon-chevron-right" style="float:right;"></i></a></li>
<li id="section3nav"><a href="#section3">section 3<i class="icon-chevron-right" style="float:right;"></i></a></li>
<li id="section4nav"><a href="#section4">section 4<i class="icon-chevron-right" style="float:right;"></i></a></li>
</ul>
</div>
<div class="span9">
<section id="section1">
<div class="page-header">
<h1>section 1</h1>
</div>
<h2>sub header</h2>
<p>lorem ipsum dolor sit amet lorem ipsum dolor sit amet lorem ipsum dolor sit amet lorem ipsum dolor sit amet lorem ipsum dolor sit amet lorem ipsum dolor sit amet lorem ipsum dolor sit amet lorem ipsum dolor sit amet lorem ipsum dolor sit amet lorem ipsum dolor sit amet lorem ipsum dolor sit amet lorem ipsum dolor sit amet lorem ipsum dolor sit amet lorem ipsum dolor sit amet lorem ipsum dolor sit amet.</p>
<p>lorem ipsum dolor sit amet lorem ipsum dolor sit amet lorem ipsum dolor sit amet lorem ipsum dolor sit amet lorem ipsum dolor sit amet lorem ipsum dolor sit amet lorem ipsum dolor sit amet lorem ipsum dolor sit amet lorem ipsum dolor sit amet lorem ipsum dolor sit amet lorem ipsum dolor sit amet lorem ipsum dolor sit amet lorem ipsum dolor sit amet lorem ipsum dolor sit amet lorem ipsum dolor sit amet.</p>
<p>lorem ipsum dolor sit amet lorem ipsum dolor sit amet lorem ipsum dolor sit amet lorem ipsum dolor sit amet lorem ipsum dolor sit amet lorem ipsum dolor sit amet lorem ipsum dolor sit amet lorem ipsum dolor sit amet lorem ipsum dolor sit amet lorem ipsum dolor sit amet lorem ipsum dolor sit amet lorem ipsum dolor sit amet lorem ipsum dolor sit amet lorem ipsum dolor sit amet lorem ipsum dolor sit amet.</p>
<p>lorem ipsum dolor sit amet lorem ipsum dolor sit amet lorem ipsum dolor sit amet lorem ipsum dolor sit amet lorem ipsum dolor sit amet lorem ipsum dolor sit amet lorem ipsum dolor sit amet lorem ipsum dolor sit amet lorem ipsum dolor sit amet lorem ipsum dolor sit amet lorem ipsum dolor sit amet lorem ipsum dolor sit amet lorem ipsum dolor sit amet lorem ipsum dolor sit amet lorem ipsum dolor sit amet.</p>
</section>
<section id="section2">
<div class="page-header">
<h1>section 2</h1>
</div>
<h2>sub header</h2>
<p>lorem ipsum dolor sit amet lorem ipsum dolor sit amet lorem ipsum dolor sit amet lorem ipsum dolor sit amet lorem ipsum dolor sit amet lorem ipsum dolor sit amet lorem ipsum dolor sit amet lorem ipsum dolor sit amet lorem ipsum dolor sit amet lorem ipsum dolor sit amet lorem ipsum dolor sit amet lorem ipsum dolor sit amet lorem ipsum dolor sit amet lorem ipsum dolor sit amet lorem ipsum dolor sit amet.</p>
<p>lorem ipsum dolor sit amet lorem ipsum dolor sit amet lorem ipsum dolor sit amet lorem ipsum dolor sit amet lorem ipsum dolor sit amet lorem ipsum dolor sit amet lorem ipsum dolor sit amet lorem ipsum dolor sit amet lorem ipsum dolor sit amet lorem ipsum dolor sit amet lorem ipsum dolor sit amet lorem ipsum dolor sit amet lorem ipsum dolor sit amet lorem ipsum dolor sit amet lorem ipsum dolor sit amet.</p>
</section>
<section id="section3">
<div class="page-header">
<h1>section 3</h1>
</div>
<h2>sub header</h2>
<p>lorem ipsum dolor sit amet lorem ipsum dolor sit amet lorem ipsum dolor sit amet lorem ipsum dolor sit amet lorem ipsum dolor sit amet lorem ipsum dolor sit amet lorem ipsum dolor sit amet lorem ipsum dolor sit amet lorem ipsum dolor sit amet lorem ipsum dolor sit amet lorem ipsum dolor sit amet lorem ipsum dolor sit amet lorem ipsum dolor sit amet lorem ipsum dolor sit amet lorem ipsum dolor sit amet.</p>
<p>lorem ipsum dolor sit amet lorem ipsum dolor sit amet lorem ipsum dolor sit amet lorem ipsum dolor sit amet lorem ipsum dolor sit amet lorem ipsum dolor sit amet lorem ipsum dolor sit amet lorem ipsum dolor sit amet lorem ipsum dolor sit amet lorem ipsum dolor sit amet lorem ipsum dolor sit amet lorem ipsum dolor sit amet lorem ipsum dolor sit amet lorem ipsum dolor sit amet lorem ipsum dolor sit amet.</p>
<p>lorem ipsum dolor sit amet lorem ipsum dolor sit amet lorem ipsum dolor sit amet lorem ipsum dolor sit amet lorem ipsum dolor sit amet lorem ipsum dolor sit amet lorem ipsum dolor sit amet lorem ipsum dolor sit amet lorem ipsum dolor sit amet lorem ipsum dolor sit amet lorem ipsum dolor sit amet lorem ipsum dolor sit amet lorem ipsum dolor sit amet lorem ipsum dolor sit amet lorem ipsum dolor sit amet.</p>
</section>
<section id="section4">
<div class="page-header">
<h1>section 4</h1>
</div>
<h2>sub header</h2>
<p>lorem ipsum dolor sit amet lorem ipsum dolor sit amet lorem ipsum dolor sit amet lorem ipsum dolor sit amet lorem ipsum dolor sit amet lorem ipsum dolor sit amet lorem ipsum dolor sit amet lorem ipsum dolor sit amet lorem ipsum dolor sit amet lorem ipsum dolor sit amet lorem ipsum dolor sit amet lorem ipsum dolor sit amet lorem ipsum dolor sit amet lorem ipsum dolor sit amet lorem ipsum dolor sit amet.</p>
<p>lorem ipsum dolor sit amet lorem ipsum dolor sit amet lorem ipsum dolor sit amet lorem ipsum dolor sit amet lorem ipsum dolor sit amet lorem ipsum dolor sit amet lorem ipsum dolor sit amet lorem ipsum dolor sit amet lorem ipsum dolor sit amet lorem ipsum dolor sit amet lorem ipsum dolor sit amet lorem ipsum dolor sit amet lorem ipsum dolor sit amet lorem ipsum dolor sit amet lorem ipsum dolor sit amet.</p>
<p>lorem ipsum dolor sit amet lorem ipsum dolor sit amet lorem ipsum dolor sit amet lorem ipsum dolor sit amet lorem ipsum dolor sit amet lorem ipsum dolor sit amet lorem ipsum dolor sit amet lorem ipsum dolor sit amet lorem ipsum dolor sit amet lorem ipsum dolor sit amet lorem ipsum dolor sit amet lorem ipsum dolor sit amet lorem ipsum dolor sit amet lorem ipsum dolor sit amet lorem ipsum dolor sit amet.</p>
</section>
</div>
</div>
open this up in your browser and verify everything is kosher. if so, we're all done with prep and can move on to the custom javascript.
the offset logic
at this point, you probably clicked the links and noticed that the viewport doesn't line up quite perfectly. this is because the height of the top nav bar isn't being taken into account. let's fix that first, then reproduce the scrollspy effect.
to fix this issue, we need to 'intercept' the normal link function and replace it with our own. once intercepted, we'll scroll to that element with an offset equal to the height of the header.
<script>
// here we set the offset value to whatever the header height is
var offset = 60;
// if a user clicks on any anchor element (a) within a list item tag (li) on our sidebar with the class sidebarnav (.sidebarnav), execute this function
$('.sidebarnav li a').click(function(event) {
// prevent the normal scroll behavior
event.preventdefault();
// grab the clicked element's href tag, scroll that element into view
$($(this).attr('href'))[0].scrollintoview();
// scroll 0 pixels horizontally and -60 (really negative offset) vertically
scrollby(0, -offset);
});
</script>
that's it. add this block of javascript in your index.html just after your script source declaration for jquery and boostrap.js. test it in your browser, and experiment with changing the offset number and its effects.
the scrollspy effect
to create the scrollspy effect, all we need to do is add the 'active' class to the li tags when the viewport is lined up with the corresponding section.
<script>
$(document).ready(function () {
var menu = $('.sidebarnav');
$(window).scroll(function () {
var currposition = $(this).scrolltop();
var section1position = $('#section1').offset().top - 100;
var section2position = $('#section2').offset().top - 100;
var section3position = $('#section3').offset().top - 100;
// the offset for section 4 is larger because it is at the bottom of the page,
// and if the offset was only 100, the window position would never 'enter' the
// section's field
var section4position = $('#section4').offset().top - 150;
// if the window is at or below the section 1 tag, then switch the
// sidebar's class from affix-top to affix so it will move with the window
if (currposition >= section1position) {
menu.removeclass('affix-top').addclass('affix');
}
// if the window is not at or below the section 1 tag, then switch the
// sidebar's class from affix to affix-top so it will position itself
// below the hero unit
else{
menu.removeclass('affix').addclass('affix-top');
}
// if the window is at or below the section 1 tag, then add the active class
// to the corresponding li tag and remove the active class from all other li
// tags in the side bar. apply the same logic to all of the other sections
if (currposition >= section1position && currposition <= section2position)
{
$('#section1nav').addclass('active').siblings().removeclass('active');
}
else if(currposition >= section2position && currposition <= section3position)
{
$('#section2nav').addclass('active').siblings().removeclass('active');
}
else if(currposition >= section3position && currposition <= section4position)
{
$('#section3nav').addclass('active').siblings().removeclass('active');
}
else if(currposition >= section4position)
{
$('#section4nav').addclass('active').siblings().removeclass('active');
}
});
});
</script>
again, you'll need to add this code block after the script source declarations for jquery boostrap.js. that's it. now you've got a dead-accurate version of the scrollspy, with complete control. demo and source for the complete package are below.
demo
github repo
enjoy.
January 4, 2014 - Categories IT/Software Projects,How-to Guides
Categories: it/software projects,how-to guides , the raspberry pi makes a great htpc or media pc, whatever you want to call it, because of its low cost, low power consumption, quiet, and small form factor. as i was getting ready to start my raspberry pi build, i realized that the pi could take over a few other functions that my desktop does, including nas, at a fraction of the cost (see my previous post about powering a pi and related utility savings). but could i modify a raspxbmc build to also run samba or some other network file sharing? could xbmc be installed on raspbian with less than a thousand calls to aptitude? could xbmc and samba run simultaneously on a pi without making video playback unwatchable? that's what i hoped to find out.
for context, i started with a raspberry pi starter kit from amazon. for storage, i am using a fantom 2tb external hard drive. after some preliminary research, i decided to start with raspbian and try to install xbmc on top. for this walk-through, i'll assume you've got your raspberry pi powered, connected to your router, and that you have gotten raspbian installed. if you need help getting started, check out the raspberry pi quick start guide.
part 1 - nas
part 1.1 - ntfs-3g
if you don't plan to use ntfs as your filesystem for your pi storage, you can skip this step!
if you do want to use ntfs, and you want to be able to read and write to the drive, you need to install ntfs support:
sudo apt-get install ntfs-3g
if you're starting with a brand new external hard drive, you'll need to create the partition and filesystem.
pi@raspberrypi ~ $ sudo fdisk /dev/sda
command (m for help): n
partition type:
p primary (1 primary, 0 extended, 3 free)
e extended
select (default p): p
partition number (1-4, default 2): 1
command (m for help): t
selected partition 1
hex code (type l to list codes):7
command (m for help): w
...
(disk is formatted)
...
pi@raspberrypi ~ $ mkfs.ntfs /dev/sda1
part 1.2 - automounting with fstab
in raspbian (and every flavor of linux i've worked with so far), all filesystems that should be mounted at boot are identified in the fstab file (/etc/fstab). the fstab file can be configured a million ways, so i'll just share my configuration and explain.
proc /proc proc defaults 0 0
/dev/mmcblk0p5 /boot vfat defaults 0 2
/dev/mmcblk0p6 / ext4 defaults,noatime 0 1
# a swapfile is not a swap partition, so no using swapon|off from here on, use dphys-swapfile swap[on|off] for that
#/dev/sda1 - the 2tb fantom drive
/dev/sda1 /media/1tb ntfs-3g defaults 0 0
the first four lines were created automatically by the raspbian install, we'll leave those alone. we're only interested in the last line that starts with /dev/sda1, that's the line i've manually added to the configuration.
but what does it all mean??? the columns of the fstab file (courtesy of the archlinux wiki) are
# <file system> <dir> <type> <options> <dump> <pass>
<file system> - the partition or storage device to be mounted. in my case, “/dev/sda1”
<dir> - the mountpoint where <file system> is mounted to. in my case, “/media/1tb”
<type> - the file system type of the partition or storage device to be mounted. in my case, it is “ntfs-3g”
<options> - mount options for the filesystem. in my case, i chose “defaults” which includes mounting the filesystem as read-write with no umasks for permissions/access
<dump> - not needed in our case, just use 0 (zero)
<pass> - used by fsck to decide which order filesystems are to be checked. you can set this to 0 (zero)
so my configuration file says to mount /dev/sda1 on /media/1tb as an ntfs filesystem, using default mount options, and never run fsck on this drive.
now that you have an example, implementing is pretty easy.
make a backup of your fstab file
sudo cp /etc/fstab /var/fstab
open fstab in your favorite text editor
sudo vim /etc/fstab
add the lines to the configuration (see example above) to automount your drives
save and close the fstab file
test your configuration by executing a mount all command
mount -a
if your drive correctly mounted to the mount point you specified (/media/1tb) and it is mounted as read-write, you're golden.
if you are using multiple drives, then simply add additional lines to the fstab to cover all of the drives you want to automount. now our storage will automatically mount read-write at startup.
part 1.3 - samba
in my build, i wanted to share out any drives mounted in /media/ in case i added drives in the future. additionally, accessibility rather than security was the priority for me. because of that i set up samba to allow anonymous access to any device on my lan. if you're cool with that approach, follow along. if not, you may have to do some research on how to set up samba to your liking.
install samba
sudo apt-get install samba
open the samba config file in your favorite text editor
sudo vim /etc/samba/smb.conf
find the line that says “security = user” and update the file with the following lines
# "security = user" is always a good idea. this will require a unix account
# in this server for every user accessing the server. see
# /usr/share/doc/samba-doc/htmldocs/samba3-howto/servertype.html
# in the samba-doc package for details.
security = share
guest account = nobody
scroll to the bottom of the samba configuration file and add a new section for your new share. see my configuration for example
[shared]
comment = shared 1tb drive on raspberry pi
path = /media/1tb/
browseable = yes
read only = no
guest ok = yes
test your configuration by executing testparm and examining the output
pi@raspberrypi ~ $ testparm
load smb config files from /etc/samba/smb.conf
rlimit_max: increasing rlimit_max (1024) to minimum windows limit (16384)
processing section "[homes]"
processing section "[printers]"
processing section "[print$]"
processing section "[shared]"
warning: the security=share option is deprecated
loaded services file ok.
server role: role_standalone
press enter to see a dump of your service definitions
assuming your test went well, reload samba
sudo /etc/init.d/samba reload
on another device, try to mount the share. on windows, you can just open the start menu and type “\yourservername” or “\your.server.ip.address” on a mac, open finder, go to the “go” dropdown menu at the top, and choose connect to server and enter “smb://yourservername” or “smb://your.server.ip.address” if prompted for a user account, choose guest.
courtesy of mobilefish.com
ok, this is already over 1000 words long so let's take a breather and continue with xbmc in part 2.
part 2 - xbmc
part 2.1 - installing xbmc
installing xbmc is usually pretty easy, but since we're using raspbian we can't use the normal packages. fortunately for me and anyone who is trying to accomplish this, michael gorven has already figured this out for us and even hosts the packages we need. go ahead and open a new window or tab and browse to http://michael.gorven.za.net/raspberrypi/xbmc . the author has already done a great job of documenting this process so i won't duplicate it here. once your installation is finished, test that you can start xbmc by executing 'sudo xbmc-standalone' and seeing if xbmc appears on your display.
this is perfect, except that xbmc is now tied to our session. now if you're directly connected to the pi with a keyboard, this is irrelevant. if, like me, you're doing all of your pi work via ssh, xbmc will die once you terminate your ssh session. let's set up xbmc as a service so we can start/stop it gracefully and allow it to run after our ssh session ends. additionally, if you're having issues with xbmc not starting at boot, setting up a service can ensure that xbmc is started for the right run levels.
part 2.2 - setting up xbmc as a service
the xbmc wiki has a good article for how to set up xbmc as a service, but i want to expand on it a little bit.
create the init script file
vim /etc/init.d/xbmc
paste the following code into your vim session:
#! /bin/sh
### begin init info
# provides: xbmc
# required-start: $all
# required-stop: $all
# default-start: 2 3 4 5
# default-stop: 0 1 6
# description: starts instance of xbmc using start-stop-daemon and xinit
# short-description: starts instance of xbmc
### end init info
############### edit me ##################
# path to xinit exec
daemon=/usr/bin/xinit
# startup args
daemon_opts=" /usr/bin/xbmc --standalone -- :0"
# script name
name=xbmc
# app name
desc=xbmc
# user
run_as=pi
# path of the pid file
pid_file=/var/run/xbmc.pid
############### end edit me ##################
test -x $daemon || exit 0
set -e
case "$1" in
start)
echo "starting $desc"
start-stop-daemon --start -c $run_as --background --pidfile $pid_file --make-pidfile --exec $daemon -- $daemon_opts
;;
stop)
echo "stopping $desc"
start-stop-daemon --stop --pidfile $pid_file
;;
status)
echo "checking status of $desc..."
pid=$(cat $pid_file)
# this line is for debugging purposes only
# echo "pid is $pid"
if ps -p $pid > /dev/null ; then
echo "xbmc is running with pid $pid"
else
echo "xbmc doesn't seem to be running"
fi
;;
restart|force-reload)
echo "restarting $desc"
start-stop-daemon --stop --pidfile $pid_file
sleep 5
start-stop-daemon --start -c $run_as --background --pidfile $pid_file --make-pidfile --exec $daemon -- $daemon_opts
;;
*)
n=/etc/init.d/$name
echo "usage: $n {start|stop|restart|force-reload}" >&2
exit 1
;;
esac
exit 0
save and quit out of vim. there are a few differences between my init script and the one provided on the xbmc wiki. for one, my “runas” user is set to “pi” - you’ll want to set this to whatever user you installed xbmc with to avoid permissions issues. additionally, my init script will take “status” as an argument to the init script and will return information about whether or not xbmc is running.
change the script’s permissions to make it executable
chmod a+x /etc/init.d/xbmc
test that the init script is working:
pi@raspberrypi ~ $ sudo /etc/init.d/xbmc start
starting xbmc
pi@raspberrypi ~ $ /etc/init.d/xbmc status
checking status of xbmc...
xbmc is running with pid 10986
pi@raspberrypi ~ $ /etc/init.d/xbmc stop
stopping xbmc
pi@raspberrypi ~ $ /etc/init.d/xbmc status
checking status of xbmc...
xbmc doesn't seem to be running
if you want xbmc to start when the os boots, update the rc.d scripts. unless you have a specific use case, using the “defaults” argument will work for you.
sudo update-rc.d xbmc defaults
if you want to be thorough, restart your raspberry pi and verify that your disk has been mounted (via fstab from part 1) and that xbmc has started.
you’re done. time to enjoy.
part 2.3 - xbmc remote
if you're going to manage your xbmc/nas/pi remotely, i would also suggest downloading the xbmc remote app for your adroid or iphone. to enable remote control on xbmc, go to system -> settings -> services -> remote control and enable both "allow programs on this system to control xbmc" and "allow programs on other systems to control xbmc."
courtesy of xbmc.org
assuming you're on the same wireless network, you should be able to connect to the xbmc with your remote app using your pi's ip address and the default username and password of 'xbmc.'
well at nearly 2000 words, this has been a whopper of a post. hopefully this write up has helped you one way or another, and let me know if you have any questions. enjoy your new combination nas and htpc.

December 18, 2013 - Categories How-to Guides,Questions for the Community,Electronics Projects
Categories: how-to guides,questions for the community,electronics projects , i recently started building out a combination nas and htpc on a raspberry pi and came across some interesting information about powering raspberry pi's. while this isn't a project post per se, i thought it was interesting enough to share and wanted to send this out as sort of a psa for the users out there who don't know the potential danger of "backpowering" a raspberry pi.
for those who don't already have one, here are a few suggestions for where to get a raspberry pi.
where to get a raspberry pi
if you have some of the peripherals (sd card, hdmi cable, micro usb power supply), you can get started with a standalone model b raspberry pi for as low as $35.
element14 - $35
alliedelec - $35
sparkfun - $39.95
amazon (prime eligible) - $40.60
dealextreme (free shipping) - $55.70
if you would rather get a starter kit, the prices are pretty reasonable and usually includes an sd card pre-loaded with the raspberry pi new out of box software (noobs). here are two good starter kits.
raspberry pi model b, case, micro usb power supply, sd card with noobs, and hdmi cable via amazon (prime eligible) - $61.95
raspberry pi model b, case, micro usb power supply, sd card with noobs, and hdmi cable via canakit - $69.95
power consumption
as an arduino die hard, i didn't think i really needed a raspberry pi for anything. i was sold once i realized i could run all of my home web server functions on the 3.5 watt arm processor instead of 85 watt intel chip in my desktop. the raspberry pi will actually pay for itself in about 4 months.
utility cost of running home server on full x86 desktop (intel dual core, ati radeon hd gpu, 3 hdds) [high estimate]
(power draw x hours per week x weeks per year x cost per kilowatt hour) / (1000 watts per kw x 0.85 efficiency x 12 months a year) = estimated cost per month
(150 watts x 168 hours x 52 weeks x $0.10 per kw hour) / 1000 watts per kw x 0.85 efficiency x 12 months a year) = $12.85 per month
utility cost of running home server on raspberry pi and one external hard drive (5 watts for raspberry pi, 15 watts for hdd under load) [high estimate]
(20 watts x 168 hours x 52 weeks x $0.10 per kw hour) / 1000 watts per kw x 0.85 efficiency x 12 months a year) = $1.71 per month
approximate cost savings: $11.14 per month
powering the pi and the dangers of "backpowering"
the pi only has two usb ports, so obviously many folks incorporate a powered usb hub to expand its capabilities. at some point, someone discovered that the powered hubs were actually supplying power to the pi via the uplink between the hub and the pi. now you can power your peripherals and the pi from one outlet. cool right?
it's pretty cool until you accidentally fry your pi or start a fire. the power supply connection on the pi includes a polyfuse to protect against overvoltages (see diagram below).
the usb data connections do not have an inline polyfuse! if you want to run your pi off of a powered usb hub, you'll need to do two things.
acquire a powered usb hub that specifically does not supply 'backpower' via the datalink/uplink/data port. if you want to play it safe, check out the list of compatible powered usb hubs that have been tested by the community. i chose to use the plugable 7-port usb hub.
run a usb-to-micro-usb cable from one of the outputs on your usb hub back to the power input connection on the pi. this will properly route your +5v power through the polyfuse, protecting your pi.
see picture below for a visual explanation.
obviously you still need to plug your powered usb hub into a power source. now your raspberry pi will run off of the powered usb hub, allowing you to safely run your pi and your peripherals from one power supply.
anyway, just wanted to share a couple of lessons learned while getting started and highlight the details behind "backpowering."
how do you power your pi?
November 2, 2013 - Categories Utilities And Other Useful Things
Categories: utilities and other useful things , i've been wanting to build a thematic password generator for some time. basically, choose some sort of "theme" and a few password strength parameters, and it will generate random passwords for you. will come back to update this post and expand on themes shortly.
pick a theme:
choose a theme...
flowers
star wars
sea animals
jelly belly flavors
countries
phonetic (military) alphabet
words that will be used for this password (editable):
minimum password length:
embed numbers?
capitalize first letters?
use exact length?
password will appear here...
here’s the code if you’re interested:
<p>pick a theme:</p>
<select id="themeselector" onchange="populatedictionarytextarea()">
<option disabled="disabled" selected="selected">choose a theme...</option>
<option value="flowers">flowers</option>
<option value="starwars">star wars</option>
<option value="seaanimals">sea animals</option>
<option value="jellybellyflavors">jelly belly flavors</option>
<option value="countries">countries</option>
<option value="phonetic">phonetic (military) alphabet</option>
</select>
<p>words that will be used for this password (editable):</p>
<p><textarea id="dictionarytextarea" cols="50" rows="5"></textarea></p>
<p>minimum password length:</p>
<input id="passwordlength" type="text" /><br />
<div>
<p class="align-left" style="padding-right:10px;">embed numbers?</p>
<p class="checkboxthree align-left">
<input type="checkbox" id="embednumberschkbox" />
<label for="embednumberschkbox"></label>
</p>
</div>
<div style="clear:both;"></div>
<div>
<p class="align-left" style="padding-right:10px;">capitalize first letters?</p>
<p class="checkboxthree align-left">
<input type="checkbox" id="capitalizechkbox" />
<label for="capitalizechkbox"></label>
</p>
</div>
<div style="clear:both;"></div>
<div>
<p class="align-left" style="padding-right:10px;">use exact length?</p>
<p class="checkboxthree align-left">
<input type="checkbox" id="exactlengthchkbox" />
<label for="exactlengthchkbox"></label>
</p>
</div>
<div style="clear:both;"></div>
<p><input type="button" onclick="makepasswd()" class="btn btn--large btn--success" value="generate" /></p>
<p><textarea id="output" cols="50" disabled="disabled" rows="5">password will appear here...</textarea></p>
<script>
function makepasswd() {
var password = '';
var desiredlength = document.getelementbyid('passwordlength').value;
var embednumbers = document.getelementbyid('embednumberschkbox').checked;
var capitalize = document.getelementbyid('capitalizechkbox').checked;
var exactlength = document.getelementbyid('exactlengthchkbox').checked;
var words = document.getelementbyid('dictionarytextarea').value.split(" ");
while (password.length < desiredlength) {
var word = words[math.floor(math.random()*words.length)];
if(capitalize){
word = word.charat(0).touppercase() + word.slice(1);
}
password += word;
if(embednumbers && (password.length < desiredlength)){
password += math.floor(math.random()*51);
}
}
if(exactlength){
password = password.slice(0,desiredlength);
}
var actuallength = password.length;
password += "\n\npasswword is " + actuallength + " characters long.";
document.getelementbyid('output').value = password;
}
function populatedictionarytextarea(){
var dictionaries = { samuelljackson : ["bullshit","shoot","bitch","kneecaps","goddamn","money","motherfucker","winston","motherfucker","shot","understand","asses","dead","fucking","fried","chicken","shit","transitional","kill","shit","case","dumbass","duty","booty","motherfucker","righteous","ezekiel","brother","tyranny","filthy","pumpkin-pie","ak-47","kill","absolutely","snakes","plane","zeus","fuck","shove","lightning-bolt","ass","goddamn","shark","enough"], pokemon: ["bulbasaur","ivysaur","venusaur","charmander","charmeleon","charizard","squirtle","wartortle","blastoise","caterpie","metapod","butterfree","weedle","kakuna","beedrill","pidgey","pidgeotto","pidgeot","rattata","raticate","spearow","fearow","ekans","arbok","pikachu","raichu","sandshrew","sandslash","nidoran","nidorina","nidoqueen","nidoran","nidorino","nidoking","clefairy","clefable","vulpix","ninetales","jigglypuff","wigglytuff","zubat","golbat","oddish","gloom","vileplume","paras","parasect","venonat","venomoth","diglett","dugtrio","meowth","persian","psyduck","golduck","mankey","primeape","growlithe","arcanine","poliwag","poliwhirl","poliwrath","abra","kadabra","alakazam","machop","machoke","machamp","bellsprout","weepinbell","victreebel","tentacool","tentacruel","geodude","graveler","golem","ponyta","rapidash","slowpoke","slowbro","magnemite","magneton","farfetchd","doduo","dodrio","seel","dewgong","grimer","muk","shellder","cloyster","gastly","haunter","gengar","onix","drowzee","hypno","krabby","kingler","voltorb","electrode","exeggcute","exeggutor","cubone","marowak","hitmonlee","hitmonchan","lickitung","koffing","weezing","rhyhorn","rhydon","chansey","tangela","kangaskhan","horsea","seadra","goldeen","seaking","staryu","starmie","mr. mime","scyther","jynx","electabuzz","magmar","pinsir","tauros","magikarp","gyarados","lapras","ditto","eevee","vaporeon","jolteon","flareon","porygon","omanyte","omastar","kabuto","kabutops","aerodactyl","snorlax","articuno","zapdos","moltres","dratini","dragonair","dragonite","mewtwo","mew†","chikorita","bayleef","meganium","cyndaquil","quilava","typhlosion","totodile","croconaw","feraligatr","sentret","furret","hoothoot","noctowl","ledyba","ledian","spinarak","ariados","crobat","chinchou","lanturn","pichu","cleffa","igglybuff","togepi","togetic","natu","xatu","mareep","flaaffy","ampharos","bellossom","marill","azumarill","sudowoodo","politoed","hoppip","skiploom","jumpluff","aipom","sunkern","sunflora","yanma","wooper","quagsire","espeon","umbreon","murkrow","slowking","misdreavus","unown","wobbuffet","girafarig","pineco","forretress","dunsparce","gligar","steelix","snubbull","granbull","qwilfish","scizor","shuckle","heracross","sneasel","teddiursa","ursaring","slugma","magcargo","swinub","piloswine","corsola","remoraid","octillery","delibird","mantine","skarmory","houndour","houndoom","kingdra","phanpy","donphan","porygon2","stantler","smeargle","tyrogue","hitmontop","smoochum","elekid","magby","miltank","blissey","raikou","entei","suicune","larvitar","pupitar","tyranitar","lugia†","ho-oh†","celebi†","treecko","grovyle","sceptile","torchic","combusken","blaziken","mudkip","marshtomp","swampert","poochyena","mightyena","zigzagoon","linoone","wurmple","silcoon","beautifly","cascoon","dustox","lotad","lombre","ludicolo","seedot","nuzleaf","shiftry","taillow","swellow","wingull","pelipper","ralts","kirlia","gardevoir","surskit","masquerain","shroomish","breloom","slakoth","vigoroth","slaking","nincada","ninjask","shedinja","whismur","loudred","exploud","makuhita","hariyama","azurill","nosepass","skitty","delcatty","sableye","mawile","aron","lairon","aggron","meditite","medicham","electrike","manectric","plusle","minun","volbeat","illumise","roselia","gulpin","swalot","carvanha","sharpedo","wailmer","wailord","numel","camerupt","torkoal","spoink","grumpig","spinda","trapinch","vibrava","flygon","cacnea","cacturne","swablu","altaria","zangoose","seviper","lunatone","solrock","barboach","whiscash","corphish","crawdaunt","baltoy","claydol","lileep","cradily","anorith","armaldo","feebas","milotic","castform","kecleon","shuppet","banette","duskull","dusclops","tropius","chimecho","absol","wynaut","snorunt","glalie","spheal","sealeo","walrein","clamperl","huntail","gorebyss","relicanth","luvdisc","bagon","shelgon","salamence","beldum","metang","metagross","regirock","regice","registeel","latias","latios","kyogre","groudon","rayquaza","jirachi†","deoxys†","turtwig","grotle","torterra","chimchar","monferno","infernape","piplup","prinplup","empoleon","starly","staravia","staraptor","bidoof","bibarel","kricketot","kricketune","shinx","luxio","luxray","budew","roserade","cranidos","rampardos","shieldon","bastiodon","burmy","wormadam","mothim","combee","vespiquen","pachirisu","buizel","floatzel","cherubi","cherrim","shellos","gastrodon","ambipom","drifloon","drifblim","buneary","lopunny","mismagius","honchkrow","glameow","purugly","chingling","stunky","skuntank","bronzor","bronzong","bonsly","mime jr.","happiny","chatot","spiritomb","gible","gabite","garchomp","munchlax","riolu","lucario","hippopotas","hippowdon","skorupi","drapion","croagunk","toxicroak","carnivine","finneon","lumineon","mantyke","snover","abomasnow","weavile","magnezone","lickilicky","rhyperior","tangrowth","electivire","magmortar","togekiss","yanmega","leafeon","glaceon","gliscor","mamoswine","porygon-z","gallade","probopass","dusknoir","froslass","rotom","uxie","mesprit","azelf","dialga","palkia","heatran","regigigas","giratina","cresselia","swoobat"], flowers: ["alstroemeria","amaranthus","amaryllis","anemone","anthurium","asters","buplerum","callalilies","callalily","carnation","mum","chrysanthemum","coxcomb","daisy","curly-willow","daffodils","dahlias","delphinium","gerbera","ginger","gladiouli","heather","heliconia","hyacinth","hydrangeas","hypericum","iris","kangaroo-paw","larkspur","leptospermum","liatris","lilies","limonium","lisianthus","asters","narcissus","orchids","pearl-blossom","peonies","poinsettia","protea","quince","ranunculus","roses","snapdragons","soldaster","sunflowers","tulips","viburnum","waxflower"], starwars: ["tan-tan","luke","han","skywalker","solo","bacta","at-at","at-st","wookie","wampa","hoth","empire","dark","side","force","leia","princess","speeder","tie-fighter","deathstar","feeling","lightsaber","x-wing","b-wing","y-wing","a-wing","millenium","falcon","destroyer","star","imperial","sith","jedi","knight","tie-bomber","blaster","shield","shields","endor","coruscant","clones","deathsticks","kaashyyk","bothans","proton","torpedo","attack","formation","spacestation","chewbacca","c3po","r2d2","droid","anakin","obi-wan","kenobi","maul","darth","vader","palpatine","emperor","operational","alderaan"], seaanimals: ["anemone","eel","carp","pike","walleye","clownfish","kraken","barracuda","shark","angelfish","squid","octopus","crab","lobster","urchin","whale","dolphin","seasnake","manatee","cuttlefish","conch","cod","salmon","tuna","barnacle","anchovy","albacore","coral","seal","flounder","goldfish","grouper","guppy","haddock","halibut","herring","jellyfish","lamprey","manta-ray","stingray","minnow","mollusk","mussel","narwhal","nautilus","nettlefish","orca","otter","oyster","plankton","piranha","sardine","shrimp","starfish","sturgeon","trout","turtle","walrus"], jellybellyflavors: ["cream","soda","root","beer","berry","blue","blueberry","bubble","gum","buttered","popcorn","cantaloupe","cappuccino","caramel","corn","chili","mango","chocolate","pudding","cinnamon","coconut","cotton","candy","crushed","pineapple","dr.pepper","french","vanilla","green","apple","island","punch","juicy","pear","kiwi","lemon","drop","lemon","lime","licorice","mango","margarita","mixed","berry","smoothie","orange","sherbet","peach","piña","colada","plum","pomegranate","raspberry","red","apple","sizzling","cinnamon","sour","cherry","strawberry","cheesecake","strawberry","daiquiri","strawberry","jam","sunkist","lemon","sunkist","lime","sunkist","orange","sunkist","pink","grapefruit","sunkist","tangerine","toasted","marshmallow","top","banana","tutti-fruitti","very","cherry","watermelon","wild","blackberry"], countries:["afghanistan","albania","algeria","american-samoa","andorra","angola","anguilla","antigua","barbuda","argentina","armenia","aruba","australia","austria","azerbaijan","bahamas","bahrain","bangladesh","barbados","belarus","belgium","belize","benin","bermuda","bhutan","bolivia","bosnia-herzegovina","botswana","bouvet-island","brazil","brunei","bulgaria","burkina-faso","burundi","cambodia","cameroon","canada","cape-verde","cayman-islands","central-african-republic","chad","chile","china","christmas-island","cocos-(keeling)-islands","colombia","comoros","zaire","cook-islands","costa-rica","croatia","cuba","cyprus","czech-republic","denmark","djibouti","dominica","dominican-republic","ecuador","egypt","el-salvador","equatorial-guinea","eritrea","estonia","ethiopia","falkland-islands","faroe-islands","fiji","finland","france","french-guiana","gabon","gambia","georgia","germany","ghana","gibraltar","greece","greenland","grenada","guadeloupe","guam","guatemala","guinea","guinea-bissau","guyana","haiti","holy-see","honduras","hong-kong","hungary","iceland","india","indonesia","iran","iraq","ireland","israel","italy","ivory-coast","jamaica","japan","jordan","kazakhstan","kenya","kiribati","kuwait","kyrgyzstan","laos","latvia","lebanon","lesotho","liberia","libya","liechtenstein","lithuania","luxembourg","macau","macedonia","madagascar","malawi","malaysia","maldives","mali","malta","marshall-islands","martinique","mauritania","mauritius","mayotte","mexico","micronesia","moldova","monaco","mongolia","montenegro","montserrat","morocco","mozambique","myanmar","namibia","nauru","nepal","netherlands","antilles","new-caledonia","new-zealand","nicaragua","niger","nigeria","niue","norfolk-island","north-korea","northern-mariana-islands","norway","oman","pakistan","palau","panama","papua-new-guinea","paraguay","peru","philippines","pitcairn-island","poland","polynesia","portugal","puerto-rico","qatar","reunion","romania","russia","rwanda","saint-helena","saint-kitts-and-nevis","saint-lucia","saint-pierre-and-miquelon","saint-vincent-and-grenadines","samoa","san-marino","sao-tome-and-principe","saudi-arabia","senegal","serbia","seychelles","sierra-leone","singapore","slovakia","slovenia","solomon-islands","somalia","south-africa","south-georgia-and-south-sandwich-islands","south-korea","south-sudan","spain","sri-lanka","sudan","suriname","svalbard-and-jan-mayen-islands","swaziland","sweden","switzerland","syria","taiwan","tajikistan","tanzania","thailand","timor-leste","togo","tokelau","tonga","trinidad-and-tobago","tunisia","turkey","turkmenistan","turks-and-caicos-islands","tuvalu","uganda","ukraine","united-arab-emirates","united-kingdom","united-states","uruguay","uzbekistan","vanuatu","venezuela","vietnam","virgin-islands","wallis-and-futuna-islands","yemen","zambia","zimbabwe"], phonetic : ["alpha","bravo","charlie","delta","echo","foxtrot","gulf","hotel","india","juliet","kilo","lima","mike","november","oscar","papa","quebec","romeo","sierra","tango","uniform","victor","whiskey","x-ray","yankee","zulu"] };
var dictionaryselect = document.getelementbyid('themeselector');
var dictionaryname = dictionaryselect.options[dictionaryselect.selectedindex].value;
//alert(dictionaryname);
var dictionarytextarea = document.getelementbyid('dictionarytextarea');
var dictionary = dictionaries[dictionaryname];
dictionarytextarea.value = "";
for(var i = 0; i < dictionary.length; i++){
dictionarytextarea.value += dictionary[i];
dictionarytextarea.value += " ";
}
}
</script>

September 29, 2013 - Categories Utilities And Other Useful Things
Categories: utilities and other useful things , for those of you out there planning a wedding, you may have thought about setting up a website. something to answer those common questions guests may have so that you can focus on all of the other aspects of wedding planning. there are some pretty slick wysiwyg sites out there like wedding wire, the knot, and wedding channel if you want to use a pre-built theme and just punch in your relevant information.
my wife and i couldn't find a theme and a site that fit our needs perfectly so i ended up building one for us.
check it out or see the screen shot below.
the site is built with bootstrap 2 to provide the responsive framework and base css, galleria for the photo gallery. i used php so i could re-use the header code on the other pages. if you're looking at the site on your computer (as opposed to phone/tablet), go to the accommodations or schedule page and try re-sizing your browser to make it smaller - you'll see the two-column layout collapse into a mobile-friendly single column layout.
anyway, this is less of a tutorial post and more of a "use my code if it will help you jump start your project."
demo
github repo
enjoy and let me know if you have any questions.
August 1, 2013 - Categories Utilities And Other Useful Things
Categories: utilities and other useful things , well it's been awhile since i've posted since i started working on hireupjob, but this one's good. i recently had a use case where i needed to get the virtual hardware version of a client machine provisioned through vcloud director. now, that information is not accessible anywhere on the client machine, so i had to look to the vcloud director api for it. the process for querying the api also had to be automated for future provisions, so it had to be scripted. enough back story and context, lets look at the ruby code.
#need to import a few ruby packages
require 'net/http'
require 'uri'
require 'openssl'
#here we are ignoring any issues that may arise with ssl certificates
openssl::ssl::verify_peer = openssl::ssl::verify_none
#main fetch function takes an initial url to fetch from and a limit for number of redirects to follow
def fetch(uri_str, limit = 10)
raise argumenterror, 'http redirect too deep' if limit == 0
#parse url into uri object
uri = uri.parse(uri_str)
#create new net::http object
http = net::http.new(uri.host, uri.port)
#set the http object to use ssl
http.use_ssl = true
#ignore issues with ssl certs
http.verify_mode = openssl::ssl::verify_none
#start the http session
http.start()
#create an http post request to /api/sessions to authenticate
req = net::http::post.new('/api/sessions')
#set http basic auth variables of username and password
req.basic_auth '<your_username>@<your_org>', '<your_password>'
req.add_field 'accept:', 'application/*+xml;version=1.5'
#send the request we created earlier, and capture the http response
response = http.request(req)
#start case to handle various http responses
case response
#if authentication is successful, a token is returned in the response header. so if we get an http 200 response from the vcloud server, then we can grab the "x-vcloud-authorization" token from the header
when net::httpsuccess then
authkey = response.header['x-vcloud-authorization']
#if we get an httpfound instead, we are probably getting redirected and should try to follow it. you may need to tweak this section to suit your use case
when net::httpfound then
#call the main fetch function again and decrement the overall redirect limit
fetch(response['location'], limit - 1)
#if we get an http redirection, we are definitely getting redirected and should follow it
when net::httpredirection then fetch(response['location'], limit - 1)
else
#something went wrong - spit out whatever the response error is
puts response.error!
end
#set the headers as a variable to be re-used later, including the authorization token we grabbed earlier
headers = {
'accept' => 'application/*+xml;version=1.5',
'x-vcloud-authorization' => "#{authkey}"
}
#build a new request, this time an http get, to grab a value from the api. supply both the api call and the headers variable we just put together
req = net::http::get.new('/api/vapp/vm-insert-your-alphanumeric-uuid-here/virtualhardwaresection', headers)
#send the new request and grab the response again
response = http.request(req)
case response
when net::httpsuccess then
#in my case, the value i wanted was returned in the xml body that was returned, so if the server responds with http 200 i just grab the entire response body and pass it to a variable
result = response.body()
#same as previous
when net::httpfound then
fetch(response['location'], limit - 1)
#same as previous
when net::httpredirection then fetch(response['location'], limit - 1)
else
puts response.error!
end
#finally, build one more request to send an http delete call to /api/sessions to kill your session
req = net::http::delete.new('/api/sessions', headers)
http.request(req)
#again, in my case, i wanted to confirm that the vm was using a specific virtual hardware version (vmx-08), so i did a quick string match to confirm this
result.include?('<vssd:virtualsystemtype>vmx-08</vssd:virtualsystemtype>')
end
print fetch('https://<your_vcloud_server>:443')
if you're using my code more or less verbatim and everything executes properly, you should get a simple "true" or "false" as output. now, this script is for a fairly specific use case, but i think the real potential value here is to use this enable opscode chef (written in ruby) to communicate with vcloud director. i'll be sure to post again as i develop some use cases.
in case you have a very different use case but need some help, here are some of the pages i referred to for writing this script:
exploring the vcloud rest api - part i and part ii
vcloud director rest api reference
ruby - net::http - following redirects
hope this helps some of you out there and let me know if you have any questions.
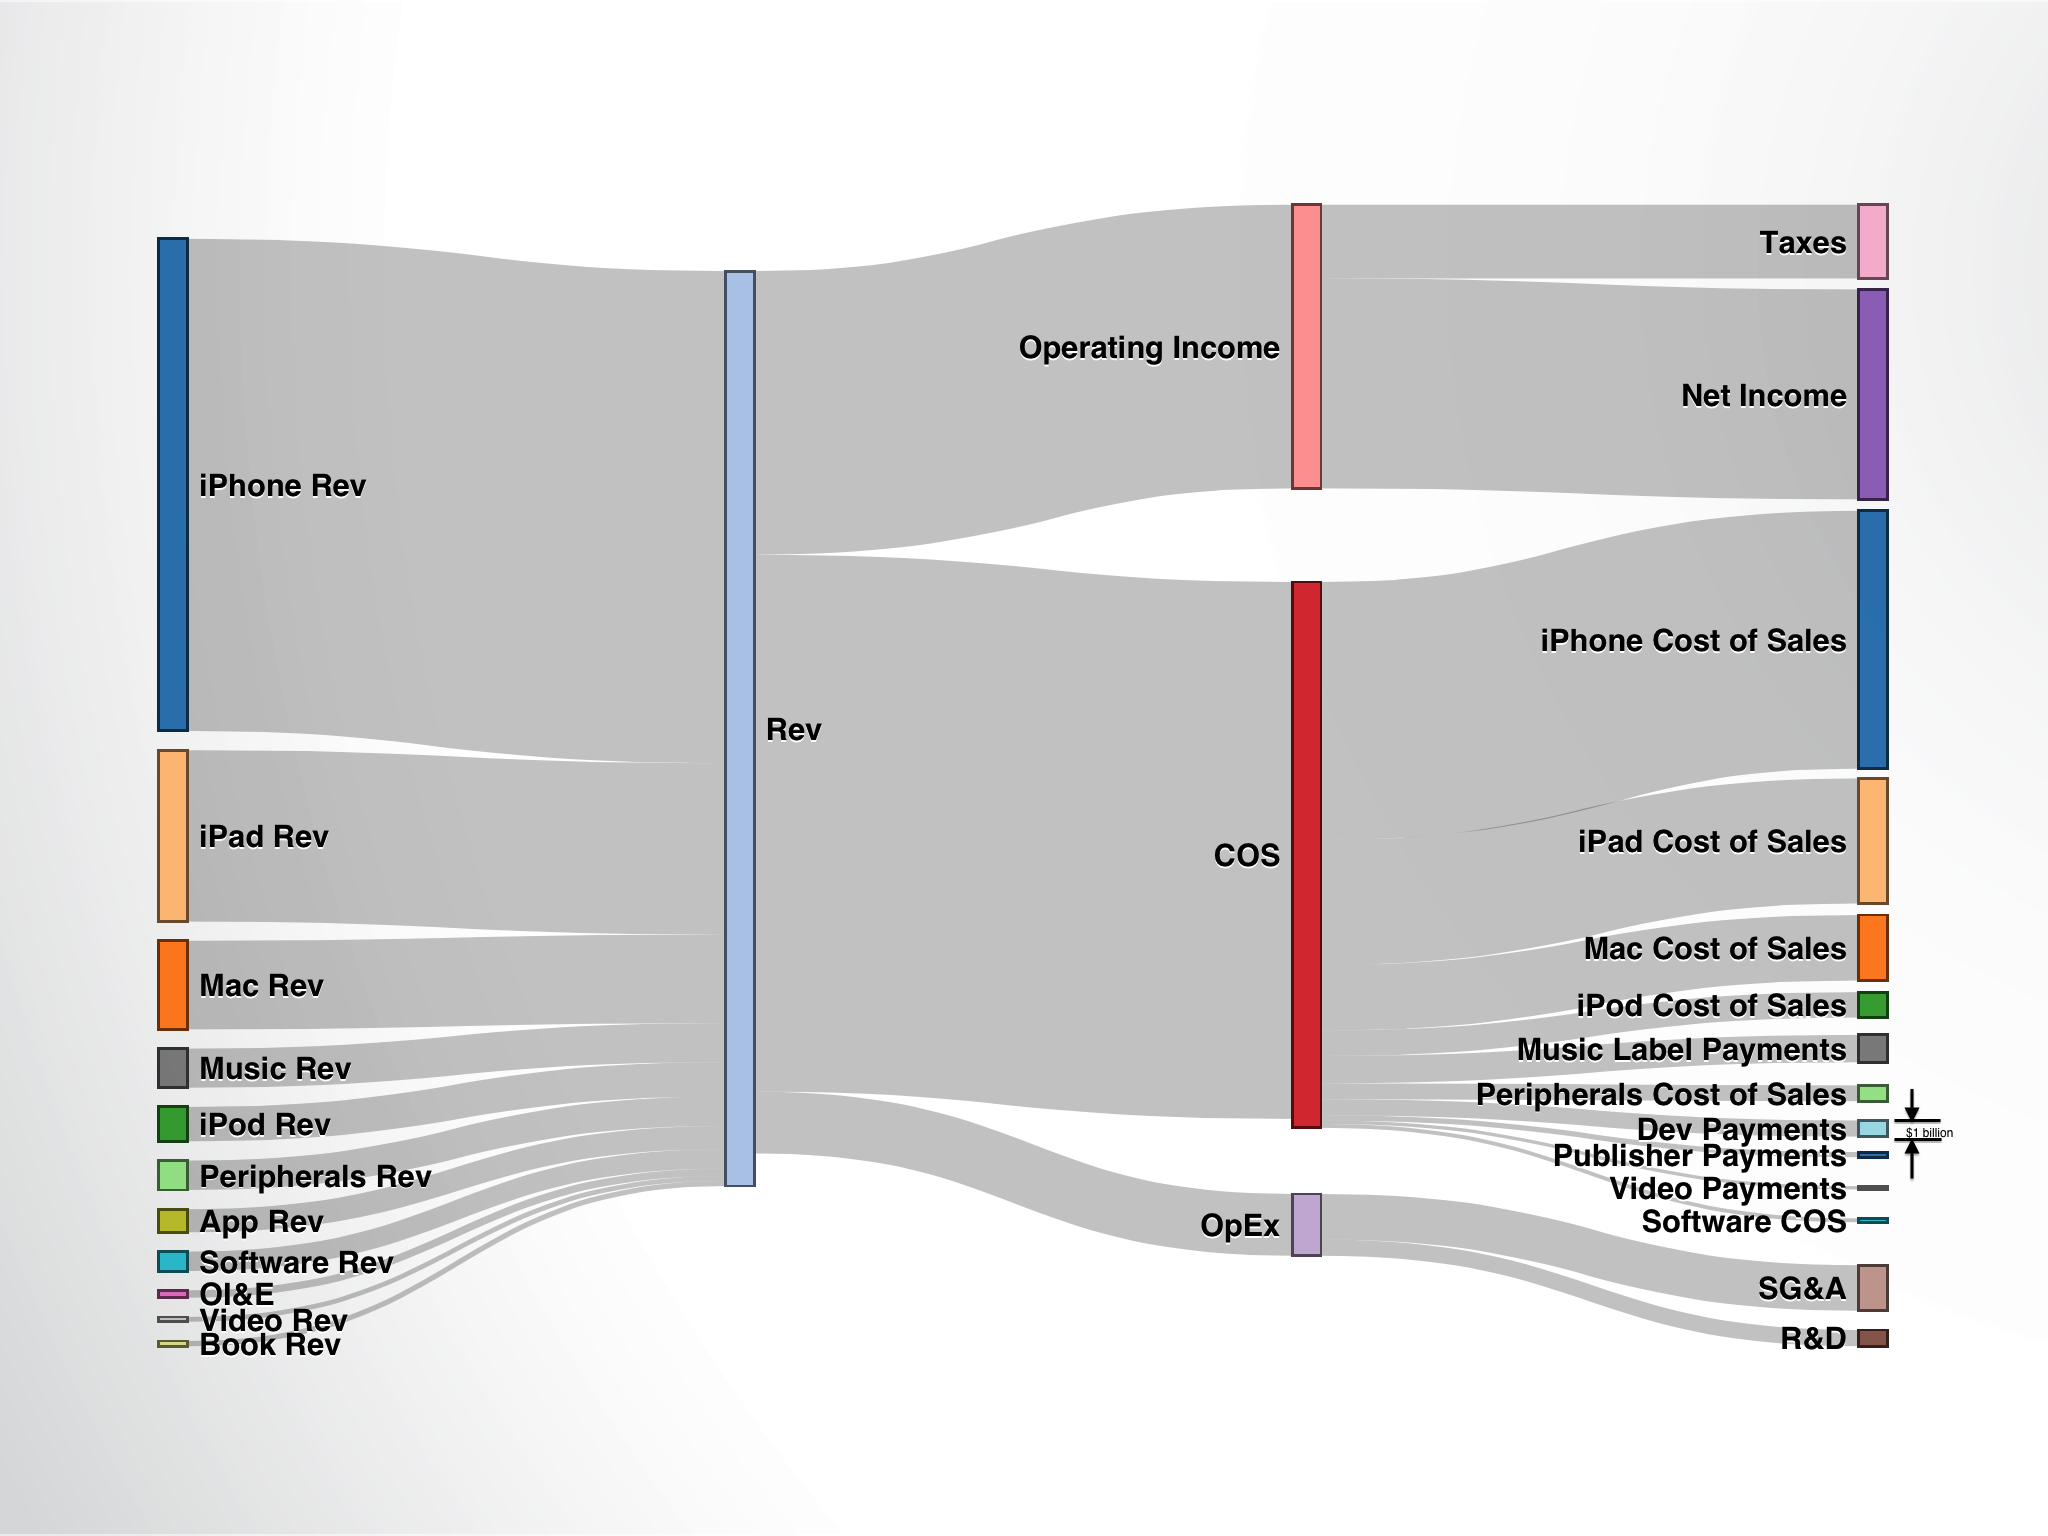
May 13, 2013 - Categories IT/Software Projects,Utilities And Other Useful Things
Categories: it/software projects,utilities and other useful things , a few months back, i came across this chart illustrating apple's segment revenues on reddit:
this is a great chart because it has impact with just a glance, and yet yields more solid data the longer you examine it. ever since i saw this chart i wanted to build my own for my department, for startups, and offer it up to anyone else who might want to build a similar chart.
horace dediu of asymco.com put this together using a chart-building ipad app called perspective. now, i should have just downloaded the damn app and made some similar charts and been happy. instead i built my own from scratch using html5's canvas tag. check out the demo.
demo
github repo
in case you didn't notice it right away (i didn't either), horace dediu's chart uses the same colors to represent both a product's revenues as well as their cost of goods sold, giving you an at-a-glance idea of what a product's margin is. i replicated this feature in my tool as well.
instead of a long-winded walk through of how i built the tool, i'm just going to share the source here and add some extra commenting for clarity.
<html>
<head>
<title>finance chart</title>
<style>
body {
margin: 20px;
padding: 20px;
}
</style>
</head>
<body>
<!-- a basic html form for getting custom inputs from users. all of these values will be sent as http get variables in the url-->
<!-- from there, the javascript will fetch these variables out of the url-->
<form method="get" action="html5canvas.html">
<label>item 1 label</label><input type="text" name="item1label" /><br/>
<label>item 1 revenues</label><input type="number" name="item1rev" /><br/>
<label>item 1 cogs</label><input type="number" name="item1cos" /><br/>
<label>item 2 label</label><input type="text" name="item2label" /><br/>
<label>item 2 revenues</label><input type="number" name="item2rev" /><br/>
<label>item 2 cogs</label><input type="number" name="item2cos" /><br/>
<label>item 3 label</label><input type="text" name="item3label" /><br/>
<label>item 3 revenues</label><input type="number" name="item3rev" /><br/>
<label>item 3 cogs</label><input type="number" name="item3cos" /><br/>
<label>operating expense</label><input type="number" name="opex" /><br/>
<label>scale ($m, $k, etc)</label><input type="text" name="scalelabel" /><br/>
<input type="submit" value="submit" /><br/>
</form>
<!-- the canvas tag - the only important thing here is to set your width and height as necessary-->
<canvas id="mycanvas" width="1000" height="1200"></canvas>
<script>
// a handy little function that i picked up at http://papermashup.com/read-url-get-variables-withjavascript/
// the function simply parses a get variable out of the url using regex and returns it
function geturlvars() {
var vars = {};
var parts = window.location.href.replace(/[?&]+([^=&]+)=([^&]*)/gi, function(m,key,value) {
vars[key] = value;
});
return vars;
}
</script>
<script>
// grabbing all of the user form variables out of the url. for integer values, we need to cast them as an int datatype
// because by default, as part of the url string, they exist as strings
var item1label =(geturlvars()["item1label"]);
var item1rev =parseint((geturlvars()["item1rev"]));
var item1cos =parseint((geturlvars()["item1cos"]));
var item2label =(geturlvars()["item2label"]);
var item2rev =parseint((geturlvars()["item2rev"]));
var item2cos =parseint((geturlvars()["item2cos"]));
var item3label =(geturlvars()["item3label"]);
var item3rev =parseint((geturlvars()["item3rev"]));
var item3cos =parseint((geturlvars()["item3cos"]));
var opexinput =parseint((geturlvars()["opex"]));
var scalelabelinput = (geturlvars()["scalelabel"]);
// we calculate the total revenue right away. total revenue should be the largest number in any practical use case
// and we will use it to set the scale for all of the rest of the variables
var totalrev = item1rev + item2rev + item3rev;
// calculate and set variables for scaling purposes
var scaler = (math.ceil(100/totalrev));
var totalrevscaled = (scaler*totalrev);
// scale label that will be used later - a conversion on the size of the scale bar will happen at the time of drawing the scale
var scalevalue = '= 10 ' + scalelabelinput;
// scale all of the item revenue and cost of goods solds values, and set them to new variables (unnecessary artifact of old code)
var revenueitem1 = scaler*item1rev;
var revenueitem2 = scaler*item2rev;
var revenueitem3 = scaler*item3rev;
// enter all revenues into an array to iterate through later. do the same for labels
var revenues = new array(revenueitem1,revenueitem2,revenueitem3);
var revenueslabels = new array(item1label,item2label,item3label);
//more detailed level cogs variables
var cositem1 = scaler*item1cos;
var cositem2 = scaler*item2cos;
var cositem3 = scaler*item3cos;
var cositems = new array(cositem1,cositem2,cositem3);
// this array is redundant with revenueslabels, another artifact
var cositemslabels = new array(item1label,item2label,item3label);
// set total cos, scale the operating expense value, and set operating income (aka net income in this case)
// to total revenue minus all other costs and operating expense. we use scaled values in this case because
// we don't actually care about the dollar value, just that the cart is proportionally correct
var cos = cositem1+cositem2+cositem3;
var opex = scaler*opexinput;
var operatingincome = totalrevscaled - (cositem1+cositem2+cositem3) - opex;
// set an array to iterate through for expense categories
var expensecats = new array(operatingincome,cos,opex);
var expensecatslabels = new array('operating income','cogs','operating expense');
// generic canvas variable setting
var canvas = document.getelementbyid('mycanvas');
var context = canvas.getcontext('2d');
// generic variables for storing location information - these will be used, incremented, and re-used to act as a "ceiling"
// for the bars in the chart
var globalverticaladjustment = 30;
var revenueverticaladjustment = 50;
// generic color array for assigning different colors to all blocks
var colors = new array('black','orange','red','yellow','green','blue','purple','gray','white');
var c = 0;
// begin "painting" revenue bars
// grab the number of items in the revenues array
var length = revenues.length;
//for debugging only
//alert("revenues array has "+length+" items");
for (var i = 0; i < length; i++) {
//debugging code
//for debugging only
//alert("global vert adj"+globalverticaladjustment);
//draw rectangle for revenue source
context.beginpath();
// set the upper left top corner. we will always use 230 as the horizontal value so all of the bars align
// globalverticaladjustment will be incremented each time we paint a bar. 20 represents the width of the bar
// in pixels, and the last argument is the height of the bar
context.rect(230, globalverticaladjustment, 20, (revenues[i]));
// set the color of the bar, and increment the color array for the next color selection
context.fillstyle = colors[c];
c++;
context.fill();
// set line color and width, then paint
context.linewidth = 2;
context.strokestyle = 'black';
context.stroke();
// set label for revenue sources
context.textalign = 'right';
context.fillstyle = 'black';
context.font = "14pt sans-serif";
// here we use the revenueslabel array to get the correct item name, and then set it to a location to correspond
// with the location of the bar
context.filltext(revenueslabels[i], 250, globalverticaladjustment-10);
// if this is not the first iteration, then we need to account for the previous bars heights for spacing reasons
if(i!=0){
revenueverticaladjustment = (revenueverticaladjustment + revenues[i-1]);
//for debugging only
//alert("rev vertical adj = "+revenueverticaladjustment);
}
// drawing the top lines that connect with the total revenue bar
context.beginpath();
context.moveto(250, (globalverticaladjustment));
// the curve is simply a line based on 4 points - the origin, which is set in the 'moveto' function, two points that dictate
// which direction to curve the line (they act almost like gravity wells, if that helps your understanding), and an ending
// point for the line
context.beziercurveto(260, revenueverticaladjustment, 380, revenueverticaladjustment, 420, revenueverticaladjustment);
context.linewidth = 1;
context.strokestyle = 'black';
context.stroke();
// drawing bottom lines to connect with total revenue bar - same functions, just different arguments
context.beginpath();
context.moveto(250, (globalverticaladjustment+revenues[i]));
context.beziercurveto(260, revenueverticaladjustment+revenues[i], 380, revenueverticaladjustment+revenues[i], 420, revenueverticaladjustment+revenues[i]);
context.linewidth = 1;
context.strokestyle = 'black';
context.stroke();
globalverticaladjustment += (revenues[i] + 50);
}
//draw vetical revenue bar here - here we don't need an iterative function, because there always be one and only one revenue line
context.beginpath();
context.rect(420, 50, 20, (totalrevscaled));
context.fillstyle = colors[c];
c++;
context.fill();
context.linewidth = 2;
context.strokestyle = 'black';
context.stroke();
// create the text label for the total revenue bar
context.fillstyle = 'black';
context.font = "14pt sans-serif";
context.textalign = 'left';
context.filltext("total revenue", 380, 40);
// resetting generic variables for location informatino
globalverticaladjustment = 30;
expensecatverticaladjustment = 50;
length = expensecats.length;
//for debugging only
//alert("expense category array has "+length+" items");
for (var i = 0; i < length; i++) {
//for debugging only
//alert("global vert adj "+globalverticaladjustment);
// same set of functions as the revenues section - drawing rectangles in the same way, just with different values
context.beginpath();
context.rect(620, globalverticaladjustment, 20, (expensecats[i]));
context.fillstyle = colors[c];
c++;
context.fill();
context.linewidth = 2;
context.strokestyle = 'black';
context.stroke();
// set label for expense category
context.fillstyle = 'black';
context.font = "14pt sans-serif";
context.filltext(expensecatslabels[i], 620, globalverticaladjustment-10);
if(i!=0){
expensecatverticaladjustment = (expensecatverticaladjustment + expensecats[i-1]);
//for debugging only
//alert("rev vertical adj = "+expensecatverticaladjustment);
}
// drawing top lines to connect with total revenue bar
// only difference is here is we are drawing the lines from right to left now, instead of left to right. this was done to keep the code
// as consistent as possible
context.beginpath();
context.moveto(620, (globalverticaladjustment));
context.beziercurveto(600, expensecatverticaladjustment, 440, expensecatverticaladjustment, 440, expensecatverticaladjustment);
context.linewidth = 1;
context.strokestyle = 'black';
context.stroke();
//drawing bottom lines to connect with total revenue bar
context.beginpath();
context.moveto(620, (globalverticaladjustment+expensecats[i]));
context.beziercurveto(600, expensecatverticaladjustment+expensecats[i], 440, expensecatverticaladjustment+expensecats[i], 440, expensecatverticaladjustment+expensecats[i]);
context.linewidth = 1;
context.strokestyle = 'black';
context.stroke();
globalverticaladjustment += (expensecats[i] + 50);
}
//resetting generic variables for location informatino
globalverticaladjustment = 30 + operatingincome;
expensecatverticaladjustment = 50 + operatingincome + 30;
c = 0;
length = cositems.length;
//for debugging only
//alert("expense category array has "+length+" items");
for (var i = 0; i < length; i++) {
//for debugging only
//alert("global vert adj "+globalverticaladjustment);
// again, drawing rectangles in the exact same way as before, just different values
context.beginpath();
context.rect(820, globalverticaladjustment, 20, (cositems[i]));
context.fillstyle = colors[c];
c++;
context.fill();
context.linewidth = 2;
context.strokestyle = 'black';
context.stroke();
//set label for revenue source
context.fillstyle = 'black';
context.font = "14pt sans-serif";
context.filltext(cositemslabels[i], 820, globalverticaladjustment-10);
if(i!=0){
expensecatverticaladjustment = (expensecatverticaladjustment + cositems[i-1]);
//for debugging only
//alert("rev vertical adj = "+expensecatverticaladjustment);
}
// drawing top lines to connect with total revenue bar
// as before with the expense categories, we draw the lines from right to left, this time aligning with the cos bar instead of
// the total revenue bar. also, to account for the variable height and location of the cos bar, we now use the expensecatverticaladjustment
// variable as the ceiling for the drawn lines.
context.beginpath();
context.moveto(820, (globalverticaladjustment));
context.beziercurveto(800, expensecatverticaladjustment, 640, expensecatverticaladjustment, 640, expensecatverticaladjustment);
context.linewidth = 1;
context.strokestyle = 'black';
context.stroke();
// drawing bottom lines to connect with total revenue bar
// same as above, except we now add the scaled value of cositems[i] to expensecatverticaladjustment to draw the bottom line
context.beginpath();
context.moveto(820, (globalverticaladjustment+cositems[i]));
context.beziercurveto(800, expensecatverticaladjustment+cositems[i], 640, expensecatverticaladjustment+cositems[i], 640, expensecatverticaladjustment+cositems[i]);
context.linewidth = 1;
context.strokestyle = 'black';
context.stroke();
globalverticaladjustment += (cositems[i] + 50);
}
// begin scale section
context.beginpath();
// here we draw a rectangle that is a scaled 10 units tall (relative to user inputs). the top of the scale rectangle will always be
// 150 pixels below the total revenue bar
context.rect(420, totalrevscaled+150, 20, 10*scaler);
context.fillstyle = colors[c];
c++;
context.fill();
context.linewidth = 2;
context.strokestyle = 'black';
context.stroke();
//set label for scale
context.fillstyle = 'black';
context.font = "14pt sans-serif";
// set the scale label to line up with the scale rectangle
context.filltext(scalevalue, 450, totalrevscaled+160);
</script>
</body>
</html>
it could still use some polish and pizzazz, but overall i'm pretty pleased with the tool. i've also learned with some time, math skills, and trial and error, you can draw just about anything in html5's canvas tag. if you are looking to build something using canvas, i'd highly recommend checking out html5 canvas tutorials. with almost zero knowledge of the canvas tag, i was able to knock out this project in just a few hours with the help of their tutorials.
as always, hope you enjoyed the post and let me know if you have any questions!
April 17, 2013 - Categories IT/Software Projects
Categories: it/software projects , be advised this post is quite old (17 apr 2013) and any code may be out of date. proceed with caution.
my fiancee loves wheel of fortune and watches whenever she can. the clever folks over at sony (producers of wheel of fortune) introduced a loyalty program called "wheel watchers." people who sign up get a "spin id," and if your spin id is chosen for a given episode, you win one of the prizes they gave away on the show. only catch is you have to watch every night.
this is a lot of random background information, but there's a reason. my fiancee asked me to write an application that would check the spin id every day and notify us if we won. this seemed like a great reason to learn some web scraping with php (although you could probably do this in just about any language).
pulling raw data
first things first, you need a decent website to scrape the information from! strangely, the official wheel of fortune site doesn't offer up the winning spin ids. luckily, there are a handful of websites that do report the winning numbers. for my application, i'll be using http://wheeloffortuneclub.blogspot.com
we'll pull the entire web page first and then parse for the spin id later. in php, this is quite simple:
<?php
$data = file_get_contents('http://wheeloffortuneclub.blogspot.com/');
?>
keep in mind, many site admins will not take kindly to you scraping their site especially if you're doing it frequently. in this example, we'll only need to scrape the information once a day, so it shouldn't be a problem.
parsing for the spin id
when scraping web pages, regular expressions come in handy. to pull the specific data you're looking for, you may need to use a clever combination of identifying content as well as identifying html tags and attributes to retrieve the data. in the case of the spin id, it's two capital letters and 6-7 numbers. this is a pretty specific format, so it'll be pretty easy to pull using regex.
now, regex syntax can be tough if you don't use it on a regular basis. regex 101 is an awesome site to use as a reference for regex syntax or to test your expressions.
for the spin id, our regular expression is "[a-z][a-z]\d{6,}". this translates to two capital letters ([a-z][a-z]) followed by 6 or more numbers (\d{6,}). we'll create a variable for our regular expression and parse our previously fetched web page to look for the expression using preg_match, which will return the first match:
$regex = '/[a-z][a-z]\d{6,}/';
preg_match($regex,$data,$match);
we're passing three parameters to preg_match - the pattern we're seeking, the string subject, and an output variable ($match in this case).
the $match variable is actually an array, and so we'll refer to the first object in the array to get the string. for now, we'll just echo the variable out to the page to confirm that everything's working!
$regex = '/[a-z][a-z]\d{6,}/';
preg_match($regex,$data,$match);
echo $match[0];
so the complete code looks like this:
<?php
$data = file_get_contents('http://wheeloffortuneclub.blogspot.com/');
$regex = '/[a-z][a-z]\d{6,}/';
preg_match($regex,$data,$match);
echo $match[0];
?>
automation with cron and email
so we've got a php page that will parse and return the most recent winning spin id. so what? i could have just browsed to the spin id website and gotten the same information. we need to automate the parsing and compare it to our specific spin id (to see if we're a winner) and contact us if it's a match. if it's a match, we'll send an email to notify us. here's the code in it's entirety:
<?php
$data = file_get_contents('http://wheeloffortuneclub.blogspot.com/');
$regex = '/[a-z][a-z]\d{6,}/';
preg_match($regex,$data,$match);
echo $match[0];
echo "<br />";
if ($match[0]=="kw6426861"){
echo "match!!!";
mail("alexdglover@gmail.com","spin id match!!!","spin id match!!!");
}
else{
echo "not a match!!!";
}
?>
the spin id "kw6426861" was the most recent winning id at the time i wrote this script, and so the check resolved to true and sent me a convenient notification email. awesome. now, to finish our project, we just need to regularly execute the php script with a cron job. if you're using your home server to host, you can just write a crontab entry using php -f /path/to/your/php/script.php and execute it at whatever interval you want.
if you are using hosting externally, most cpanels will offer a cron functionality. again, you just need to provide the command ("php -f" in this case), the path to your php script, and then your interval. i used " 0 */12 * * * " to check every 12 hours.
that's it! a very simple but powerful php script in just 14 lines of code!
feb 1, 2015 update: for those who don't have their own servers or can't be bothered to build their own spinid monitoring service, check out wheelnotify.com - for just $1/month, the service notify you via email, text, and/or phone if your spinid is ever a winner on wheel of fortune. awesome!
April 3, 2013 - Categories Utilities And Other Useful Things,IT/Software Projects
Categories: utilities and other useful things,it/software projects , be advised this post is quite old (03 apr 2013) and any code may be out of date. proceed with caution.
update feb 2017 i’ve happily used this todo app for the past ~4 years, but i’m taking it down with the rest of my old php hosting. in conjunction, i’ve removed the demo-related content from this post. for anyone interested, i’m now using wunderlist
short post, as this isn't really a tutorial. i was recently checking out todomvc to look at some javascript frameworks, and i really liked the to do list app...
i've been looking for something similar for awhile. looked at evernote and other apps, but nothing was as simple and lightweight as this app. only problem was that the items stored in the app didn't persist, as there was not database/storage behind the app. so i went ahead and wrote my own.
github repo
in my haste to modify the to do list app to save values, i skipped the part where i should have learned one of the new javascript frameworks highlighted on todomvc. i actually used the template provided in the todomvc package and used the asynchronous database call setup i outlined in a related post.
the bad news - this isn't a secure application, sql injection attacks will succeed here. also, some of the icons don't seem to work outside of chrome.
the good news - this application supports multiple clients via the use of a "poor man's pull." basically, if user a and user b are writing to dos in the app on two separate computers, they will see each other's notes in near real time. this is possible by using javascript to call the db query every x number of milliseconds. here's a code snippet if you're having a hard time understanding:
<script>
setinterval( function(){ querydb() }, 5000); //call the querydb() function every 5 seconds
</script>
<script type="text/javascript">
function querydb()
{
$.ajax({
type: "post",
url: "dbengine.php",
data: "keyword=read",
success: function(server_response)
{
$('#todo-list').html(server_response).show();
}
})
}
</script>
the app also works on mobile phones, which is great.
if you want to set up your own instance of this app, you can download the code from github. obviously you'll need your own hosting and a mysql database, but the rest should be pretty easy to figure out.
this isn't a fully finished product by any means, but i wanted to put it out there in case there's someone like me who needs a simple to-do list app.
March 26, 2013 - Categories Utilities And Other Useful Things
Categories: utilities and other useful things , be advised this post is quite old (26 mar 2013) and any code may be out of date. proceed with caution.
in a recent work project, we had to do some simple database calls to update records. i was going to do a simple form with a submit button, but decided checked in with one of my coworkers (who's a far better developer than i) to see what he thought. since we were developing a 'flashier' application, he pushed me to do it all asynchronously with jquery. i had a hard time finding some good examples at the time, so i decided to create some demos and do a write up.
before we start looking at the code, i need to mention two things. for this walk-through, we'll start with a simple php form and add in jquery components. if this doesn't interest you, feel free to skip down to the final section. second, if you want to follow my example to the letter, you'll need to setup a database (i'm using mysql) and add a table 'customer' with the following structure:
here's a quick script to create the table if you're feeling lazy:
create table `customer` (
`id` int(11) not null auto_increment,
`last_name` varchar(50) collate latin1_general_ci not null,
`first_name` varchar(50) collate latin1_general_ci not null,
`phone_number` varchar(10) collate latin1_general_ci not null,
`street_address` varchar(50) collate latin1_general_ci not null,
`city` varchar(50) collate latin1_general_ci not null,
`state` varchar(25) collate latin1_general_ci not null,
`zip` varchar(5) collate latin1_general_ci not null,
primary key (`id`)
) engine=myisam default charset=latin1 collate=latin1_general_ci auto_increment=19 ;
of course you can use a different database, different table name, columns etc., just keep that in mind as you write your code.
part 1 - simple php form and submit button
before we add anything new, let's just get a basic page working. this page will have a form with a text field input for each field in the database (except the id, since it auto-increments), and a submit button. the page will also have a simple table to show the records currently in the database. if you're totally new to php forms and mysql, check out the w3schools php tutorials on forms, $_get/$_post, insert and select.
<head>
<?php
$con=mysqli_connect("<hostname>","<username>","<password>","<database_name>");
// check connection
if (mysqli_connect_errno())
{
echo "failed to connect to mysql: " . mysqli_connect_error();
}
if (isset($_post["lastname"])) {
$sql="insert into customer (last_name, first_name, phone_number, street_address, city, state, zip) values ('$_post[lastname]', '$_post[firstname]', '$_post[phonenumber]', '$_post[address]', '$_post[city]', '$_post[state]', '$_post[zip]')";
if (!mysqli_query($con,$sql))
{
die('error: ' . mysqli_error());
}
echo "1 record added";
}
?>
<title>alex glover's portfolio site</title>
</head>
<body>
<h1>asynchronous database calls demo</h1>
<form action="asynchdatabasedemo.php" method="post">
last name: <input type="text" name="lastname"><br />
first name: <input type="text" name="firstname"><br />
phone: <input type="text" name="phonenumber"><br />
address: <input type="text" name="address"><br />
city: <input type="text" name="city"><br />
state: <input type="text" name="state"><br />
zip: <input type="text" name="zip"><br />
<button type="submit">submit</button>
</form>
<br />
<br />
<br />
<table>
<tr><th>last name</th><th>first name</th><th>phone number</th><th>address</th><th>city</th><th>state</th><th>zip</th></tr>
<?php
/* get the entire appgen table to fill out the table on the page */
$query = "select * from customer order by last_name desc;";
if($result = $con->query($query)) {
while ($row = $result->fetch_row()){
echo "<tr>";
echo "<td>" . $row[1] . "</td>";
echo "<td>" . $row[2] . "</td>";
echo "<td>" . $row[3] . "</td>";
echo "<td>" . $row[4] . "</td>";
echo "<td>" . $row[5] . "</td>";
echo "<td>" . $row[6] . "</td>";
echo "<td>" . $row[7] . "</td>";
echo "</tr>";
}
$result->close();
}
?>
</table>
</body>
</html>
so now we can insert new records, and see all the records in the table. this is all web development 101, but it's important that we've built a working foundation. this way if we have issues later we can narrow it down to javascript or database issues.
part 2 - introducing jquery and serialize
ok, we're going to take a small step. instead of using a button within a form to submit the page and all of the form values, we'll use javascript. conveniently, jquery has a serialize function we can use to grab all of the input values at once and format them in a convenient string. then we'll use an ajax call to submit that pre-formatted string to the server.
i haven't removed any of the original code, simply added one javascript function insert() and one anchor tag that will call the insert function. the insert() function will actually post the values back to the server, back to the very same page (see the url: "asynchdatabasedemo2.php" line). since our php is looking for post values, it will 'catch' them and insert them into the database. let's review the code:
<head>
<?php
$con=mysqli_connect("<hostname>","<username>","<password>","<database_name>");
// check connection
if (mysqli_connect_errno())
{
echo "failed to connect to mysql: " . mysqli_connect_error();
}
if (isset($_post["lastname"])) {
$sql="insert into customer (last_name, first_name, phone_number, street_address, city, state, zip) values ('$_post[lastname]', '$_post[firstname]', '$_post[phonenumber]', '$_post[address]', '$_post[city]', '$_post[state]', '$_post[zip]')";
if (!mysqli_query($con,$sql))
{
die('error: ' . mysqli_error());
}
echo "1 record added";
//mysqli_close($con);
}
?>
<title>alex glover's portfolio site</title>
<script src="http://code.jquery.com/jquery-1.9.1.js"></script>
<script type="text/javascript">
function insert()
{
var formvalues = $('form').serialize();
alert(formvalues);
$.ajax({
type: "post",
url: "asynchdatabasedemo2.php",
data: formvalues
})
}
</script>
</head>
<body>
<h1>asynchronous database calls demo</h1>
search:<input type="text" onkeydown="search()"><button type="submit"></button>
<br />
<br />
<br />
<form action="asynchdatabasedemo.php" method="post">
last name: <input type="text" name="lastname"><br />
first name: <input type="text" name="firstname"><br />
phone: <input type="text" name="phonenumber"><br />
address: <input type="text" name="address"><br />
city: <input type="text" name="city"><br />
state: <input type="text" name="state"><br />
zip: <input type="text" name="zip"><br />
<button type="submit">submit</button>
<a href="#" onclick="insert()">jquery insert</button>
</form>
<br />
<br />
<br />
<table>
<tr><th>last name</th><th>first name</th><th>phone number</th><th>address</th><th>city</th><th>state</th><th>zip</th></tr>
<?php
/* get the entire appgen table to fill out the table on the page */
$query = "select * from customer order by last_name desc;";
if($result = $con->query($query)) {
while ($row = $result->fetch_row()){
echo "<tr>";
echo "<td>" . $row[1] . "</td>";
echo "<td>" . $row[2] . "</td>";
echo "<td>" . $row[3] . "</td>";
echo "<td>" . $row[4] . "</td>";
echo "<td>" . $row[5] . "</td>";
echo "<td>" . $row[6] . "</td>";
echo "<td>" . $row[7] . "</td>";
echo "</tr>";
}
$result->close();
}
?>
</table>
</body>
</html>
simple right? the data is inserted, we see the alert that shows the serialized string... but the table doesn't show the new values. no worries, we just need to make the table operate asynchronously as well.
part 3 - asynchronous search results
this is a slightly more complicated step, so a couple quick notes before we get started:
javascript can't call the php directly to re-query the database; javascript is a client-side language, php is a server-side language. however, we can 'cheat' by using http post or get requests to act as a bridge between the two. to do this we need to create a separate php page to handle the searching, called "asynchdatabasedemo_dbengine.php". this page will echo table tags identical to our original table structure
we'll add a new javascript function, searchdb(), that will post to the php page dedicated to querying the database. then we'll add a search field that calls the searchdb() function. finally, we'll modify the insert() function to call the searchdb() function - that way the table will be refreshed as soon as the insert completes
the ajax call within the searchdb() function has an additional attribute, 'success' that will handle the server response by placing the html within the table tags (by referencing the id '#searchresults')
alright, hopefully that will make the code make a little more sense. let's look at the asynchdatabasedemo_dbengine.php file to start:
<?php
$con=mysqli_connect("<hostname>","<username>","<password>","<database_name>");
// check connection
if (mysqli_connect_errno())
{
echo "failed to connect to mysql: " . mysqli_connect_error();
}
if (isset($_post["keyword"]))
{
$keyword = $_post["keyword"];
$query = "select * from customer where last_name like '%$keyword%' order by last_name desc;";
if($result = $con->query($query))
{
echo "<tr><th>last name</th><th>first name</th><th>phone number</th><th>address</th><th>city</th><th>state</th><th>zip</th></tr>";
while ($row = $result->fetch_row()){
echo "<tr>";
echo "<td>" . $row[1] . "</td>";
echo "<td>" . $row[2] . "</td>";
echo "<td>" . $row[3] . "</td>";
echo "<td>" . $row[4] . "</td>";
echo "<td>" . $row[5] . "</td>";
echo "<td>" . $row[6] . "</td>";
echo "<td>" . $row[7] . "</td>";
echo "</tr>";
}
$result->close();
}
else
{
echo 'no results for :"'.$_post['keyword'].'"';
}
}
?>
and finally the aynchdatabasedemo_frontend.php code:
<head>
<?php
$con=mysqli_connect("<hostname>","<username>","<password>","<database_name>");
// check connection
if (mysqli_connect_errno())
{
echo "failed to connect to mysql: " . mysqli_connect_error();
}
if (isset($_post["lastname"])) {
$sql="insert into customer (last_name, first_name, phone_number, street_address, city, state, zip) values ('$_post[lastname]', '$_post[firstname]', '$_post[phonenumber]', '$_post[address]', '$_post[city]', '$_post[state]', '$_post[zip]')";
if (!mysqli_query($con,$sql))
{
die('error: ' . mysqli_error());
}
echo "1 record added";
//mysqli_close($con);
}
?>
<title>alex glover's portfolio site</title>
<script src="http://code.jquery.com/jquery-1.9.1.js"></script>
<script type="text/javascript">
function insert()
{
var formvalues = $('form').serialize();
alert(formvalues);
$.ajax({
type: "post",
url: "asynchdatabasedemo_frontend.php",
data: formvalues
})
querydb();
$(this).closest('form').find("input[type=text], textarea").val("");
}
</script>
<script type="text/javascript">
function querydb()
{
var keyword = $("#searchfield").val();
$.ajax({
type: "post",
url: "asynchdatabasedemo_dbengine.php",
data: "keyword=" + keyword,
success: function(server_response)
{
$('#searchresults').html(server_response).show();
}
})
}
</script>
</head>
<body>
<h1>asynchronous database calls demo</h1>
search:<input type="text" onkeydown="querydb()" id="searchfield"><a href="#" onclick="querydb()">search</a>
<br />
<br />
<br />
<form action="asynchdatabasedemo.php" method="post">
last name: <input type="text" name="lastname"><br />
first name: <input type="text" name="firstname"><br />
phone: <input type="text" name="phonenumber"><br />
address: <input type="text" name="address"><br />
city: <input type="text" name="city"><br />
state: <input type="text" name="state"><br />
zip: <input type="text" name="zip"><br />
<button type="submit">submit</button>
<a href="#" onclick="insert()">jquery insert</button>
</form>
<br />
<br />
<br />
<table id="searchresults">
<tr><th>last name</th><th>first name</th><th>phone number</th><th>address</th><th>city</th><th>state</th><th>zip</th></tr>
<?php
/* get the entire appgen table to fill out the table on the page */
$query = "select * from customer order by last_name desc;";
if($result = $con->query($query)) {
while ($row = $result->fetch_row()){
echo "<tr>";
echo "<td>" . $row[1] . "</td>";
echo "<td>" . $row[2] . "</td>";
echo "<td>" . $row[3] . "</td>";
echo "<td>" . $row[4] . "</td>";
echo "<td>" . $row[5] . "</td>";
echo "<td>" . $row[6] . "</td>";
echo "<td>" . $row[7] . "</td>";
echo "</tr>";
}
$result->close();
}
?>
</table>
</body>
</html>
done! this tutorial came out a little more scatter-brained than i had hoped, so feel free to comment/contact me if you have any questions. as always, i hope this helps.

March 10, 2013 - Categories How-to Guides
Categories: how-to guides , like all good things, my time on wordpress.com's hosting has come to an end. don't get me wrong - anyone toying with the idea for a blog should strongly consider it, as it's well-managed and does 90% of what any user needs it to do. it's a powerful tool for the uninitiated...
so as one of the 'initiated,' i had to go to my own hosting to take full control. for subscribers of my old site, you've been migrated (this is probably obvious since this post has been emailed to you) with the rest of the site. if you're just visiting the site, consider registering - it's free, hides all advertisements, and signs you up to receive future posts by email.
now, in the process of migrating to my own wordpress instance, i've learned a number of valuable things. and what's a better way to transition to a new site than to cover the lessons learned from the migration? i present to you, the 6 wordpress.com migration tips!
6 wordpress.com migration tips
now some of these tips are more generic, some are specific to migrating from wordpress.com hosting. i'm not going to cover the hosting setup or wordpress install, but leave a comment if you have questions related to those processes.
assuming you want to keep all of your pages/posts/images, your first step should be to do an export/import. on your wordpress.com site's dashboard, go to tools --> export
wordpress.com will present you with 2 options, a free xml export or a "guided transfer" for a whopping $129... just do the xml export. remember where you saved your xml export! next, go to your new wordpress instance dashboard and choose tools --> import. click on the wordpress option, and install the necessary plugin. then upload your xml file. the import should include all pages, posts, and even images/media.
now, that's all pretty useless, "wordpress-101" information. here's the important tip - if you do the import, and you seem to be missing pages/posts, try 2 things:
re-run the import - the wordpress import function is smart enough to skip any posts/pages that already exist based on permalink.
go to your "all posts" view and look for "deleted" posts. a good number of my posts were marked as deleted for some reason. then just select all of the posts that should not be deleted, and click restore!
like the stats, wp reader, and "freshly pressed" features that wordpress.com offers? not to fear - install jetpack! jetpack allows you to connect your stand-alone instance of wordpress back to the wordpress.com's admin panel, allowing you to continue using all of the functionality you've come to know and love. i was pretty psyched that i was still able to use the "views by country" feature after going to my own wp instance.
set up a subscription service. jetpack offers a form for readers to subscribe to your blog like when it was hosted at wordpress.com. alternatively, if you're looking for some additional control and features (or if you don't want to rely on wordpress.com), check out subscribe2. it's a no muss, no fuss plugin that allows users to subscribe to your blog with their email address. unlike the jetpack service, you can control which posts do and do not get pushed out to your subscribers. any user that is registered with your instance will also receive post notifications, which can come in handy if you're using a membership plugin.
if you're changing themes, try to decide on one before you spend time customizing widgets! oftentimes when you activate a new theme, your widgets will get deactivated. if you do change themes after customizing, don't re-create all of the widgets - they should be in the inactive widget area at the bottom of the widgets screen! i made the mistake of re-creating everything. the widget settings should still be saved, you just need to drag them into the sidebar to reactivate them.
if you've left wordpress.com so that you can start advertising on your blog, i strongly suggest you check out easy adsense. it allows you to easily inject google ads into posts, sidebars, and headers/footers. easy adsense also attempts to limit the number of ads on any given page to comply with google's policies. best of all, it's free!
this is a very broad statement, but start thinking more like a sysadmin - you're no longer operating in the safe sandbox of wordpress.com. when you're on your own hosting, you're fully capable of deleting your entire instance and all of your content (or otherwise royally screwing things up). start taking backups, make sure your domain name doesn't expire or get sold to another party, and keep your instance and plug-ins updated.
i hope some of these tips help you with your migration, and i hope you enjoy the new site.
February 18, 2013 - Categories IT/Software Projects,How-to Guides,Utilities And Other Useful Things
Categories: it/software projects,how-to guides,utilities and other useful things , i'm getting ready to start an arduino home automation project, so i started looking at ways to interface with an arduino across the internet. that way i'll be able to control all of the lights, locks, etc. anywhere i have internet access.
now, the obvious answer was to buy an ethernet shield, but i already run a home web server so that seemed unnecessary. i saw a few solutions using processing or python scripts, but that seemed unnecessarily complicated. it took a fair amount of digging and brainstorming, but i've found an ultra-easy, ultra-flexible, and ultra-fast solution. ultra.
there are a few major assumptions here.
you have a computer running a web server that is accessible from the open internet, using a static ip address or a dynamic dns name. your computer is either directly connected to your isp and using a public ip address or your router is set up for port forwarding. if you don't have this set up yet, just google it - there are a lot of tutorials that explain how to set up a home web server.
your home web server has php. if not, this will still work, you'll just have to re-write it in java or whatever server-side language you're using.
the arduino will be plugged into the web server via usb.
here's the basic concept: the arduino can't read files from the server via the usb serial connection, so the server will have to "push" the message. the server side code (php, java, whatever you choose) cannot talk directly to the serial com port, so we need a local script on the web server that can talk to the serial (usb) port. last, the arduino sketch has to be written so it can "catch" and process the message.
in this example, we'll just create a barebones web page for controls that will turn an led on and off via the arduino. let's start with the sketch. the sketch is just listening on the serial connection for a 1 or 0. if it receives a 1 it will turn the led on, if it receives a 0 it will turn the led off.
/*
alex glover
february 2013
*/
void setup() {
serial.begin(9600);
//set the led pin to output
pinmode(13, output);
}
void loop() {
//wait until the serial connection is open
while (serial.available() ==0);
//read from the serial connection; the - '0' is to cast the values as the int and not the ascii code
int val = serial.read() - '0';
//print to the console for testing
serial.println(val);
//if we've recieved a '1', turn on the led and print a message
if(val==1){
serial.println("received a 1");
digitalwrite(13, high);
}
//if we've recieved a '0', turn off the led and print a message
if(val==0){
serial.println("received a 0");
digitalwrite(13, low);
}
}
pretty straightforward, right? ok, now we need two scripts, one to send a '1' and one to send a '0'. in windows, simply create a text file (call it whatever you want), and give it a .bat extension. in my setup, my files are called serial_out_0.bat and serial_out_1.bat. each script has only one line of code.
echo 0 > com3:
and
echo 1 > com3:
note that you might have to change the com designation. you can check which com your arduino is connected to by looking in the arduino ide under tools --> serial port. if you're not using windows, you should be able to do this pretty easily in a shell script. at this point you can test to see if the batch scripts will turn the led off and on. also ensure that the web server will be able to execute these scripts (don't assign user-specific privileges or save them in protected directories). if you're unsure, just put these scripts in the same web root directory where you'll host your web page.
easy right? alright, the last piece is the web form. all you need are buttons within a form that will then execute the batch scripts we wrote earlier. easiest solution is to use 'submit' buttons and then check for which post variables are set. the rest of the code is very straightforward so i'll let it speak for itself.
<head>
<?php
if(isset($_post['submiton'])) {
exec(‘c:\xampp\htdocs\home_automation\serial_out_1.bat’);
}
else if(isset($_post['submitoff'])) {
exec(‘c:\xampp\htdocs\home_automation\serial_out_0.bat’);
}
?>
</head>
<body>
<form action=”control.php” method=”post”>
<input type=”submit” name=”submiton” value=”submit on”>
<input type=”submit” name=”submitoff” value=”submit off”>
</form>
</body>
</html>
you'll have to change the paths to correspond with the location of your scripts, but otherwise that's it. add some css if you want to add some polish to your controls. this is a very simple example, but you should be able to adapt this code to any project.
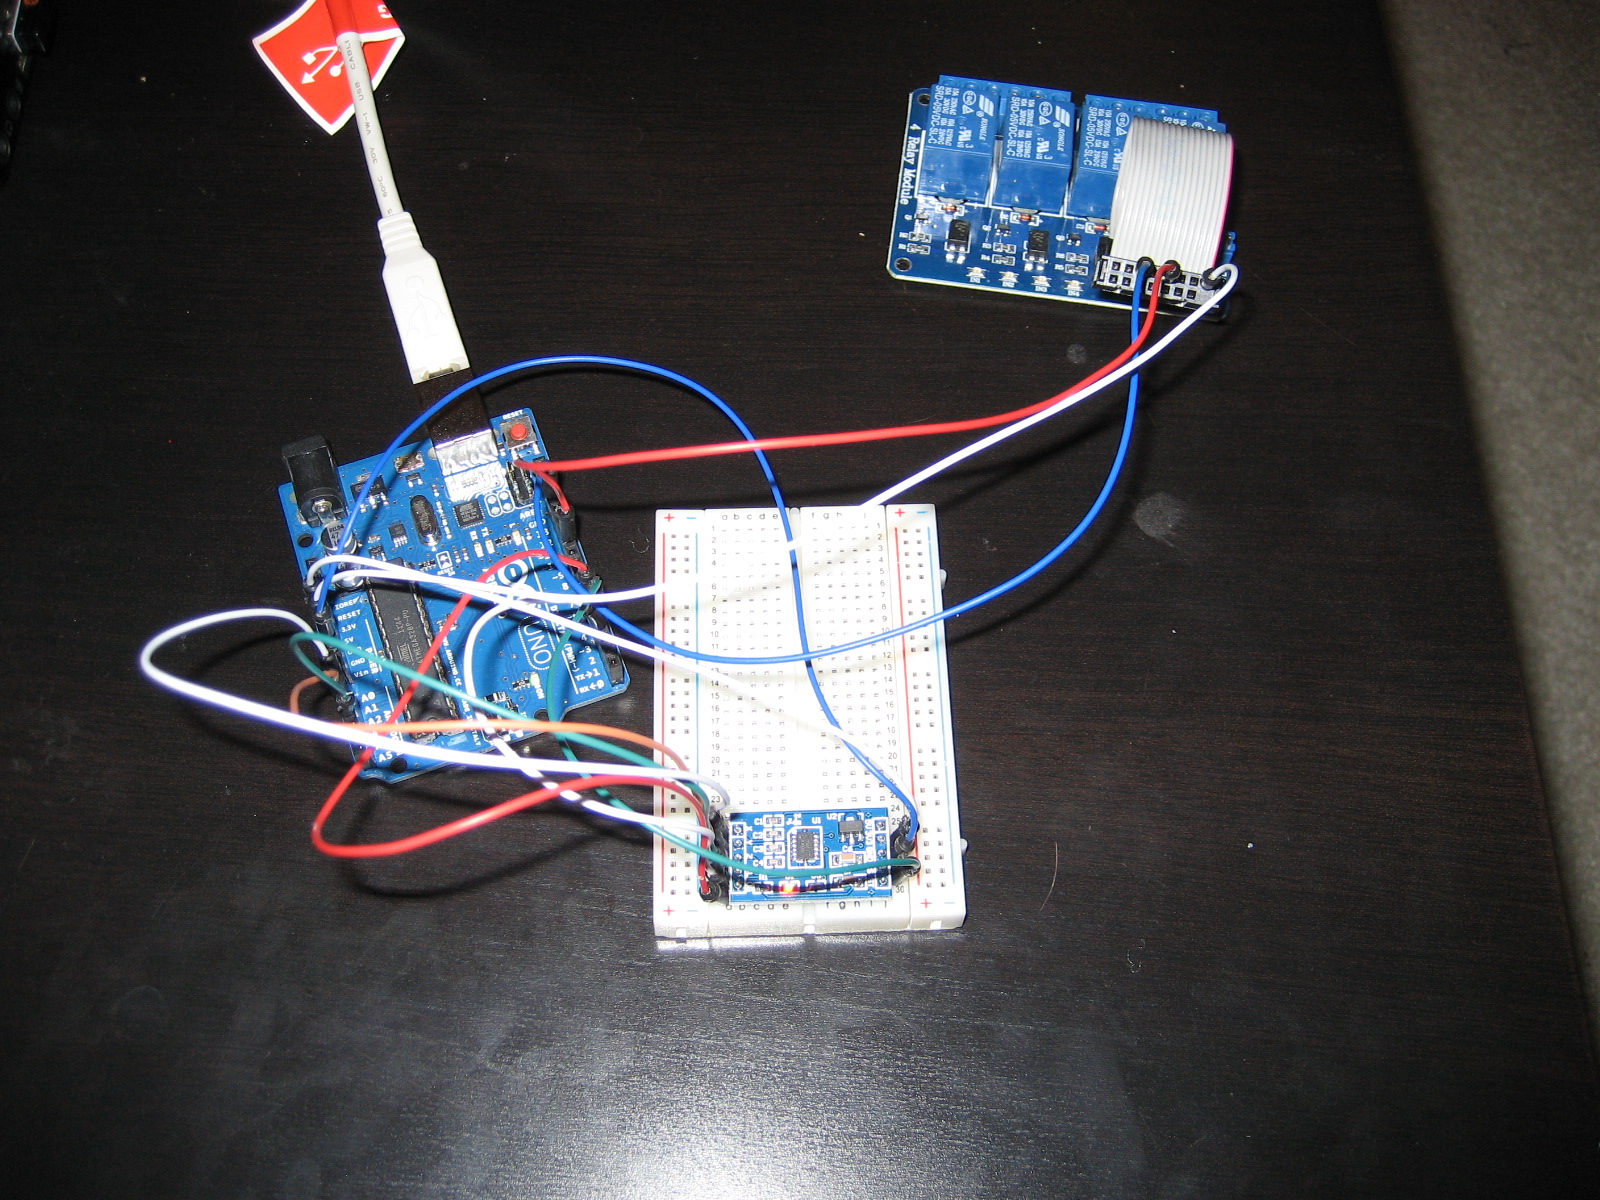
February 7, 2013 - Categories Electronics Projects,How-to Guides
Categories: electronics projects,how-to guides , this is my favorite arduino project to date. after some basic experimenting with an accelerometer, i had an idea. what if you used the accelerometer to look for a combination of movements? instead of using a combination lock or a traditional key lock, you could just tilt the object in a set pattern to unlock it. here's what i ended up with:
pretty sweet if you ask me.
note - in spite of my terrible, coffee-fueled, shakey-handed videography, a lot of this post will be in video form.
now this post is based on my acclerometer primer, so if you're following along and want to build one of these for yourself you should go back and build the primer.
parts used (beyond what was used in the primer)
amico dc 12v open frame type solenoid for electric door lock
sainsmart 4-channel 5v relay module (any 5v relay will work, we won't use all 4 channels)
12v power supply (you can use a battery or wall adapter)
some sort of box/container - something larger than 4in x 4in x 4in, otherwise you may have trouble getting all of the components in
phase 1 - adapting the primer to recognize a combination
before we try to add any new hardware, let's modify the accelerometer primer code to look for a pattern of movements. we've already got the mechanism for recognizing simple single movements, so all we need is to add some code to track multiple movements relative to each other. i just added a new integer variable called "currentmove." currentmove will get incremented each time a correct move in the sequence is made. to thwart people from just shaking the box or trying random patterns, each incorrect move will reset currentmove to 1. let's see it in action:
here's my code:
/*####################################################################
tilt to unlock
alex glover
february 2013
combination to unlock box is y+ (left), x+ (forward), y+ (left), x- (back), y+ (forward)
based on autocalibration.ino, provided by virtuabotix
#######################################################################*/
#include "accelerometer.h"</code>
accelerometer myaccelerometer = accelerometer();
int ypospin = 11;
int ynegpin = 13;
int xpospin = 10;
int xnegpin = 9;
int zpin = 12;
int currentmove = 1;
int resettrigger = 0;
void setup()
{
serial.begin(9600);
//connect up the following pins and your power rail
// sl gs 0g x y z
myaccelerometer.begin(3, 4, 5, a0, a1, a2);
pinmode(ypospin, output);
pinmode(ynegpin, output);
pinmode(xpospin, output);
pinmode(xnegpin, output);
pinmode(zpin, output);
//calibration performed below
serial.println("please place the accelerometer on a flatnlevel surface");
delay(2000);//give user 2 seconds to comply
myaccelerometer.calibrate();
}
void loop()
{
delay(20);//delay for readability
resettrigger++; //increment the reset trigger
myaccelerometer.read();
if(myaccelerometer._zgs <= -0.9){ digitalwrite(zpin, high); } else if(myaccelerometer._zgs > -0.9){
digitalwrite(zpin, low);
}
if(myaccelerometer._xgs >= 0.5){
digitalwrite(xpospin, high);
if(currentmove==2){
serial.println("second move successful");
currentmove++;
delay(1000);
}
else if(currentmove==5){
serial.println("fifth move successful - opening");
currentmove++;
delay(1000);
}
else{
serial.println("wrong move!");
currentmove=1;
}
}
else if(myaccelerometer._xgs < 0.5){
digitalwrite(xpospin, low);
}
if(myaccelerometer._xgs <= -0.5){
digitalwrite(xnegpin, high);
if(currentmove==4){
serial.println("fourth move successful");
currentmove++;
delay(1000);
}
else{
serial.println("wrong move!");
currentmove=1;
}
}
else if(myaccelerometer._xgs > -0.5){
digitalwrite(xnegpin, low);
}
if(myaccelerometer._ygs >= 0.5){
digitalwrite(ypospin, high);
if(currentmove==1){
serial.println("first move successful");
currentmove++;
delay(1000);
}
else if(currentmove==3){
serial.println("third move successful");
currentmove++;
delay(1000);
}
else{
serial.println("wrong move!");
currentmove=1;
}
}
else if(myaccelerometer._ygs < 0.5){
digitalwrite(ypospin, low);
}
if(myaccelerometer._ygs <= -0.5){
digitalwrite(ynegpin, high);
serial.println("wrong move!");
currentmove=1;
} else if(myaccelerometer._ygs > -0.5){
digitalwrite(ynegpin, low);
}
if(resettrigger==3000){ //do this every minute (3000 iterations * 0.02 seconds = 60 seconds)
currentmove=1; //reset currentmove back to 1, so user can try to do the sequence again
resettrigger=0; //set the resettrigger back to 0 so it can start another iteration to 3000
}
}
perfect! now we can recognize a combination of movements. now all we need to do is something meaningful when the combination is recognized.
phase 2 - incorporating the cigar box, relay, and 12v door latch
time for the hardware. now, at this point we should be pretty confident in our code (we are confident in our code, right?) so we can get rid of the leds and all of the associated jumper wires. next, switch your virtuabotix accelerometer from using the 5v power from the arduino to using the 3.3v power from the arduino (you'll need to change the connection at both ends, since the accelerometer has connections for both). we need to switch to 3.3v because our relay is going to use the 5v power from the arduino. that being said, connect the 5v power to the vcc pin on the relay and also connect the ground from your arduino to the relay. next, choose one of the digital pins from your arduino (doesn't matter which) and connect it to the relay control connections - this pin will control the opening and closing of your relay circuit. in my case, i had to use a ribbon cable as an adapter between the male pins on the relay and the male jumper wires. in the picture below, i've removed all of the leds and connected the relay (white wire is 5v power to relay, blue is ground, and red wire connects pin 10 to the 3rd relay control).
now might be a good time to mount your 12v door latch. once mounted, take the ground wire from the door latch and solder/connect it directly to the ground of your 12v power supply. next, take the voltage-in wire from the door latch and connect it to the middle 'port' of one of your relays. this middle port is the 'common' connection, and it is always connected to the circuit. the other two 'ports' are normally open (no) and normally closed (nc). normally open means that the circuit is open (no current flowing through) when the relay is not powered; once the relay is powered by the 5v connection from the arduino, the circuit closes and current flows through. the normally closed port is the opposite - current is flowing through until the relay gets a 5v signal, at which point it breaks (opens) the circuit. in our case, we want to connect the positive wire from the 12v power supply to the normally open contact. here's a quick diagram to help:
we've just covered a lot so here's a quick recap video to bring it all together:
alright, if you've managed to get all of the hardware put together, all you need is a little more code to interact with the relay and door latch. here's my code:
/*####################################################################
tilttounlock
alex glover
february 2013
combination to unlock box is y+ (left), x+ (forward), y+ (left), x- (back), y+ (forward)
based on autocalibration.ino, provided by virtuabotix
#######################################################################*/
#include "accelerometer.h"
accelerometer myaccelerometer = accelerometer();
/*int ypospin = 11;
int ynegpin = 13;
int xpospin = 10;
int xnegpin = 9;
int zpin = 12;
we don't need any of these pins anymore, as we're not using leds*/
int currentmove = 1;
int resettrigger = 0;
int relaypin = 10;
void setup()
{
serial.begin(9600);
//connect up the following pins and your power rail
// sl gs 0g x y z
myaccelerometer.begin(3, 4, 5, a0, a1, a2);
/*pinmode(ypospin, output);
pinmode(ynegpin, output);
pinmode(xpospin, output);
pinmode(xnegpin, output);
pinmode(zpin, output);
we don't need any of these pins anymore, as we're not using leds*/
pinmode(relaypin, output);//set the pin that will control the relay in output mode
digitalwrite(relaypin, high);//write a high voltage signal to the relay on startup - this will break the circuit
//calibration performed below
serial.println("please place the accelerometer on a flatnlevel surface");
delay(2000);//give user 2 seconds to comply
serial.println("calibration complete");
myaccelerometer.calibrate();
}
void loop()
{
delay(20);//delay for readability
resettrigger++; //increment the reset trigger
myaccelerometer.read();
if(myaccelerometer._zgs -0.9){
//digitalwrite(zpin, low);
}
if(myaccelerometer._xgs >= 0.5){
//digitalwrite(xpospin, high);
if(currentmove==2){
serial.println("second move successful");
currentmove++;
delay(1000);
}
else if(currentmove==5){
serial.println("fifth move successful - opening");
currentmove=1;
digitalwrite(relaypin, low);
delay(2000);
digitalwrite(relaypin, high);
delay(1000);
}
else{
serial.println("wrong move!");
currentmove=1;
}
}
else if(myaccelerometer._xgs < 0.5){
//digitalwrite(xpospin, low);
}
if(myaccelerometer._xgs -0.5){
//digitalwrite(xnegpin, low);
}
if(myaccelerometer._ygs >= 0.5){
//digitalwrite(ypospin, high);
if(currentmove==1){
serial.println("first move successful");
currentmove++;
delay(1000);
}
else if(currentmove==3){
serial.println("third move successful");
currentmove++;
delay(1000);
}
else{
serial.println("wrong move!");
currentmove=1;
}
}
else if(myaccelerometer._ygs < 0.5){
//digitalwrite(ypospin, low);
}
if(myaccelerometer._ygs -0.5){
//digitalwrite(ynegpin, low);
}
if(resettrigger==3000){ //do this every minute (3000 iterations * 0.02 seconds = 60 seconds)
currentmove=1; //reset currentmove back to 1, so user can try to do the sequence again
resettrigger=0; //set the resettrigger back to 0 so it can start another iteration to 3000
}
}
awesome. one thing i almost forgot to mention - the 12v door latch needs something to latch on. you may have to get creative with this part, depending on what kind of box you are using. in my case, the cigar box lid actually slid off (rather than opening on hinges) so all i had to do was carve a notch into the lid for the latch to catch on.
now when i slide the lid of the box again, it pushes the latch down until it lines up with the notch and then *click*, it latches and locks the box closed.
whew. long write-up. if i missed anything or if you have any questions, feel free to comment and i'll be happy to help!
update: by connecting both the arduino and the door latch to the ground and power rails on the breadboard, i was able to do away with the 9v battery altogether. now you don't have to worry about the battery dying and the box being locked forever.

January 28, 2013 - Categories IT/Software Projects,Utilities And Other Useful Things
Categories: it/software projects,utilities and other useful things , ok - i've been spending the last few hours getting acquainted with the wordpress backend (that sounds more risque than i had intended) and making my first custom 'child' theme.
if you have an interest in making custom themes and you're just getting started, i've got a few very generic tips:
don't underestimate how complex some of the themes and frameworks can be
start by creating a child theme or modifying an existing theme
check out this tutorial on presscoders
the tutorial on presscoders is very clear, so i won't re-invent the wheel and write a tutorial on making child themes. instead, i wanted to share the child theme that i made. basically, i've taken the twenty eleven theme and replaced the static header image with a dynamic image slider (using galleria). here's a quick screenshot:
anyways, as simple as it is, i've learned a lot from the exercise. if you want to use the theme or take a look at the code, check out the github repo.
github repo
thanks for reading.
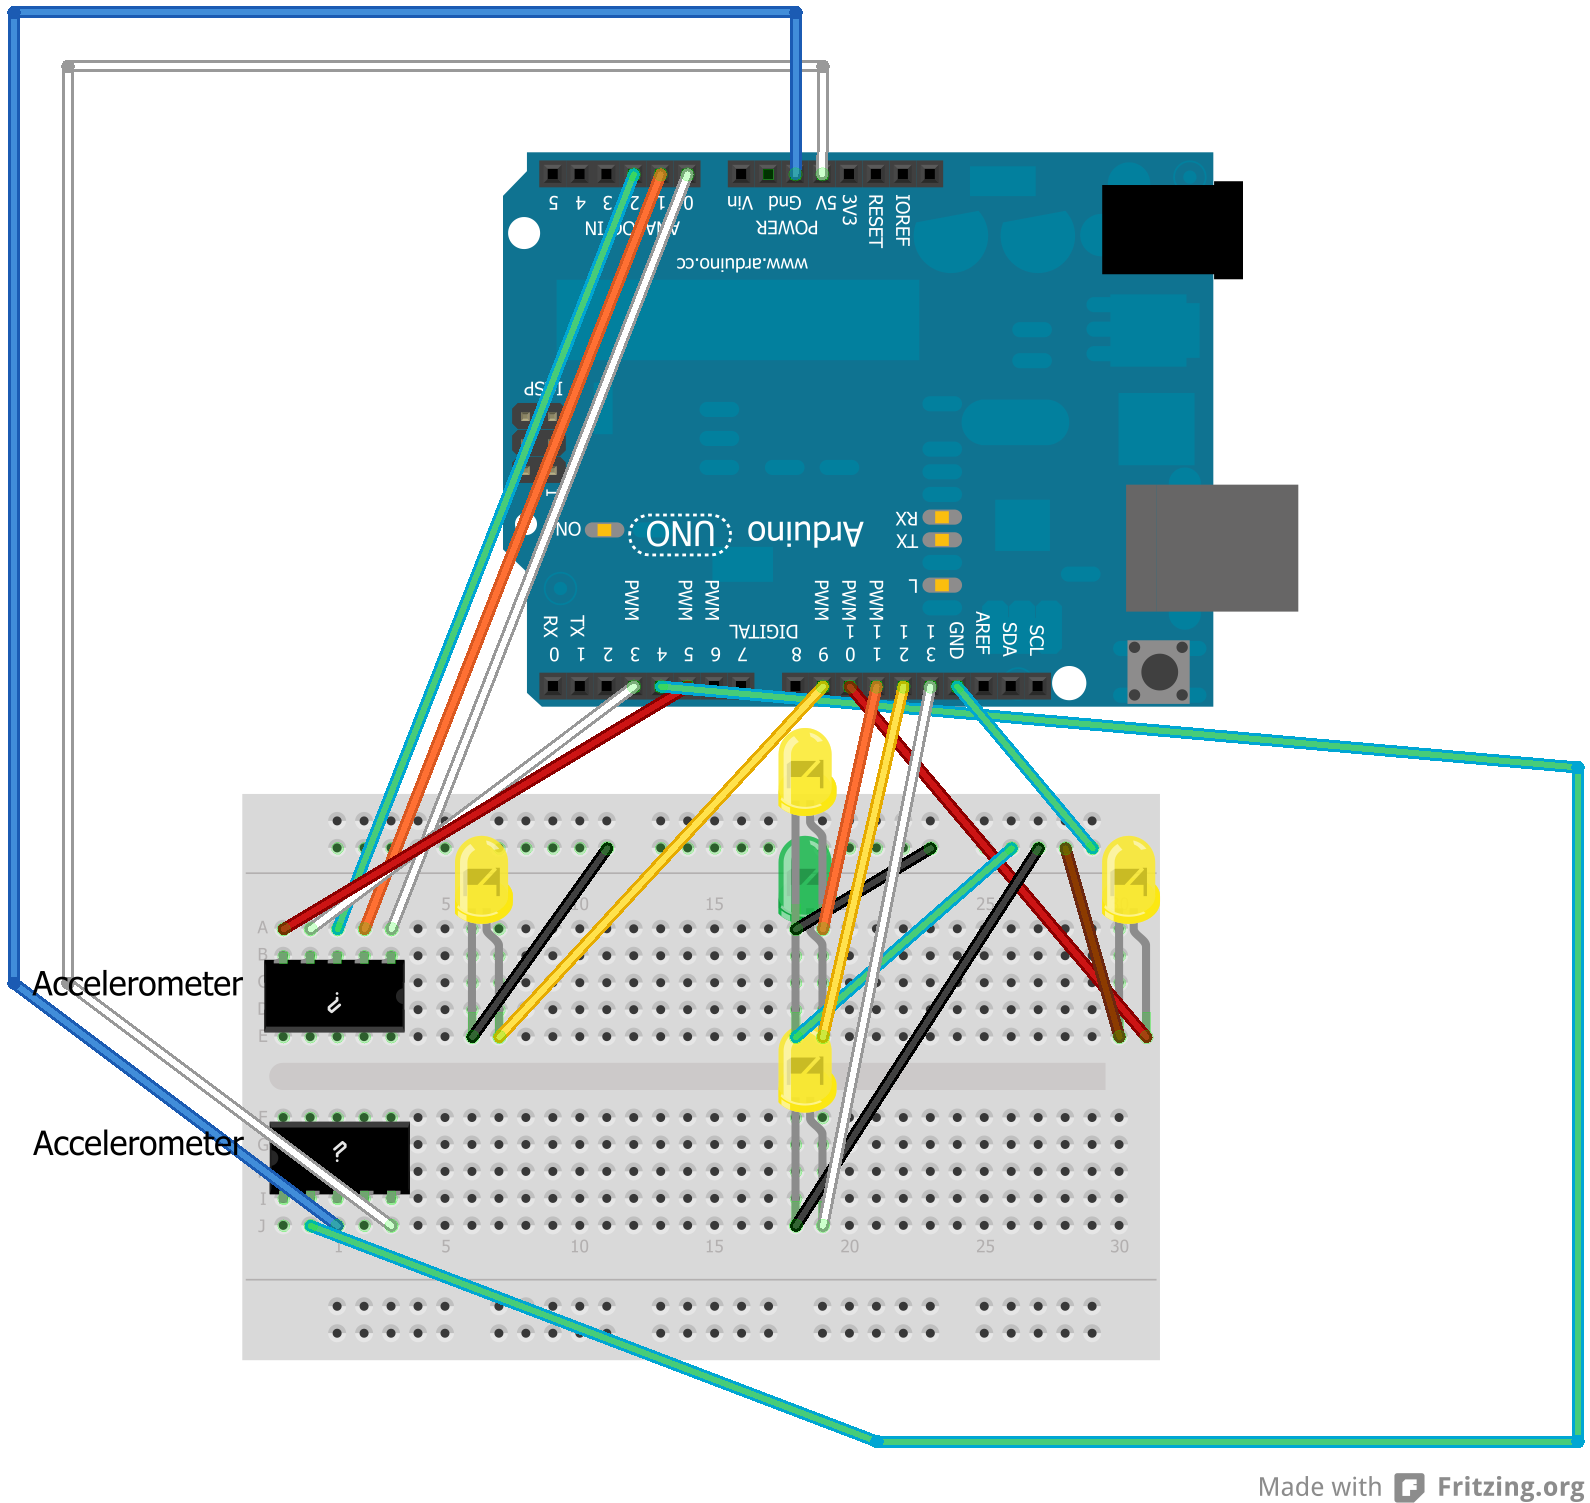
January 21, 2013 - Categories Electronics Projects,IT/Software Projects,How-to Guides
Categories: electronics projects,it/software projects,how-to guides , this project is more of a warm-up than a full-blown project. i wanted to get a feel for the basic workings of an accelerometer in preparation for a larger undertaking (no spoilers!). i borrowed this project idea from a forum about arduino and accelerometers but can't remember which forum, so i can't credit back to the original poster - sorry about that.
before we get to the how, let's take a look at the what. basically we have an accelerometer and 5 leds mounted on a breadboard. four of the leds are mounted to correspond with the x and y accelerometer axes and one led is in the middle. when the accelerometer is level, only the middle led is illuminated. if you tilt the accelerometer to the side, the led on that side is illuminated.
remember the accelerometer measures force, not tilt - we can demonstrate this by quickly moving the accelerometer to one side, creating lateral force. the led on the opposite side relative to the direction we move the board will illuminate - that is, if we move the board to the left, the led on the right will illuminate.
let's move on to the how. here are the parts i used:
virtuabotix mma7361 three axis accelerometer module - $10
arduino uno r3 - $26
400-point breadboard with jumper wires - $9
5mm leds with resistors (5 colors, pack of 25) - $7
total project cost of $52, plus you'll have some leftover jumper wires and leds.
since this is just a simple primer, i won't go into great detail. basically we need to wire up the accelerometer as outlined in the arduino sketch and we need to wire up each led to an output pin and ground. if you need help with the wiring, here's a rough diagram. note - fritzing didn't include a piece that was identical to my accelerometer, so i used two 5 pin components - they represent one piece. also, the wire colors don't have any logical meaning, they match my real-world build.
here's what it looks like up close.
here are a couple more angles of the wiring:
as far as the programming goes, i started with the example on this page of the virtuabotix wiki. here's the my finished sktech:
/*####################################################################
accelerometerprimer
alex glover
january 2013
based on autocalibration.ino, provided by virtuabotix
#######################################################################*/
#include "accelerometer.h"
accelerometer myaccelerometer = accelerometer();
int ypospin = 11;
int ynegpin = 13;
int xpospin = 10;
int xnegpin = 9;
int zpin = 12;
void setup()
{
serial.begin(9600);
//connect up the following pins and your power rail
// sl gs 0g x y z
myaccelerometer.begin(3, 4, 5, a0, a1, a2);
pinmode(ypospin, output);
pinmode(ynegpin, output);
pinmode(xpospin, output);
pinmode(xnegpin, output);
pinmode(zpin, output);
//calibration performed below
serial.println("please place the accelerometer on a flatnlevel surface");
delay(2000);//give user 2 seconds to comply
myaccelerometer.calibrate();
}
void loop()
{
delay(20);//delay for readability
myaccelerometer.read();
if(myaccelerometer._zgs <= -0.9){ digitalwrite(zpin, high); } else if(myaccelerometer._zgs > -0.9){
digitalwrite(zpin, low);
}
if(myaccelerometer._xgs >= 0.5){
digitalwrite(xpospin, high);
}
else if(myaccelerometer._xgs < 0.5){
digitalwrite(xpospin, low);
}
if(myaccelerometer._xgs <= -0.5){ digitalwrite(xnegpin, high); } else if(myaccelerometer._xgs > -0.5){
digitalwrite(xnegpin, low);
}
if(myaccelerometer._ygs >= 0.5){
digitalwrite(ypospin, high);
}
else if(myaccelerometer._ygs < 0.5){
digitalwrite(ypospin, low);
}
if(myaccelerometer._ygs <= -0.5){
digitalwrite(ynegpin, high);
}
else if(myaccelerometer._ygs > -0.5){
digitalwrite(ynegpin, low);
}
}
you can adjust the values to increase/decrease sensitivity. hope you enjoyed the post, and i hope this helps you jumpstart your project with your accelerometer!
January 14, 2013 - Categories How-to Guides,Utilities And Other Useful Things
Categories: how-to guides,utilities and other useful things , ok, so you have a netbook or ultrabook with no optical drive. or maybe your optical drive is dead. or maybe you're smart enough to not use optical drives in general. whatever the situation is, you want to run or install something from a bootable usb drive.
there are lots of solutions out there, but nothing beats the universal netboot installer, or unetbootin. unetbootin has a simple gui and never gives any grief. you can use your own iso that you've downloaded or use one of the 42 isos unetbootin provides, including backtrack, centos, ubuntu, as well as several rescue and recovery utilities.
using unetbootin is stupid easy. grab a usb flash drive with enough storage to hold your iso. better yet - pick up a 16gb flash drive for $10 and it will be big enough to hold any iso you could ever want. got your usb flash drive? let's get started.
plug your usb flash drive into your computer. note the drive assignment; in windows, it will probably be d: or e:, or some other letter. for the unix users, your drive designation will probably be sda, sdb, sdc... sdx. remember the drive assignment.
go to unetbootin's page and download the correct version for your os.
if you have a particular iso you want to use, download it. otherwise if you want to use one of the included isos, skip this step.
open unetbootin. if you want to use one of the isos they provide, check the "distribution" radio button and choose an iso from the dropdown
if you want to use your own iso, click the "diskimage" radio button, click the browse button " ... " and find your iso that you downloaded.
change the drive to correspond with your usb flash drive. if you can't find your drive, make sure it's mounted and then restart unetbootin.
click ok. if you chose a distribution provided by unetbootin, it will take a fair amount of time to download the iso before it can write to your usb drive. this is normal.
once the usb has been formatted and the iso written to it, unetbootin will restart your computer in an attempt to boot from the usb drive. if it doesn't work, go into your bios settings and try changing the boot order.
donezo. hope you found this useful.

January 9, 2013 - Categories Electronics Projects,How-to Guides
Categories: electronics projects,how-to guides , alright, if you're following along from part 1, you should have your headphones/speakers as well as your ultrasonic rangefinder wired up and operational. next we have to write the code to marry these two devices.
the code
/*
alex glover
copyright december 2012
the audible eye - handheld device that utilizes an ultrasonic rangefinder to determine distance to whatever object the device is pointed at.
feedback will be delivered to operator via sound - tone will increase pitch for shorter distances, no tones played for extreme distances.
credit to:
yourduino sketch ultrasonic serial 1.0
terry@yourduino.com
uses: ultrasonic library (copy to arduino library folder)
http://iteadstudio.com/store/images/produce/sensor/hcsr04/ultrasonic.rar
*/
/* libraries */
#include "ultrasonic.h"
/* pin assignments */
//pin designated for controlling the emission of ultrasonic 'pings'
#define trig_pin 2
//pin designated to 'listen' for ultrasonic 'pings'
#define echo_pin 7
//pin used to drive the audio output through the headphones
#define sound_pin 12
/* declare objects */
//create an object of type 'ultrasonic' and call it 'sensor,' passing the trig pin and echo pin numbers into the constructor
ultrasonic sensor(trig_pin, echo_pin);
/*-----( declare variables )-----*/
//variable to hold the tone value; this value will be calculated first, and then passed to the tone() function
int tonetoplay=0;
void setup()
{
serial.begin(9600);
//pring the following text to the serial monitor
serial.println("the audible eye");
serial.println("alexdglover.wordpress.com alexdglover@gmail.com");
}
void loop()
{
delay(200); //20 millisend delay to let echos from room dissipate
//the sensor occasionally returns 0 incorrectly. 0 would also give us a divide by zero error in the next line of code. to address these issues
//we use this simple if statement. basically, if a 0 is returned, we play no tones through the headphones.
if (sensor.ranging(inc) != 0){
//calculating the tone to play as 1000 hertz divided by the number of inches. so if the device is one inch away from an obstacle, we play
//a 1000 hertz tone. if the device is 10 inches away, it plays a 100 hertz tone. anything greater than 20 inches reduces the tone to almost inaudible.
tonetoplay=(1000/sensor.ranging(inc));
}
else{
tonetoplay=(0);
}
//here we take whatever value tonetoplay was calculated at and pass it into the tone() function. the parameter of 200 is the number of milliseconds to play
//the tone. the loop takes about 200 milliseconds in total, so if the loop hangs or crashes, the tone won't keep getting played indefinitely.
tone(sound_pin,tonetoplay, 200);
}
upload that sketch to your arduino and test. if all's well, you should be hearing various tones coming out of your headphones depending on what's in front of your rangefinder.
the finishing touches
now at this point, you could declare this project a success. the device works as intended. however, i wanted to give this project a few finishing touches that i usually skip over, so let's put it all inside an enclosure, make it portable (i.e. battery powered), and throw on a badass toggle switch for the fun of it.
first, let's wire up the toggle switch. take one of your 9v battery adapters and cut both wires about halfway between the battery clip and the male adapter. now take the battery clip side and strip the wires. connect the red wire to the voltage-in connection on the switch and the black wire to the ground. now take the male adapter piece and strip the wires. connect the red wire to the voltage-out connection on the switch and connect the black wire to the same ground connection on the switch we used before. my wiring is quite ugly, but you should get something that looks like this:
now for the enclosure. i was having a hard time finding a legitimate project enclosure of the right size, so i just used an old cardboard box. cut out a small rectangle for the the rangefinder to protrude from at the front of your device. on a different side, cut out another hole (size will depend on what size of toggle switch you use). once you have your holes cut, start installing your components. for my enclosure, i installed everything but the arduino on one 'level' and used some packing foam to wedge things into place.
then i installed the arduino and connected the power adapter, leaving the headphones outside of the box as i closed the lid. here's a final closeup:
that's it, hope you enjoyed the post!

January 7, 2013 - Categories Electronics Projects,How-to Guides
Categories: electronics projects,how-to guides , the audible eye is a short proof-of-concept project that i came up with while looking for ways to experiment with some new gear. the idea of combining an ultrasonic rangefinder and some sort of signaling audio output jumped out to me - it would give you a depth perception, not unlike echo location that bats and dolphins use. as far as practical use, i believe it could be used by the visually impaired as a complement to a white cane, but not as a replacement.
basically, the tone/pitch of the audio signal would get higher as the operator moves closer to a wall or object, indicating to the operator that they are getting closer. similarly, as the operator moves away from the wall the tone will drop until it's almost inaudible.
let me provide some context to make this more clear. let's imagine our operator is blindfolded. if the operator pointed the device down an empty hallway for example, they would hear almost no tone, telling them it's safe to walk forward. as they approached a wall, the tone would increase. the operator would then scan around them with the device, find another path that was unobstructed, and could continue walking.
this video is all but unwatchable (quality is impressively bad), but it will at least give you an idea of how it works. and of course i disassembled the project before i realized the video was botched.
alright, let's open up the enclosure and start breaking down the project. the entire project can be broken down into just a few components. here's a view inside of the enclosure.
component list:
arduino uno
hc-sr04 ultrasonic rangefinder
breadboard and jumper wires
9v battery adapter
3 pin toggle switch
9v battery (stop putting it on your tongue)
headphones (or any other audio output device)
building the project can be broken down into phases. let's focus on the ultrasonic rangefinder first, and build from there.
setting up the ultrasonic rangefinder
there are 4 pins on the hc-sr04 ultrasonic sensor module: voltage in (labeled "vcc" on my module), ground, trig, and echo. the trig pin will control the transmission of ultrasound. the echo pin will be the receiver pin. use your jumper wires to connect the ground on the module to the ground on the arduino (red wire near the top of the above picture) and connect the voltage in pin to the +5v pin on the arduion (white wire near the top of the above picture). next, use jumper wires to connect the trig and echo pins to two of the digital pins on the arduino. these will be the numbered pins on the arduino that do not have the tilde (~) prefix. in my build, i used pin 2 for the trig connection and pin 7 for the echo connection. here's a better picture:
ok we're all wired up! there are several libraries for interacting with ultrasonic rangefinders. the one i used is probably out of date, but you can download it here.
note: if you're having issues with this library, edit ultrasonic.cpp and ultrasonic.h. replace this line:
#include "wprogram.h"
with this:
#include "arduino.h"
once you've downloaded it, add the entire directory (should contain ultrasonic.h, ultrasonic.cpp, keywords.txt, and an examples directory) to your arduino's libraries directory. i'm being lazy and have the arduino install on my desktop, so my library directory is here:
c:\users\alex\desktop\arduino-1.0.1\libraries\
once that's done, open up the arduino ide. click on the "sketch" dropdown menu, click "import library" and verify that ultrasonic is a listed library. if it's there, you're in good shape.
visit http://arduino-info.wikispaces.com/ultrasonicdistance and check out the arduino sketch provided there. edit the trig_pin and echo_pin variables to coincide with the pins you used (remember i used 2 and 7 in my case). connect your arduino via usb and upload the sketch. finally, open the serial monitor (tools dropdown --> serial monitor). you should see readings in inches and centimeters being reported back to the serial monitor.
awesome - this is our first building block.
setting up the audio output
this step is super easy, unless you're me and you waste an hour getting stereo wires confused. if you're using a piezo-electric piece or a simple mono-speaker or headphones, there should be only 2 wires - a voltage in and a ground. simple. now, the scrap headphones i had were stereo headphones, which threw me off. if you have a stereo device, you'll likely have 2 separate insulated sections with 2 types of wiring each. in each insulated wire is one plain copper wire and one painted wire. the copper wires are both grounds and the painted wires are the right and left voltage-in connections. since we're just doing simple mono output, go ahead and twist the two copper wires together and twist the two painted wires together. next, connect the copper ground wires to one of the grounds on the arduino. for the voltage-in wires, connect them to one of the pwm pins on the arduino (i used pin 11). here's a closeup of the headphone wiring:
now to test! conveniently, the arduino ide (at least version 1.01) includes a few audio output sketches. go to file --> examples -->2. digial --> tone melody. search the sketch for the tone() function - change the pin number in each of these functions to coincide with the pin you connected your headphones/speaker to. now upload the sketch to your arduino - if everything is working, you should hear some the melody of "shave and a haircut, two bits."
awesome - now we have two of our building blocks completed.
cliffhanger! in part 2, we'll wire up the toggle switch and battery, as well as write the code to combine the rangefinder and the headphones to complete "the audible eye."
December 5, 2012 - Categories How-to Guides,Utilities And Other Useful Things
Categories: how-to guides,utilities and other useful things , for many folks whose motherboards don't support raid or just want a simple, easy to implement raid solution, software raid is often the best solution. in windows 7, microsoft finally got around to providing out-of-the-box software raid capabilities (apparently you could do it in windows xp, but not without some real leg work). only problem is microsoft didn't include a notification or alarm mechanism to deal with disk failures. the only notification is a passive entry in the event log, which is not obvious for basic users and not really convenient for anyone. this effectively defeats the purpose of raid as a mechanism for data redundancy, as your disks could fail one by one until all of your data was unrecoverable, and you as the user wouldn't realize until it was too late.
fortunately there are several free disk monitoring applications that can fill this void microsoft left for us. i've chosen diskcheckup for one important reason - it has the ability to send email notifications when there's an issue (what good is a desktop alert, if you're not on your desktop?). diskcheckup uses the s.m.a.r.t values from your hard drives to look for potential issues and notifies you if they exceed pre-set thresholds. downloading and installing diskcheckup is quite easy, but there are a few important configuration steps i wanted to highlight:
after installing, open diskcheckup. note - by default, it doesn't start the application after installation or after a reboot. something to keep in mind if you want it running all the time
click configuration in the bottom left
choose the send e-mail notification radio button and click settings
enter the email address where you want notifications sent in the top right and click add. for outgoing mail server settings, use your isps smtp relay information. for example, here's a good list of time warner cable smtp relay servers. with a little bit of googling, you should be able to find your relay. with my isps smtp relay, i do not have to provide credentials. also note, this screen allows you to specify a port - don't bother trying to use smtp relays with tls enforced, diskcheckup doesn't support it. you can also optionally add a "from" address if you want, although that may cause issues with your smtp relay.
that's it - fire off a test email to make sure it works, and click ok! an email will be sent if any of the s.m.a.r.t. values or the temperature exceeds their respective thresholds. you now have a vigilant application looking after your hard drives!
November 28, 2012 - Categories Utilities And Other Useful Things
Categories: utilities and other useful things , i had initially set out to build my own custom store locator (just for the learning experience) and post a how-to article for it. i quickly found that this has been done many times before, and google has a very good tutorial if you want to build your own.
but what if you don't have a database behind your website? what if you don't have any it staff to support a custom store locator? what if you need an easy solution?
check out batchgeo, a free (with ads) hosted store locator service. all you need is a spreadsheet of your locations that you want to map and whatever secondary information you want to display. batchgeo takes care of mapping the addresses, so you don't have to determine the latitude and longitude values for each address (like in the google tutorial). you can also group your locations arbitrarily, such as by location type by simply adding another column of data.
once you supply your information and click "map now," the map will be generated for you to preview. if all is well, just click save & continue. you'll be asked to provide an email address and some basic information about the map you generated, including whether you want it to be public or unlisted. then just click save map.
finally, batchgeo will email you the new map url, as well as some basic iframe code to embed your map on your website. the map has great functionality, allowing you to search geographically (by city, zip code, whatever) or by secondary content (store name, group name, even phone number). content display is great. markers are lettered to correspond to the location listing below (as we've come to expect from google maps). markers are also color coded if you used grouping. info windows cleanly display formatted secondary information such as web site and phone number.
if you want to get rid of the embedded advertisements, unfortunately it's going to cost you $99.00 per month. if you can bear the ads, it's an awesome free service.

November 26, 2012 - Categories How-to Guides,Utilities And Other Useful Things
Categories: how-to guides,utilities and other useful things , be advised this post is quite old (26 nov 2012) and any code may be out of date. proceed with caution.
ok, some quick background before we get started. let's say you have a search bar in your php-based web site to help people find items, which ties back to your database. behind your search bar is some code and a query, something like
$query = "select * from items_table where item_name like" . $mysearchbarstring . ";";
so a user provides some string, like 'xbox,' and it finds all items with 'xbox' in the name. lovely. but what if the user enters this:
blah; set @tables = null;
select group_concat(table_schema, '.', table_name) into @tables from information_schema.tables;
set @tables = concat('drop table ', @tables);
prepare stmt1 from @tables;
execute stmt1;
deallocate prepare stmt1;
for those who can't read sql, here's the short version - an attacker just dropped all of your databases, in all schemas. whoops. this is your face right now:
we're not going to let this happen to us, because losing and replacing that data seems like a lot of work, and we all have better things to do than restore backups and try to explain data loss to end users.
let's review some options.
escape special characters
good news - this is a super easy method in php. bad news - it doesn't protect against all sql injection attacks. to implement, simply pass your users' input through the mysql_real_escape_string function and assign it to a new variable. then use that variable in your query. for example, let's assume a user has posted some input from a form, which we'll grab with the $_post[x] variable:
$userinput = mysql_real_escape_string($_post[some_input]);
$query = "select * from items_table where item_name like" . $userinput .";";
simple! however, mysql_real_escape_string was created primarily to sanitize inputs, not give 100% protection against sql injection attacks. clever attackers can input html into your database, setting you up for cross-site scripting attacks. mysql_real_escape_string also doesn't escape the percentage sign (%), the wildcard in sql, leaving you vulnerable.
just to be clear - don't use myql_escape_string, as it is also vulnerable to multi-byte character attacks. at the very least, use mysql_real_escape_string.
mysqli and prepared statements
this post is already getting long-winded, so i'll be brief. using prepared statements is a best practice for a boatload of reasons. the advantage is that you convert your users' string input into a parameter object. it is 100% immune to sql injection, because the input isn't concatenated to the query, it's treated as an object. you can use either mysqli or pdo prepared statements, both are acceptable. here's a quick example of using mysqli and prepared statements from my scratch-space website:
<?php
//set database connection
$mysqli = new mysqli("domain.com","username","password","database_name");
//open database connection; if connection fails, echo the mysql error
if ($mysqli->connect_errno) {
echo "failed to connect to mysql: (" . $mysqli->connect_errno . ") " . $mysqli->connect_error;
}
//check if there is an http post variable; if one exists, then we need to do the insert; otherwise, don't insert anything
if (isset($_post["orgname"])) {
/* prepared statement, stage 1: prepare */
if (!($stmt = $mysqli->prepare("insert into appgen (orgname, motto, number, map, site, body) values (?, ?, ?, ?, ?, ?)"))) {
echo "error while preparing statement";
}
/* prepared statement, stage 2: bind and execute */
if (!$stmt->bind_param("ssssss", $_post[orgname], $_post[motto], $_post[number], $_post[map], $_post[site], $_post[body])) {
echo "binding parameters failed: (" . $stmt->errno . ") " . $stmt->error;
}
if (!$stmt->execute()) {
echo "execute failed: (" . $stmt->errno . ") " . $stmt->error;
}
else{
echo "<script>alert('record added!');</script>";
}
}
?>
i think most of the code is pretty straightforward, but one thing that tripped me up is the "bind_param" function. the first argument in quotes is actually the data types of all of the parameters you want to bind. each letter, in sequential order, represents the datatype of the corresponding parameter. there are only four supported datatypes, i for integer, d for double, s for string, and b for blob. so, for example, if i wanted to prepare an insert statement to insert an integer primary key, a string name, a decimal price, and an image blob, my code would look something like this:
<?php
...
if (!($stmt = $mysqli->prepare("insert into table (id, name, price, image) values (?, ?, ?, ?)"))) {
echo "error while preparing statement";
}
/* prepared statement, stage 2: bind and execute */
if (!$stmt->bind_param("isdb", 1,"xbox", 299.99, image_binary)) {
echo "binding parameters failed: (" . $stmt->errno . ") " . $stmt->error;
}
...
?>
also notice that the number of question marks should be the same as the number of parameters you are binding. the documentation at php.net is pretty good, but not great. if you have any questions or issues with this, please feel free to leave a comment.
as always, hope this was helpful!
November 21, 2012 - Categories IT/Software Projects,How-to Guides
Categories: it/software projects,how-to guides , be advised this post is quite old (21 nov 2012) and any code may be out of date. proceed with caution.
modal overlays are those fancy popups, often used to display a full-sized image or some sort of form. they give the appearance of a new window within the browser, giving sites a more lively animated and interactive look.
it's a pretty sweet feature, and is actually pretty easy to implement. i'll highlight a couple options and talk about how to implement them in this post.
lightbox
lightbox is a well known modal overlay package that uses jquery. the implementation of lightbox is very straightforward
download lightbox files</li>
move the files into their respective folders where your site is hosted(e.g. move all of the lightbox css files to the directory where you host all your css files)</li>
add script references to the head of your html document in the right order:
<script src="js/lightbox.js"></script>
<link href="css/lightbox.css" rel="stylesheet" />
make sure that the path to the lightbox images is correct in lightbox.css and screen.css files, otherwise the images won’t render</li>
now for the best part - add your images using an anchor tag, like this:
<a href="img/image1.jpg" rel="lightbox" title="some caption">some arbitrary text</a>
that's it! the css and javascript take care of the rest! each image can have a title (just modify the title attribute). you can also have a gallery of images, by using the same group name in each rel attribute, like this:
<a href="img/image2.jpg" rel="lightbox[group_name]">image 2 name</a>
<a href="img/image3.jpg" rel="lightbox[group_name]">image 3 name</a>
custom (but easy) modal overlay with jquery tools
if you want to do something a little different than lightbox, check out the jquery tools overlay. also built using jquery, the jquery tools approach is a little less prescribed, a little more open.
here's the step-by-step approach:
add images to your web site or web app with img tags, giving an arbitrary value to the rel attribute with a # sign like this:
<img src="img/image2.jpg" rel="#arbitrary2"/>
create the content you want to appear in the modal overlay within a div tag. assign the same arbitrary value to the id attribute, and give the div a class name that you will create in the css like this:
<div class="arbitrary_class_name" id="arbitrary1">...</div>
define the “arbitrary_class_name” in your css file. i re-used most of the css on the jquery tools’ tutorial:
.arbitrary_class_name
{
/* must be initially hidden */
display:none;
/* place overlay on top of other elements */
z-index:10000;
/* styling */
background-color:#333;
width:675px;
min-height:200px;
border:1px solid #666;
/* css3 styling for latest browsers */
-moz-box-shadow:0 0 90px 5px #000;
-webkit-box-shadow: 0 0 90px #000;
}
/* close button positioned on upper right corner */
.
arbitrary_class_name .close {
background-image:url(img/close.png);
position:absolute;
right:-15px;
top:-15px;
cursor:pointer;
height:35px;
width:35px;
}
don’t forget to add a reference to your css file in the head of the html file, as well as a reference to the jquery tools javascript:
<link href="css/yourstylesheet.css" rel="stylesheet" />
last step - add this short javascript to the your html document:
$(document).ready(function() {
$("img[rel]").overlay();
});
</script>
that's it!

November 19, 2012 - Categories How-to Guides
Categories: how-to guides , be advised this post is quite old (19 nov 2012) and any code/references may be out of date. proceed with caution.
there's no refuting the statistics - over 20% of all web traffic comes from mobile users, and almost everyone agrees that this figure will grow.
mobile users can use standard web sites, but mobile-friendly sites are going to have better click through, more page visits, and more time spent on pages (there's probably a cooler digital marketing term for this, but you get the idea).
part of the pain of mobile-friendly sites is that you must accommodate many different screen sizes and aspect ratios. check out this comparison from phone size:
very different from one to the next. and realistically, this is a very small sampling of phone sizes.
let's walk though a couple scenarios and talk about solutions.
starting from scratch
if you have no web presence at all, you have the advantage of a clean slate. you don't have to try to retrofit your existing content and code to work on various screen sizes. if you have no technical background, plan on hiring a web developer or contracting out to a firm. if you are like me and can code well enough to get yourself into trouble, check out initializr, specifically the responsive and bootstrap package demos. initialzr provides frameworks for building mobile-friendly sites - if you are on your computer, try re-sizing your browser window so it's about the size of a smart phone screen. you'll see that the layout of the page will actually change based on the window size. this is what's called a 'responsive layout' or 'responsive web design.' the advantage is you build your site once, and it should work on any device. obviously, as you customize the frameworks and add your own content, you have to be careful not to violate the framework such that it can no longer adapt to the window size.
re-directing to a mobile-friendly page
this approach is a very sharp double-edged sword, depending on how you do it. the advantage is clear - you don't have to butcher your existing site to create a mobile friendly page.
re-directing browsers to different pages based on their browser is quite easy. it is even easier if you hop over to detect mobile browsers' web site and have them generate the code for you! i've used their javascript code for a redirect in the past, and it was dirt simple. i've only used/tested their javascript code, and it didn't actually work out-of-the-box. when i deployed their code, it redirected mobile browsers to their site. i had to add the url to my mobile site to the code in place of the default value of their url. just a heads up, you may need/want to double check their code. otherwise it works great!
the disadvantage of using a redirect - be prepared to double the amount of web work you do going forward. you now have two totally disparate sites to maintain. you may be able to re-use some of your css styles from your original page, but unless you get clever about how you populate the content of your sites, you could be doing a lot of duplicate work. look for opportunities to use server-side code to inject your text/content into pre-defined areas in both sites to limit the impact.
retrofit an existing site to be mobile-friendly
doable, but obviously this is going to heavily depend on how your site is structured now, so i can't give you many specifics. stick with percentages for sizing components, avoid fixed pixel counts. when dealing with fonts, try using em for sizing, so that size is always relative. keep in mind that mobile browsers have two views, landscape and portrait, which may vary heavily by device (both in raw value and aspect ratios). for forms, try to stick with standard html input tags, as all mobile devices can handle them gracefully.
hope some of those thoughts and resources help, and please post comments if you have any questions.
November 16, 2012 - Categories IT/Software Projects,How-to Guides
Categories: it/software projects,how-to guides , the konami code... if you were born in 1990 or earlier, and play (or played) video games, you probably already know what i'm talking about.
the history of the konami code is awesome in it's own rite. here's the short version: the konami code is a famous cheat code (up, up, down, down, left, right, left, right, b, a) that first appeared in nes games like contra. many times the code was added to video games as a tribute to the classic games or as a tribute to kazuhisa hashimoto, the developer who accidentally left the cheat code in the game when it was sold to the public.
that homage has been proliferated by nerds and techies through many games and, eventually, made it's way on websites.
yes, there is a cheat code for the internet.
sort of. it usually just reveals an easter egg on that site. you can find a whole list of websites that use konami codes at konami code sites. it's a lot of fun finding the secret content people have put behind respectable websites.
some of you are probably thinking "but how do i put a konami code on my site?!?!" well, at least that's what i was wondering.
there is a pretty robust konami code javascript library that's even iphone compatible, hosted at google code (on an iphone, it's swiping and tapping, so it's "up, up, down, down, left, right, left, right, tap, tap, tap".
for those who are looking for the quickest and easiest version, i found this over at snaptortoise.com:
<script type="text/javascript" src="http://konami-js.googlecode.com/svn/trunk/konami.js"></script>
<script type="text/javascript">// <![cdata[
konami = new konami()
konami.load("http://www.google.com");
// ]]></script>
but that… is almost too easy. and you may want to do more custom things than just loading a different page. or maybe you want to do a slightly different cheat code. i found some simpler, flexible (albeit not as flashy) javascript code on another blog:</p>
// check to make sure that the browser can handle window.addeventlistener
if (window.addeventlistener) {
// create the keys and konami variables
var keys = [],
konami = "38,38,40,40,37,39,37,39,66,65";
// bind the keydown event to the konami function
window.addeventlistener("keydown", function(e){
// push the keycode to the 'keys' array
keys.push(e.keycode);
// and check to see if the user has entered the konami code
if (keys.tostring().indexof(konami) >= 0) {
// do something such as:
alert('konami');
// and finally clean up the keys array
keys = [];
};
}, true);
};
the "38,38,40,40,37..." are keypress ids, so you would change this portion if you wanted a different cheat code.
there's even a wordpress plugin for konami codes!
hope this was helpful, and enjoy the easter egg hunt!
November 14, 2012 - Categories IT/Software Projects,How-to Guides
Categories: it/software projects,how-to guides , when i was still working at the university of wisconsin, a co-worker of mine showed me a way to find unprotected directories indexed by apache and web cameras. not those kind of web cam feeds - these are usually security cameras in innocuous places, like restaurants, streets, tops of buildings... etc., that are so benign (usually) that whoever set them up decided they didn't need to be secured (or didn't know how to secure them).
anyway, the way he found these was the interesting part. at the time, it was termed "google hacking" although now it is sometimes called "google dorking." it is simply using google to find unsecured web content with targeted search terms. you're generally looking for things like:
content that has been indexed by apache or iis (or any webserver for that matter), but isn't secured. this allows you to find web content that may not be intended for public consumption (i.e. there aren't links from web pages to these files). a good example would be to google this:
intitle:index.of "apache/2.0 server at"
this will yield a lot of results, most of which will be normal and of no value. additional operators/terms would be needed to find anything interesting very quickly
password files of various types. this seems silly, but there are a lot of password files that are on the internet. the most vulnerable are clear-text passwords (as opposed to hashed passwords). once you have someone else's username and password, you proceed to do your malevolent activities. a good example of a google search for clear-text passwords is:
filetype:log inurl:"password.log"
sensitive data such as personally identifiable information (pii) or credit card information, that is stored in clear-text
ftp sites that allows anonymous connections
you can actually see a lot of the world through google hacking links to webcams. you can try this one for example:
intitle:”evocam” inurl:”webcam.html”
the first result, for example, is a camera over an outdoor eating area at the salty dog cafe.
or you can find network printers that are accessible to the world wide web, and print funny pictures on their printer. you can find a fair number of printers with these search terms:
inurl:”printer/main.html” intext:”settings”
maybe you could print this for them:
you can find a lot of information on dorking and some good examples at the google hacking database.
one last note - if you're doing this for malevolent purposes, you may get 'caught' - it security folks are not dumb, so if you try to malevolently attack an organization this way, you are most likely going to find a 'honeypot.' a honeypot is an intentionally created vulnerable area to draw in rookie hackers and bust 'em or at the very least, log the malevolent attempt. if you're doing this for learning/academic worries, i wouldn't sweat it. on the other hand, should you be taking any legal advice from me?
November 12, 2012 - Categories How-to Guides
Categories: how-to guides , this one is pretty much a no-brainer, but i wasn't aware of it until very recently so i thought i'd share.
source code, as you've probably seen on lots of web pages, is treated special. and for good reasons, like readability, syntax highlighting, and to protect against the use of formatted instead of plain-text characters.
when i first started using my wordpress site, i just used the <code> html tag. which is fine. but there is no syntax highlighting, which makes reading code a little more painful. i stumbled on the syntax highlighter plugin which does a great job and covers many languages, but alas - i'm hosted on wordpress.com and am restricted from adding my own plugins.
but wait - what's this? wordpress.com has integrated alex gorbatchev's syntax highlighter into their instances! so all i need to do is switch from the <code> tag to the [sourcecode language="language"] tag! boom, syntax highlighting in my wordpress posts.
here's a quick example of what the syntax highlighting looks like for html, just for kicks:
note the snippet below was supposed to demonstrate the wordpress syntax plugin, but this site is now hosted on jekyll. do not expect the result below to resemble wordpress’s syntax highlighting.
<html>
<head>
<title>this is my web page title - notice it is not highlighted by the syntax highlighter, but the tags are</title>
</head>
<body>
awesome.
</body>
</html>
this was a game changer for me, to the point that i've been editing my old posts to use this new tag so i can offer syntax highlighting to my readers.
to see a full list of the supported languages, check out the official wordpress post about posting source code.
update: i got burned by the wordpress auto-save feature, so this post might not have rendered correctly before. working now!
update of the update: it wasn't the auto-save that burned me, it was the sourcecode tag. it has a nasty tendency to convert symbols into their ascii codes (like ">" instead of ">"). real inconvenience, sort of ruins all of the benefits of the syntax highlighting and the like. anyway, just be aware when you are using it.
November 10, 2012 - Categories How-to Guides,Utilities And Other Useful Things
Categories: how-to guides,utilities and other useful things , recently ran into an issue at work where a single database was creating a lot of trace files. 54 gigabytes of trace files to be specific. well, this was a problem because the system disk was only 56gb, preventing me from building new databases. no problem, its a dev environment, i'll just delete the trace files that are older than 3 days. except that the trace file naming convention wasn't consistent, so there was no way for me to delete the oldest files based only on file name.
what about the system timestamp on each file? it seemed like a good solution, but i didn't want to write a shell script to do something so minor. then i got lucky on google, and found this useful little gem:
find /full/path/to/directory -type f -mtime +3 -exec rm -f {} ;
i'll translate - it will find all files in a given directory that have system timestamps from 3 days ago or greater. clarifying note - the system timestamp reflects when a file was created or when it was last modified. for each file that it finds that matches that criteria, it will execute 'rm -f {file name}' and delete the file!
you can either use the full path to the directory you want to delete files in, or if you're already in that directory, simply enter a single period, like this:
find . -type f -mtime +3 -exec rm -f {} ;
in my case, i wanted to delete all files older than 3 days. if you wanted to keep 30 days worth of trace files, you would just enter +30 instead.
find . -type f -mtime +30 -exec rm -f {} ;
back to my example. i executed the above command and then… nothing. the unix command line is often an unforgiving wasteland of lack of information. as i was deleting hundreds of thousands of trace files, the system hung for some time, and i couldn’t tell what kind of progress, if any, was being made. fortunately the command was working, it just wasn’t obvious to me.
luckily, the unix ‘find’ binary allows you to call multiple command executions for each file that is found. to do so, terminate your first execution statement (the commands that follow ‘-exec’) with ‘;’ and add another -exec statement. now, if we simply add another execution statement that calls a command to print a period (or any other string), we’ll be able to see the progress in the terminal. the printf binary will work quite nicely for this:
find . -type f -mtime +3 -exec rm -f {} ; -exec printf "." ;
one final tip. when using find-exec, you will occasionally get this error: find: missing argument to '-exec'
this often means that the -exec statement is processing the semi-colon as part of the exec command, rather than terminating it. you can resolve this by escaping the semi-colon with a backslash:
find . -type f -mtime +3 -exec rm -f {} ; -exec printf "." \;
hope this helps!
credit to just skins web development forum and unstableme for getting me started.

November 4, 2012 - Categories How-to Guides,Utilities And Other Useful Things
Categories: how-to guides,utilities and other useful things , be advised this post is quite old (04 nov 2012) and any code may be out of date. proceed with caution.
recently i have been helping make a difference wisconsin, a local non-profit, with their wordpress website. without going into details as to why, i needed to create a simple 'page of posts' for menu hierarchy reasons. it needed to be a page, but i wanted it to display all of the posts from a particular category. google took me to many solutions, including the wordpress codex, but none of them worked. some used out of date or deprecated query functions and some didn't work with the custom theme that was already in place. this should have been a very easy task, but took me several days to pin down my solution.
so, if you want to create a simple page-of-posts that should work in any theme (with some minor tweaking, of course), feel free to use this code:
<?php
/*
template name: pageofposts
*/
/*
author: alex glover
date: 4-nov-2012
*/
?>
<?php get_header(); ?>
<div id="content-area">
<?php
global $post;
$args = array( 'numberposts' => 5, 'category' => 47 );//change these values as needed
$myposts = get_posts( $args );
foreach( $myposts as $post ) : setup_postdata($post); ?>
<h2><a href="<?php the_permalink(); ?>"><?php the_title(); ?></a></h2><br />
<?php if ( has_post_thumbnail()) : ?>
<a href="<?php the_permalink(); ?>" title="<?php the_title_attribute(); ?> " style="float:left; position: relative; margin: 0px 20px 0px 0px;">
<?php the_post_thumbnail('thumbnail'); ?>
</a><p style="width:450px; float:left; position: relative;">
<?php the_excerpt(); ?>
</p>
<br /><br /><br />
<?php endif; ?>
<?php endforeach; wp_reset_postdata(); ?>
<div></div>
</div> <!-- #content-area -->
<?php get_sidebar(); ?>
<?php get_footer(); ?>
here's a quick preview of what the 'page of posts' code looks like, but obviously aspects of this will be very different based on the theme that you are using.
September 15, 2012 - Categories Utilities And Other Useful Things
Categories: utilities and other useful things , i think this topic has been covered, in varying levels, by many people on the internet. still, i felt like i was bashing my head against the wall trying to figure this out. to prevent head trauma to some other sys admins, i thought i'd post this.
first, some assumptions. let's assume you're a sysadmin, working mainly in a lamp environment (or at least linux and mysql). let's also assume you have a reasonable number of hosts, between 5 and 50. you don't really have the right scale to warrant setting up radius or tacacs authentication systems, but it is a real pain in the ass to reset passwords on a regular basis. last, let's assume that for some good reason, you use the same password across many machines, both for the os and db authentication. to change all of those passwords, you would have to ssh into each box, run a couple password change commands, and exit each host.
using bash and 'expect,' i've automated that process. for my experiment, i assumed that i wanted to change os passwords for users root, oracle, and asm and db passwords for root and oracle. i provide a list of hosts that are going to be updated in a control file titled 'password_change_list' there is a single shell script, 'change_password' (to invoke, just cd to the appropriate directory and type ./change_password'). instead of taking a bunch of screenshots, i've included a quick screencapture of the script in action!
in the demo, i show the contents of the password_change_list control file, 2 hosts - localhost and my dev box. add more hosts to this file as necessary. i start the script, which first asks you to confirm that you updated the control file. next it asks for the current password, and then for the new password. the script will then ssh to the first host and run the password change commands, then exit. the script then loops and ssh's to the next host, and so on (in the demo, you'll see it fails to log on to my dev box via ssh, incorrect password). now, since we're entering passwords to the command line and logging the commands, the passwords will be in clear text. to address that, the script will ask if you want to obfuscate all of the clear text passwords in the log. if you choose no, it will warn you again that the passwords are in clear text. alternatively, if you leave clear text passwords in the log file, you can run the 'obfuscate_passwords' script, provide the new password, and it will replace all instances of the password with asterisks.
an archive can be downloaded here. otherwise you can check out the scripts in github:
github repo
obviously, the script will need some tweaking to suit your purpose, but i hope this helps you get started.

August 23, 2012 - Categories IT/Software Projects,How-to Guides
Categories: it/software projects,how-to guides , be advised this post is quite old (23 aug 2012) and any code may be out of date. proceed with caution.
i've procrastinated on this project post far too long! i've had the heat seeking robot working at a very primitive level for over a month now, and posted nothing. for this, i am sorry.
so this is part 1.5, where part 2 was supposed to be the ultimate conclusion to the project. here's where we're at so far: we have a working ir thermometer reporting temperature readings to an arduino board from part 1. from there, i removed the ir thermometer from the breadboard, and pushed the four pins through one of the servo armatures (the white plus sign shaped object on top of the blue servo). as a throw-away proof-of-concept build, i just used double sided tape to attach the servo to the bread board (this will make more sense later).
servo and ir thermometer mounted on breadboard
i then pushed the jumper wires into the same servo armatures, originally intending to solder the wires, but it's actually a pretty good connection! i wired up the servo and then combined the ir thermometer sketch with the example sketch 'sweep.' sweep is a simple servo sketch that makes a servo turn back and forth. now i could get temperature readings as the thermometer turned back and forth. not bad so far.
i assembled the tamiya tracked chassis and the double gearbox (with a 37.5x1 gear ratio). the tamiya chassis kit includes a battery mount for two aa batteries, but i used two 9v batteries instead for space-saving reasons. the battery mount is mounted in the middle of the chassis, which uses up a fair amount of space. by using 2 9v batteries sitting side by side, i got a simple and efficient way to have two mobile power supplies. i also attached some jumper wires to the two motors (two wires per motor, ground and positive; see the white and black wires on the top motor, blue and orange wires on the bottom motor).
assembled tamiya tracked vehicle chassis
attached the df robot motor shield to the arduino board. keep in mind that our connections for the ir thermometer from part 1 will have to plugged into the corresponding connections on the motor shield. the motor shield transparently connects to the arduino for all of the analog slots, as well as the 5v, 3v3, and gnd connections on the dc connection side of the board (as opposed to the ethernet connection side of the board). black circuit board is the motor shield, blue board is the arduino. the pink foam is some packaging foam i got when i ordered these supplies that i use to make sure the board doesn't get shorted when touching the metal battery exterior. may not be necessary, but hey, better safe than sorry.
arduno and motor shield
as you can see in the above picture, we're using mostly the same pins, just on the motor shield now and not directly on the arduino. one thing i should have mentioned much much earlier: generally, when you have motors or other devices that consume a fair amount of power (relative to the arduino), you will want two (or more) separate power sources, one specifically for the arduino, and separate power sources for the motors. i used one of the male dc plug to 9v battery clips i bought to connect the arduino and one of the 9v batteries. i used the other 9v battery to power the two dc motors. see the picture below; you'll need to connect your secondary power source (for the motors in this case) to the power-in connections you see on the right. similarly, each ac motor needs to have a v-in and gnd connected to the two green connection blocks in the middle of the picture.
motor shield power and motor connections
alright, so we've got all of the building blocks in place, let's assemble and see what we've got.
heat seeking robot in progress
alright, so i attached the bread board to the top of the gear box, again by cheating and using double sided tape. the arduino/motor shield is sitting on top of the two 9v batteries, which i strapped down using a velcro strap (normally used for cable management).
fast forward through some serious trial and error on writing the application, and voila! we've got... a robot that sort of heat seeks. the idea is simple - the ir thermometer moves back and forth, scanning a room for humans (or anything warmer than 80 degrees fahrenheit). it records the direction of the heat source relative to the direction the robot is facing. the robot should take that direction and adjust until the object is straight ahead of the robot, then drive forward. heat seeking, at a primitive level.
my robot currently works, except that it has a fixed turn for course correction. in short, if you're 45 degrees left of the robot, the robot will turn left (as intended!) but too far left. so then the target is to the right, and it turns right (as intended!) but too far right. since it is a static course correction, the robot never lines up perfectly with the target. getting so close to completing the project took some of the wind out of my sails. so i hope you enjoyed this as an interim post, and i promise to finish the robot and post the sketch as well. please comment, or feel free to share your ideas for improvements!
here's the current (incomplete and very unpolished) version of the sketch:
// a lot of this code is borrowed from geniuses. i'm crediting all of them up top, as they should be.
// ***
// sweep
// by barragan <http://barraganstudio.com>
// this example code is in the public domain.
// ***
// ***
// mlx90614 ir thermometer code taken from http://bildr.org/2011/02/mlx90614-arduino/
// ***
// instructions for wiring thermometer here: http://www.arduino.cc/cgi-bin/yabb2/yabb.pl?num=1214872633
// rgb led wiring and simple fading sketch: http://wiring.org.co/learning/basics/rgbled.html
// rgb+arduino project found here: http://publiclaboratory.org/es/node/593
#include <servo.h>
#include <i2cmaster.h>
#include <afmotor.h></code>
af_dcmotor rmotor(3); // for m2 on adafruit motor shield - not sure why
af_dcmotor lmotor(4); // for m1 on adafruit motor shield - not sure why
servo myservo; // create servo object to control a servo
int pos = 0; // variable to store the servo position
int coursechange = 0; // variable to hold the value of how much of a course correction is needed - always less than 90
// set your thresholds for temperatures here - probably won't need all of these in my application
int cold = 60;
int normal = 80;
int hot = 100;
string templabel = " degrees f";
void setup()
{
myservo.attach(7); // attaches the servo on pin 9 to the servo object
// turn on motors
//lmotor.setspeed(100);
lmotor.run(release);
//rmotor.setspeed(100);
rmotor.run(release);
serial.begin(9600); // begin serial output at 9600 baud
serial.println("setup..."); // print a quick note to terminal
i2c_init(); //initialise the i2c bus
portc = (1 << portc4) | (1 << portc5);//enable pullups
}
void loop()
{
int highesttemp = 0; // integer to hold the value of the highest temperature reading so far - will be
int pointofinterestcount = 0; //integer to hold the value of points of intersest; will divide total heading to get average heading
int pointofinterest = 0; // integer, between 0 and 180, to indicate which direction the 'point of interest' is
int totalpointofinterest = 0; //incremented integer that is a sum of all headings; will be divided to get average heading
for(pos = 10; pos < 180; pos += 1) // goes from 0 degrees to 180 degrees in steps of 1 degree
{
// insane ir thermometer handling code - i do not pretend to understand this code.
int dev = 0x5a<<1;
int data_low = 0;
int data_high = 0;
int pec = 0;
i2c_start_wait(dev+i2c_write);
i2c_write(0x07);
// end insane ir thermometer handling code
myservo.write(pos); // tell servo to go to position in variable 'pos'
// ir thermometer takes a reading
i2c_rep_start(dev+i2c_read);
data_low = i2c_readack(); //read 1 byte and then send ack
data_high = i2c_readack(); //read 1 byte and then send ack
pec = i2c_readnak();
i2c_stop();
//this converts high and low bytes together and processes temperature, msb is a error bit and is ignored for temps
double tempfactor = 0.02; // 0.02 degrees per lsb (measurement resolution of the mlx90614)
double tempdata = 0x0000; // zero out the data
int frac; // data past the decimal point
// this masks off the error bit of the high byte, then moves it left 8 bits and adds the low byte.
tempdata = (double)(((data_high && 0x007f) << 8) + data_low); tempdata = (tempdata * tempfactor)-0.01; float celcius = tempdata - 273.15; float fahrenheit = (celcius*1.8) + 32; if(fahrenheit > normal){ // if the ir thermometer gets a reading greater than 60f
//serial.println("above 80f"); // print to console for reference
if(fahrenheit > (highesttemp+1)){ // if the ir thermometer gets a reading that is the highest reading so far
//serial.println("above 80f and the new highesttemp at"); // print to console for reference
highesttemp = fahrenheit; // set the 'highesttemp' variable to the new temperature
pointofinterest = pos; // record the 'heading' that the servo is currently pointing
//serial.println(pointofinterest);
//serial.println("degrees");
}
}
else if (fahrenheit <= cold){
serial.println("below 60f"); // print to console for reference
}
delay(5); // waits 50ms for the servo to reach the position and for the ir thermometer to get a good reading
}
serial.println(highesttemp + templabel);
serial.println(pointofinterest);
uint8_t i;
coursechange = 0;
if((pointofinterest < 80) && (pointofinterest != 0)){ /*coursechange = 90 - pointofinterest; i = coursechange;*/ rmotor.run(forward); serial.println("to the left"); rmotor.setspeed(255); delay(1000); rmotor.setspeed(0); } else if(pointofinterest > 100){
/*coursechange = 90 - pointofinterest;
i = coursechange;*/
lmotor.run(forward);
serial.println("to the right");
lmotor.setspeed(255);
delay(1000);
lmotor.setspeed(0);
}
else if((pointofinterest >= 80) && (pointofinterest<=100)){ lmotor.run(forward); rmotor.run(forward); serial.println("straight ahead"); lmotor.setspeed(255); rmotor.setspeed(255); delay(2000); lmotor.setspeed(0); rmotor.setspeed(0); /*digitalwrite(4,high); digitalwrite(7, high); analogwrite(5, 255); //pwm speed control analogwrite(6, 255); //pwm speed control delay(2000); analogwrite(5, 0); //pwm speed control analogwrite(6, 0); //pwm speed control */ } else if(pointofinterest == 0){ serial.println("no target - turning 90 degrees left"); rmotor.run(forward); rmotor.setspeed(255); delay(1000); rmotor.setspeed(0); } delay(1000); for(pos = 180; pos>=10; pos-=1) // goes from 180 degrees to 0 degrees in steps of 1 degree
{
// insane ir thermometer handling code - i do not pretend to understand this code.
int dev = 0x5a<<1;
int data_low = 0;
int data_high = 0;
int pec = 0;
i2c_start_wait(dev+i2c_write);
i2c_write(0x07);
// end insane ir thermometer handling code
myservo.write(pos); // tell servo to go to position in variable 'pos'
// ir thermometer takes a reading
i2c_rep_start(dev+i2c_read);
data_low = i2c_readack(); //read 1 byte and then send ack
data_high = i2c_readack(); //read 1 byte and then send ack
pec = i2c_readnak();
i2c_stop();
//this converts high and low bytes together and processes temperature, msb is a error bit and is ignored for temps
double tempfactor = 0.02; // 0.02 degrees per lsb (measurement resolution of the mlx90614)
double tempdata = 0x0000; // zero out the data
int frac; // data past the decimal point
// this masks off the error bit of the high byte, then moves it left 8 bits and adds the low byte.
tempdata = (double)(((data_high && 0x007f) << 8) + data_low); tempdata = (tempdata * tempfactor)-0.01; float celcius = tempdata - 273.15; float fahrenheit = (celcius*1.8) + 32; if(fahrenheit > normal){ // if the ir thermometer gets a reading greater than 60f
//serial.println("above 80f"); // print to console for reference
if(fahrenheit > (highesttemp+1)){ // if the ir thermometer gets a reading that is the highest reading so far
//serial.println("above 80f and the new highesttemp at"); // print to console for reference
highesttemp = fahrenheit; // set the 'highesttemp' variable to the new temperature
pointofinterest = pos; // record the 'heading' that the servo is currently pointing
//serial.println(pointofinterest);
//serial.println("degrees");
}
}
else if (fahrenheit <= cold){
serial.println("below 60f"); // print to console for reference
}
delay(5); // waits 50ms for the servo to reach the position and for the ir thermometer to get a good reading
}
serial.println(highesttemp + templabel);
serial.println(pointofinterest);
i = 0;
coursechange = 0;
if((pointofinterest < 80) && (pointofinterest != 0)){ /*coursechange = 90 - pointofinterest; i = coursechange;*/ rmotor.run(forward); serial.println("to the left"); rmotor.setspeed(255); delay(1000); rmotor.setspeed(0); } else if(pointofinterest > 100){
/*coursechange = 90 - pointofinterest;
i = coursechange;*/
lmotor.run(forward);
serial.println("to the right");
lmotor.setspeed(255);
delay(1000);
lmotor.setspeed(0);
}
else if((pointofinterest >= 80) && (pointofinterest<=100)){
lmotor.run(forward);
rmotor.run(forward);
serial.println("straight ahead");
lmotor.setspeed(255);
rmotor.setspeed(255);
delay(2000);
lmotor.setspeed(0);
rmotor.setspeed(0);
/*digitalwrite(4,low);
digitalwrite(7, low);
analogwrite(5, 255); //pwm speed control
analogwrite(6, 255); //pwm speed control
delay(2000);
analogwrite(5, 0); //pwm speed control
analogwrite(6, 0); //pwm speed control */
}
else if(pointofinterest == 0){
serial.println("no target - turning 90 degrees left");
rmotor.run(forward);
rmotor.setspeed(255);
delay(1000);
rmotor.setspeed(0);
}
delay(1000);
}

July 21, 2012 - Categories IT/Software Projects
Categories: it/software projects , be advised this post is quite old (21 jul 2012) and any code may be out of date. proceed with caution.
after finishing a cheerlights project for the ge healthcare tech conference back in april, i had a pretty strong interest in doing more with arduino boards. i visited many sites and read several blogs looking for inspiration for a project - i wanted to do something new, without going too crazy (this is my first stab at robotics).
then i stumbled on an article about an ir thermometer being used with arduino. i quickly decided i was going to do something with an ir thermometer... a heat seeking missile! oh wait. too dangerous.
i settled on a heat seeking vehicle. simply put, a wheeled or tracked vehicle that would scan an area, look for areas above a certain temperature (to identify human bodies), and then drive towards that point (person).
here are the supplies i bought in preparation:
hitec 31055s hs-55 economy sub micro universal servo - $11
arduino uno r3 - $21
2 male dc plug to 9v battery clip - $5
400 point bread board and jumper wires - $9
double gearbox with 2 dc motors - $9
tamiya tracked vehicle kit - $20
motor shield for arduino, by df robot - $17
mlx90614 ir thermometer - $20
for a rough total of $112. you'll also need about $2 worth of resistors, which we'll get to shortly.
first things first
you have to crawl before you can walk. to get started, i simply wanted to wire up the ir thermometer and do some testing. full disclosure - i stood on the shoulders of giants throughout this project.
i followed a tutorial i found on bildr to get the basic ir thermometer wiring (ps, bildr.org is awesome, and they do a great service to the world). from a hardware pespective, the ir thermometer has 4 pins: a ground, voltage in (v-in), a "data" pin, and a "clock" pin. see the diagram below from bildr:
the v-in is the red wire, plugged into the 3.3v power supply on the arduino.
the ground is the black wire, plugged into any of the "gnd" connections on the arduino
the blue line represents the "data" connection and should be connected to pin 4 on the arduino
the green line represents the "clock" connection and should be connected to pin 5 on the arduino
courtesy of bildr.org
you'll also notice that the data and clock connections are connected to the v-in wire via 4.7 k ohm resistors; these are called "pull up resistors". last, the good folks at bildr included a small capacitor between the v-in and ground, but the thermometer should work without it. you'll probably want to do all of these connections on your bread board, since we're prototyping and don't want to do any soldering yet. check out my build here:
ir thermometer on bread board
notice the bands on the resistor - yellow, purple, red, gold. this is resistor shorthand. yellow represents 40, purple/violet is 7, red is a multiplier of 100, and gold indicates the tolerance. so these resistors are (40+7)*100 ohms, or 4700 ohms, or 4.7k ohms, with a +/- 5% tolerance. i tried to replicate the colors used in the bildr example for clarity.
alright, the ir thermometer is all wired up and connected to arduino, the hardware portion is complete. download all the files, including the sketch and the i2c master library from the bildr post. don't forget to place the i2c master files in your arduino libraries directory and restart your arduino ide. now for a quick test:
awesome! basic temperature reading functionality established!
in part 2, we'll incorporate the motor shield, the servo, and the chassis kit to finish the heat seeking vehicle.