
The Move to Jekyll
WordPress has served me well over the years, but it’s time for me to move on. My blog first started with Wordpress.com hosting, but I didn’t like that I was hosting WP’s ads, a custom domain was an up-charge, and they limit which themes and plugins I could use. So I migrated to a self-hosted WordPress instance, allowing me to serve Google ads, add membership functionality, and allow people to subscribe to my site by email.
I’ve had some issues with 1and1 hosting over the years (downtime, charges for PHP support, non-refundable contracts), and I’ve come to realize I don’t need most of the plugins. I don’t make enough money to justify the ads, and a lot of the site’s visitors are friends and family anyway. I only have a few members/subscribers, so I don’t really need membership functionality either. On top of that, 1and1 isn’t free - I’m literally paying for a hosting service I don’t like, to host functionality I don’t need.
With all of that in mind, blogging with Jekyll and hosting on GitHub seemed like a no-brainer. Hosting is free, it’s faster and more secure than WP, and I get to enjoy hacking on a new tool set. But before I made the switch, I wanted to make sure Jekyll could do everything I wanted with a blogging platform.
TL;DR - I’m ditching WordPress hosted on 1and1, and I’m moving to Jekyll hosted on GitHub.
Reproducing features in Jekyll
Out of the box, Jekyll is a great blogging platform and meets the majority of my use cases. That said, there a few features of my WordPress blog that Jekyll doesn’t include, and I didn’t want to lose as part of the transition.
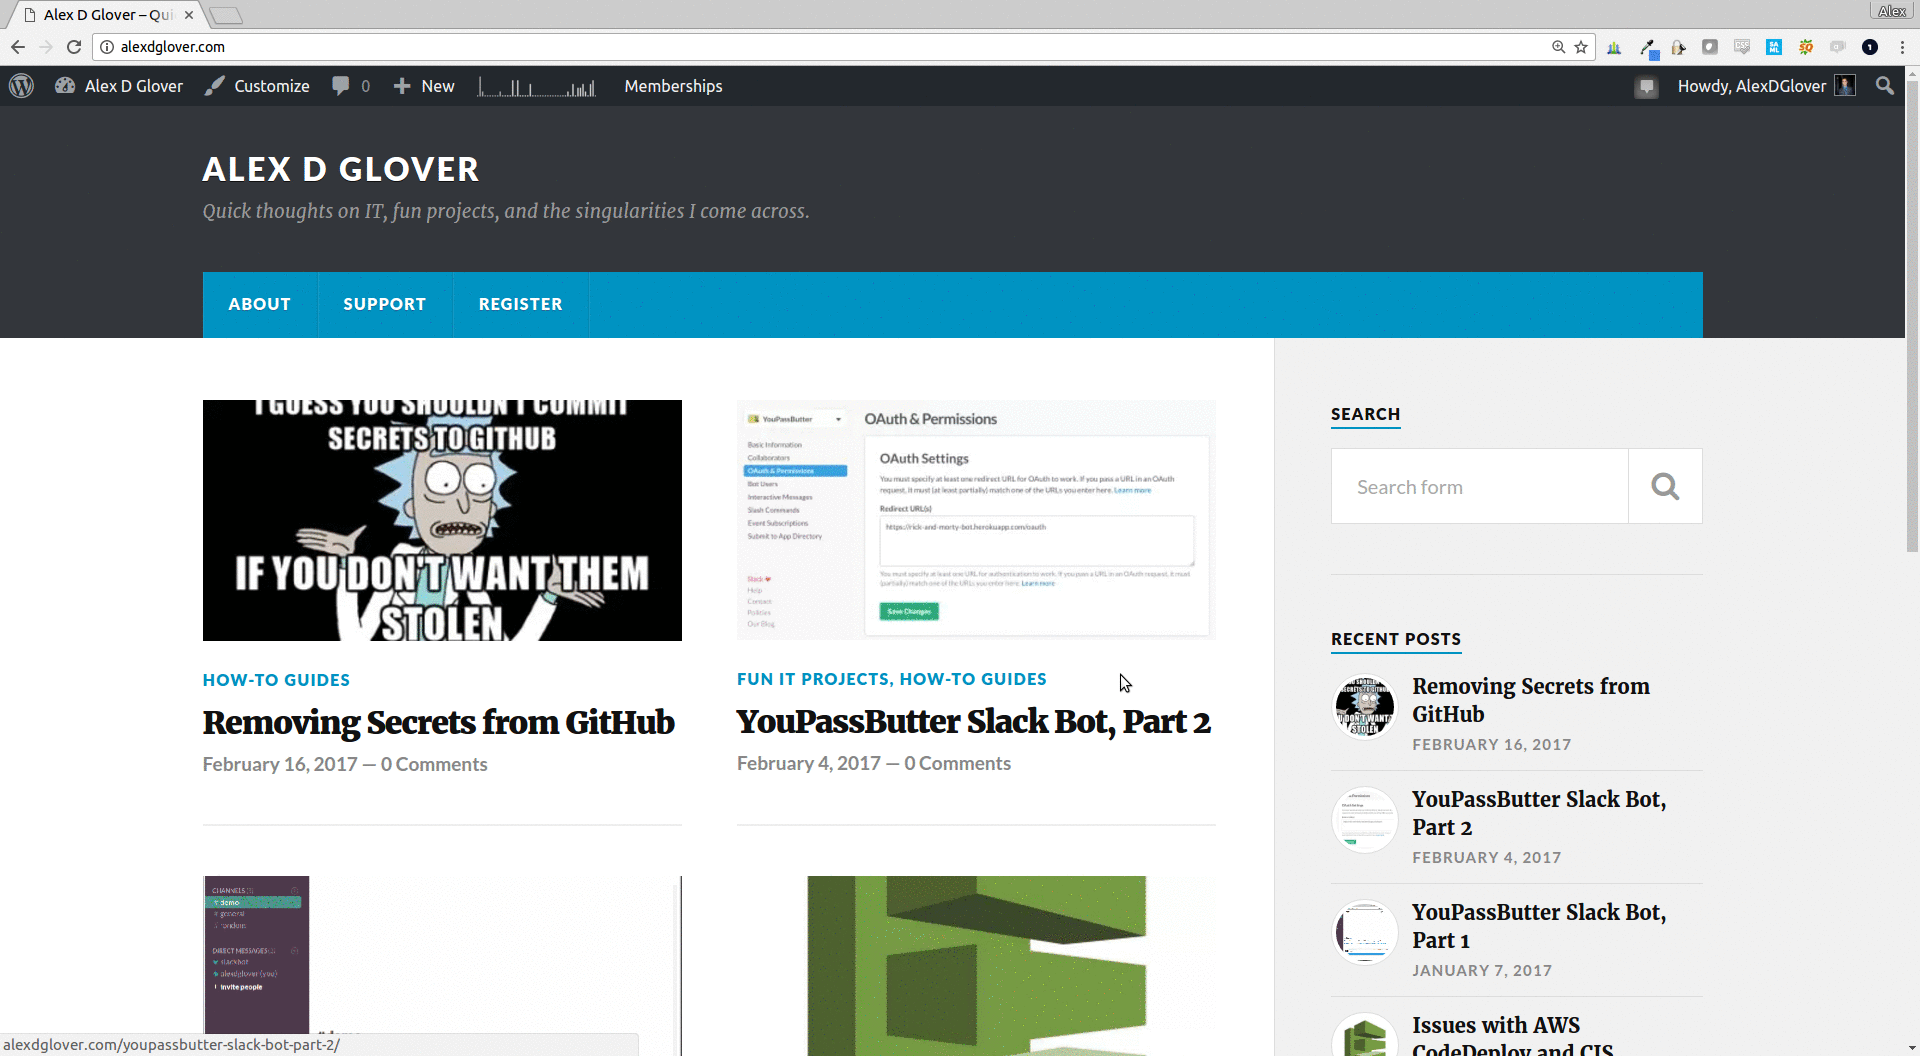
- Featured image functionality - basically, I can set an image for a post, and it shows up in any list of posts, as well as the first image you see when you open a specific blog post.
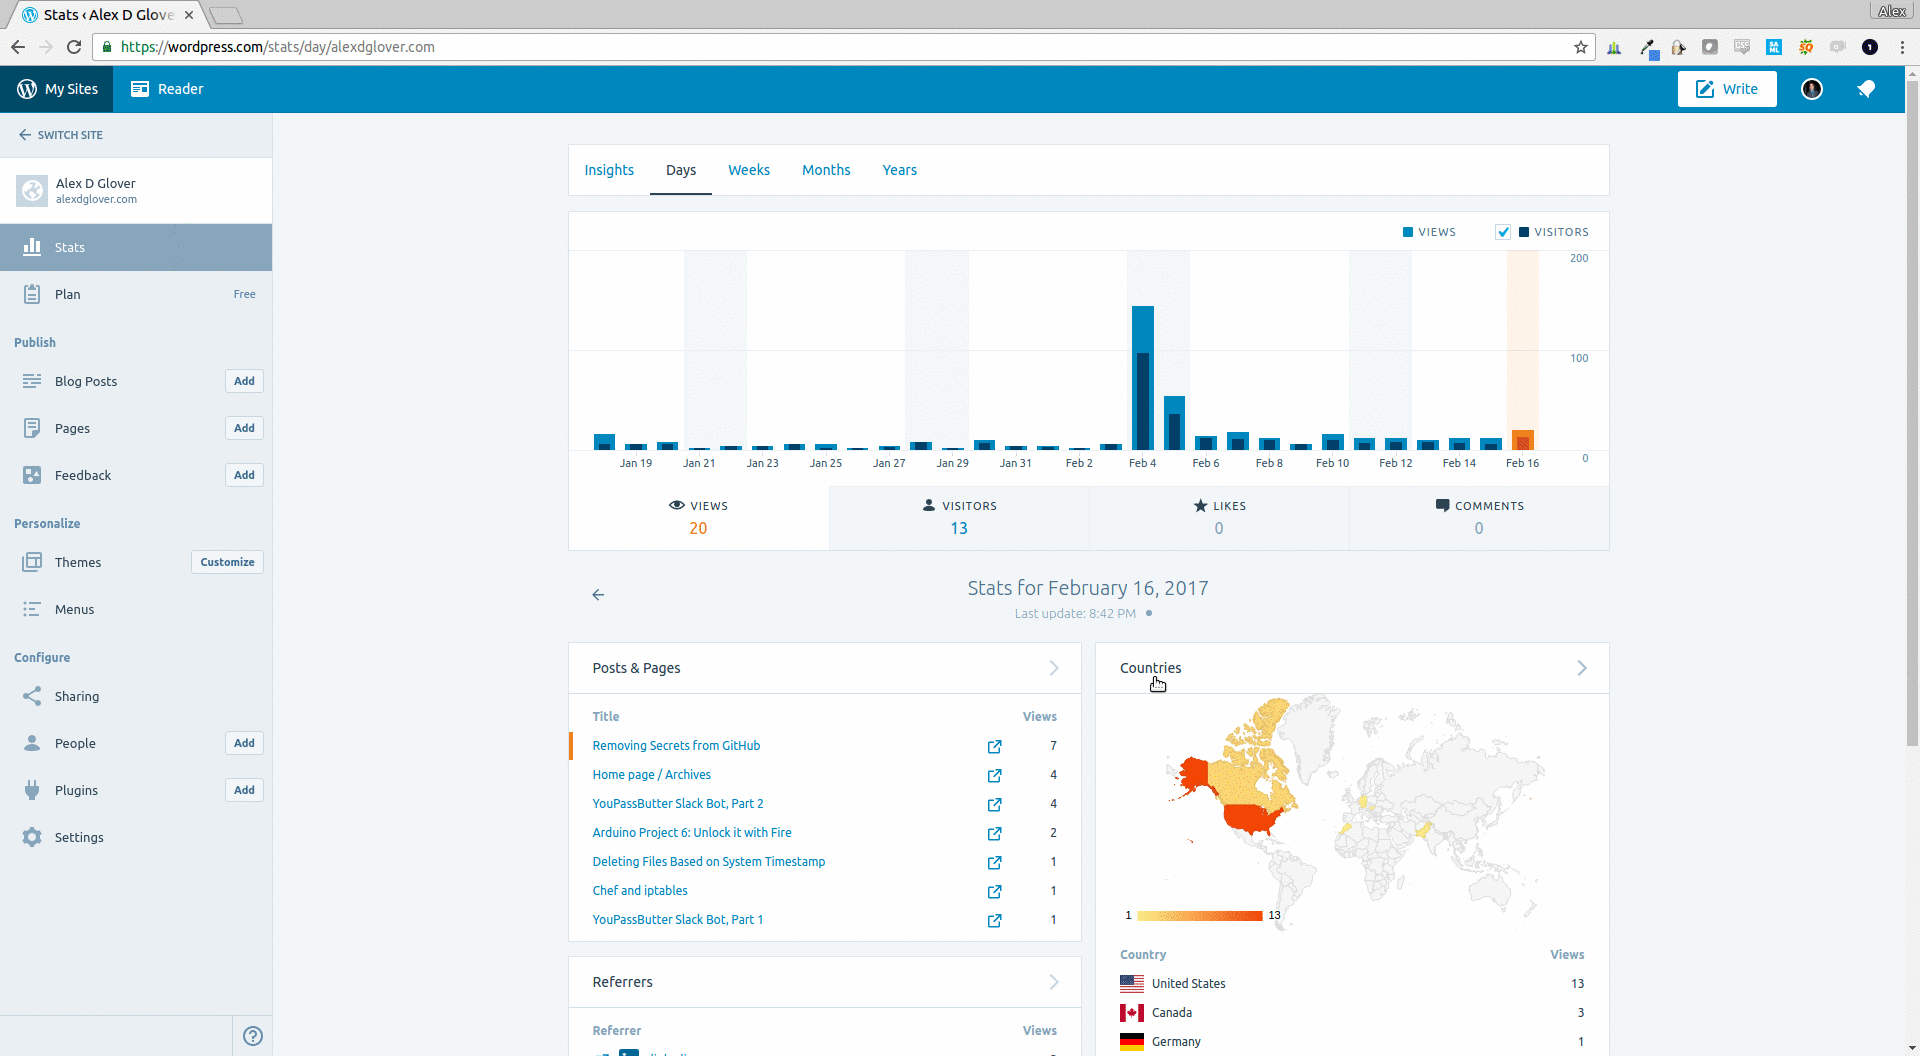
- JetPack site statistics - Part of the satisfaction of blogging is seeing how much traffic you get. WordPress does a great job with their JetPack plugin, which allows you to get fairly substantial analytics in a simple and consumable dashboard.
- Social media integration - when I publish a post, WordPress shares it to Twitter, Facebook, and LinkedIn automatically. There are also sharing buttons appended to every post.
- Retaining permalinks for SEO and backlinks - SEO is not very important for my humble blog, but I hate when I try to browse to some personal blog only to get a 404 or weird redirect. With that in mind, Jekyll needs to support my existing permalink structure (e.g. alexdglover.com/my-post-title)
- Search - users should be able to find content based on query text.
The rest of this post will cover how I modified Jekyll and the Minimal Mistakes theme for my blog.
Featured Image Functionality
Fortunately, implementing the “featured image” was fairly easy with the Minimal Mistakes theme. The theme itself is supposed to offer it out-of-the-box, but either I’m doing something wrong or misunderstanding the theme documentation. In theory, you only need to set “teaser” property in the header section of your posts’ front matter, like this:
---
title:  "Hello world"
date:   2016-11-17 16:16:01 -0600
categories: jekyll category1 category2
header:
  teaser: https://i0.wp.com/alexdglover.com/wp-content/uploads/2017/01/anim-3.gif
---

And here's the body of your blog post.
For some reason, that didn't work for me using the stock home page. After doing some digging, I narrowed the so-called issue to a "grid" conditional in _includes/archive-single.html:
{% if include.type == "grid" and teaser %}
  <div class="archive__item-teaser">
    <img src=
      {% if teaser contains "://" %}
        "{{ teaser }}"
      {% else %}
        "{{ teaser | prepend: "/images/" | prepend: base_path }}"
      {% endif %}
      alt="">
  </div>
{% endif %}
Well, I couldn't figure out where the include.type was supposed to be set, but who cares! The best thing about Jekyll is you have total control and it's easy to modify. I have no plans to use this "grid" functionality, so I just removed it from the conditional. Now the teaser is displayed on the home page (and in any page using the archive layout).

Site Analytics and Stats
Jekyll supports Google Analytics, injecting your tracking ID into every page on your behalf. Google Analytics is a little overkill for a personal blog and I personally dislike the dashboard/interface, but there aren’t that many site analytics platforms out there that are free and feature-rich. So I’m going down the path of least resistance on this one. I just need to take my existing GA tracking ID, and put in the _config.yml file:
# Analytics
analytics:
  provider       : "google"
  google:
    tracking_id  : "ga-my-tracking-id-1234556789"
Posting to Social Media
I’ve seen plenty of other Jekyll users create a simple integration to social media sites using the built-in RSS feed from Jekyll and IFTTT, so I won’t beat that dead horse. The most interesting implementation I’ve seen done was by Eduardo Boucas, so I’ll direct you to his site for an example.
Retaining Permalinks
Fortunately, when I set up my self-hosted WordPress site I had the foresight to choose a sane and practical permalink structure. All of my permalinks are just the post title, but URL encoded (99% of the time this just means spaces are replaced by hyphens, and all words are downcased). I can maintain all of my permalinks and not lose any SEO “juice” by using that setting the same permalink pattern in the _config.yml of my new Jekyll blog:
# Outputting
permalink: /:title/
Easy.
Search
Search functionality was an interesting problem, but I knew right away how I wanted to solve it. In short, because Jekyll is a static site generator, there is no server-side code that can process search queries. It all needs to be handled in HTML and JavaScript.
This is a trivial limitation, considering how small my site is and how “cheap” it is to send a few extra kilobytes of HTML text to the end user. With that in mind, a search solution is fairly easy. In my initial implementation, I set up a separate search page (rather than try to do an _includes/search.html that I could embed in other pages or sidebars). The search page is populated with an HTML input field, followed by every single post in the blog wrapped in div tags with style="display: none;" . At this point, the DOM of the page becomes our search “database,” and we just need to write some JavaScript to un-hide our divs based on the search query. This gives us the power to search not only post titles, but also the actual content of the post bodies.
---
title: Search
permalink: search.html
---

<script>
function getSearchResults(val) {
  console.log("hiding all elements");
  $( ".result" ).hide();
  $( ".postContent" ).hide();
  $( ".searchResultSnippet " ).hide();

  if(val.length > 2){
    // Downcase query val for case-insensitive search
    val = val.toLowerCase();

    // Show any results based on post title matching query
    $( "div[id*='" + val + "' i]" ).filter( ".result").show();

    // Show any results where query matches part of the post content
    $( "div:contains('" + val + "')" ).filter( ".result").show();

    // For each result based on post content, extract the surrounding text
    // and display it in the search results, bolding the search term
   $( "div:contains('" + val + "')" ).filter( ".result").each( function( index ) {
      var postText = $( this ).find( ".postContent" ).text();
      var resultPosition = postText.indexOf(val);
      if(resultPosition > -1){
        var snippet = "..." + postText.substring( resultPosition-30, resultPosition+30 ) + "...";
        snippet = snippet.replace(val, "<strong>" + val + "</strong>");
        $( this ).find( ".searchResultSnippet" ).show().html(snippet);
      }
    });
  } // End of input length check

} // End of getSearchResults
</script>

<input type="text" onkeyup="getSearchResults(this.value)">

<div id="results">
  {% for post in site.posts %}
  <div id="{{ post.title }}" class="result" style="display: none;">
    <h3><a href="{{ post.url }}">{{ post.title }}</a></h3>
    {% if post.header.teaser %}
    <a href="{{ post.url }}"><img src="{{ post.header.teaser }}" style="width: 150px;" class="align-left" /></a>
    {% endif %}
    <p><small><strong>{{ post.date | date: "%B %e, %Y" }}</strong> - <strong>Categories</strong> {{ post.categories | join:',' }} </small></p>
    <div class="postContent" style="display:none;">{{ post.content }}</div>
    <div id="searchResult{{ post.url }}" class="searchResultSnippet" style="display:none;"></div>
  </div>
  {% endfor %}
</div>
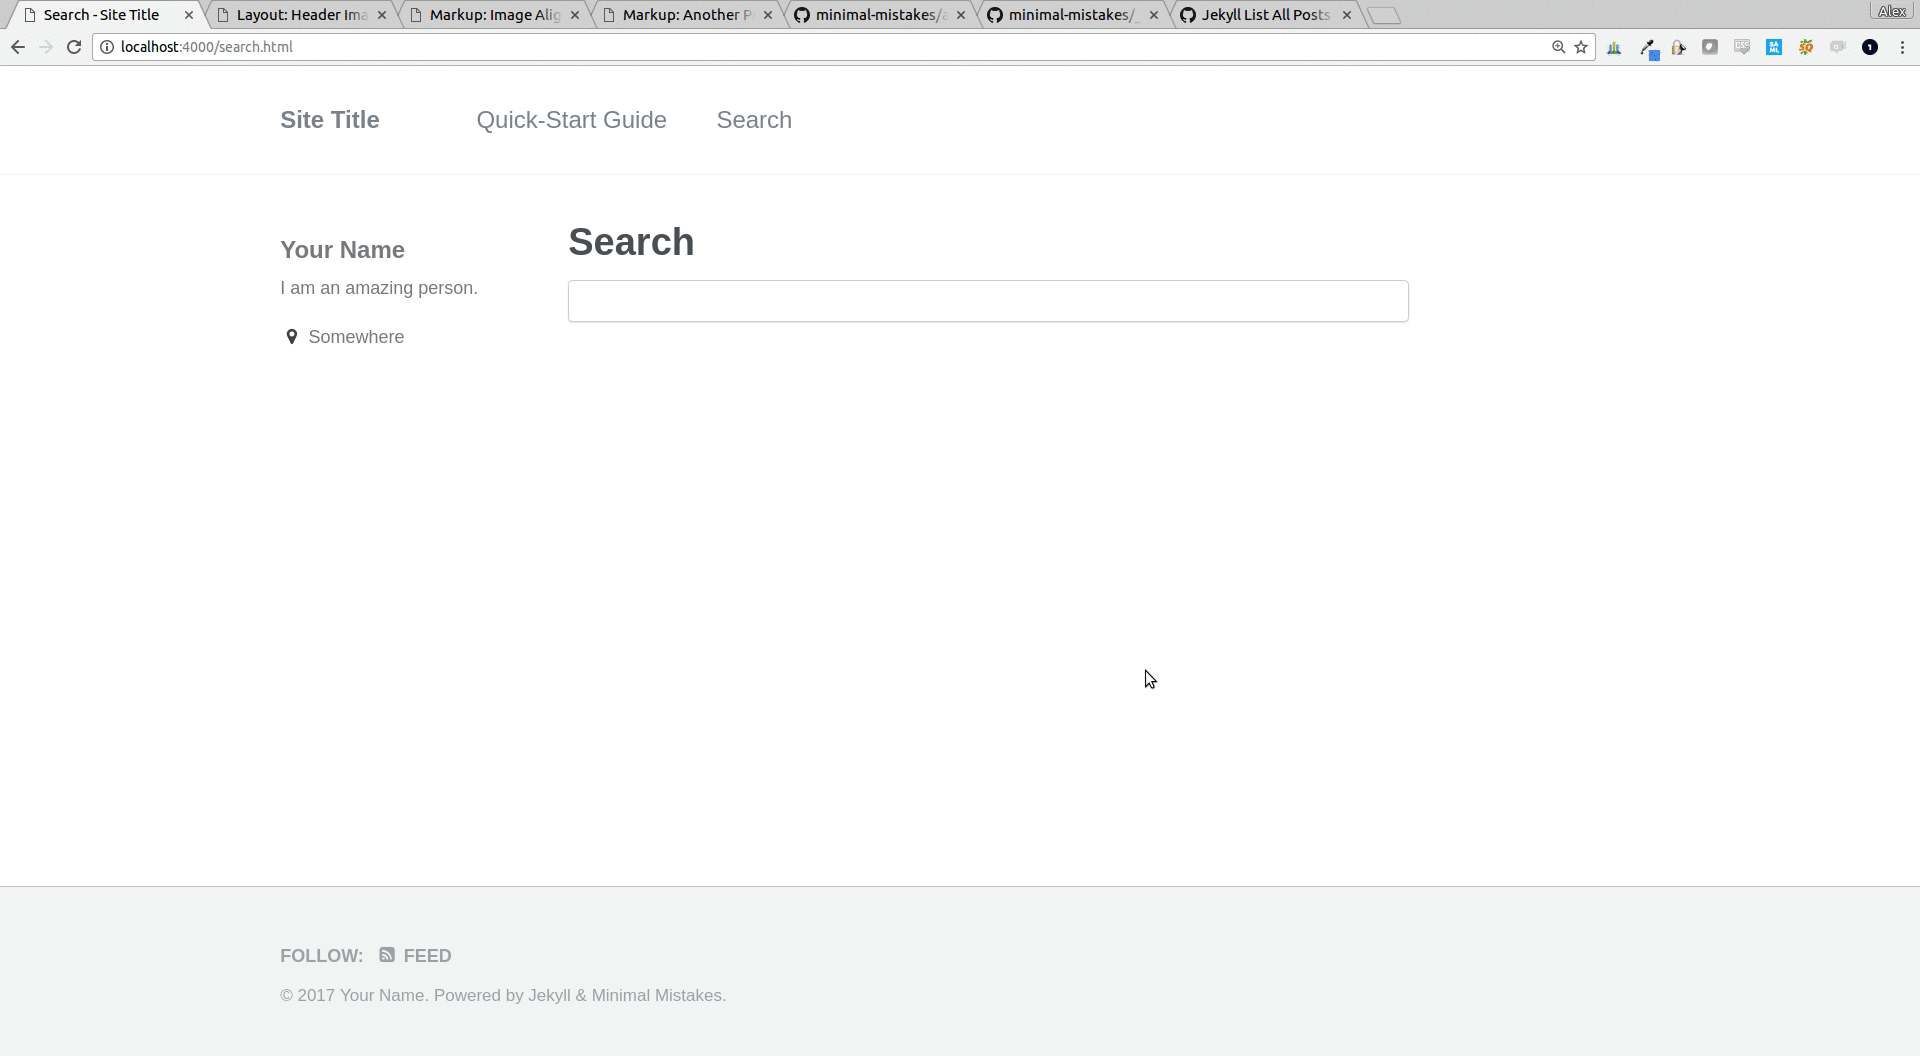
And here’s the end result:
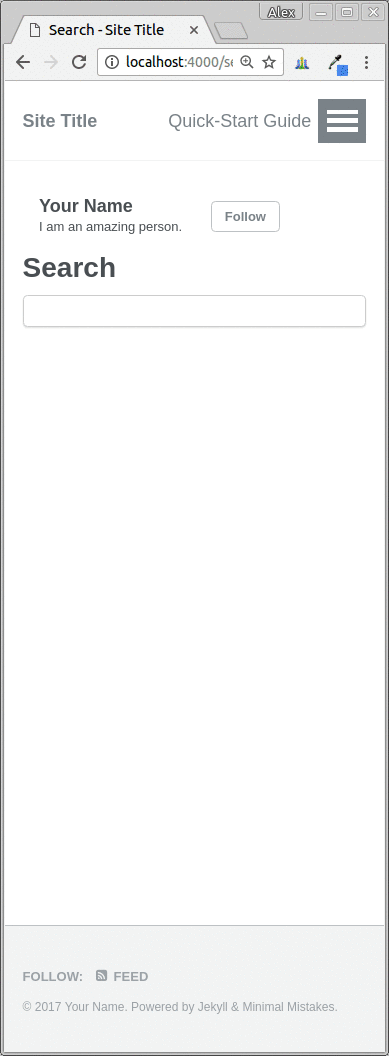
It even looks good on mobile-friendly display port sizes:
Conclusion
Well I’m sold! After testing my minor customizations, I’m ready to make the switch to GitHub pages using Jekyll and the Minimal Mistakes theme. I’ll be sure to post again to describe any lessons learned from the actual migration, as well as any future customizations I make. If any of you have Jekyll tips and tricks to share, send ‘em my way!
Leave a Comment