Arduino Project 1: Heat Seeking Robot (Part 1.5)
Be advised This post is quite old (23 Aug 2012) and any code may be out of date. Proceed with caution.
I've procrastinated on this project post far too long! I've had the Heat Seeking Robot working at a very primitive level for over a month now, and posted NOTHING. For this, I am sorry.
So this is Part 1.5, where Part 2 was supposed to be the ultimate conclusion to the project. Here's where we're at so far: we have a working IR Thermometer reporting temperature readings to an Arduino board from Part 1. From there, I removed the IR thermometer from the breadboard, and pushed the four pins through one of the servo armatures (the white plus sign shaped object on top of the blue servo). As a throw-away proof-of-concept build, I just used double sided tape to attach the servo to the bread board (this will make more sense later).
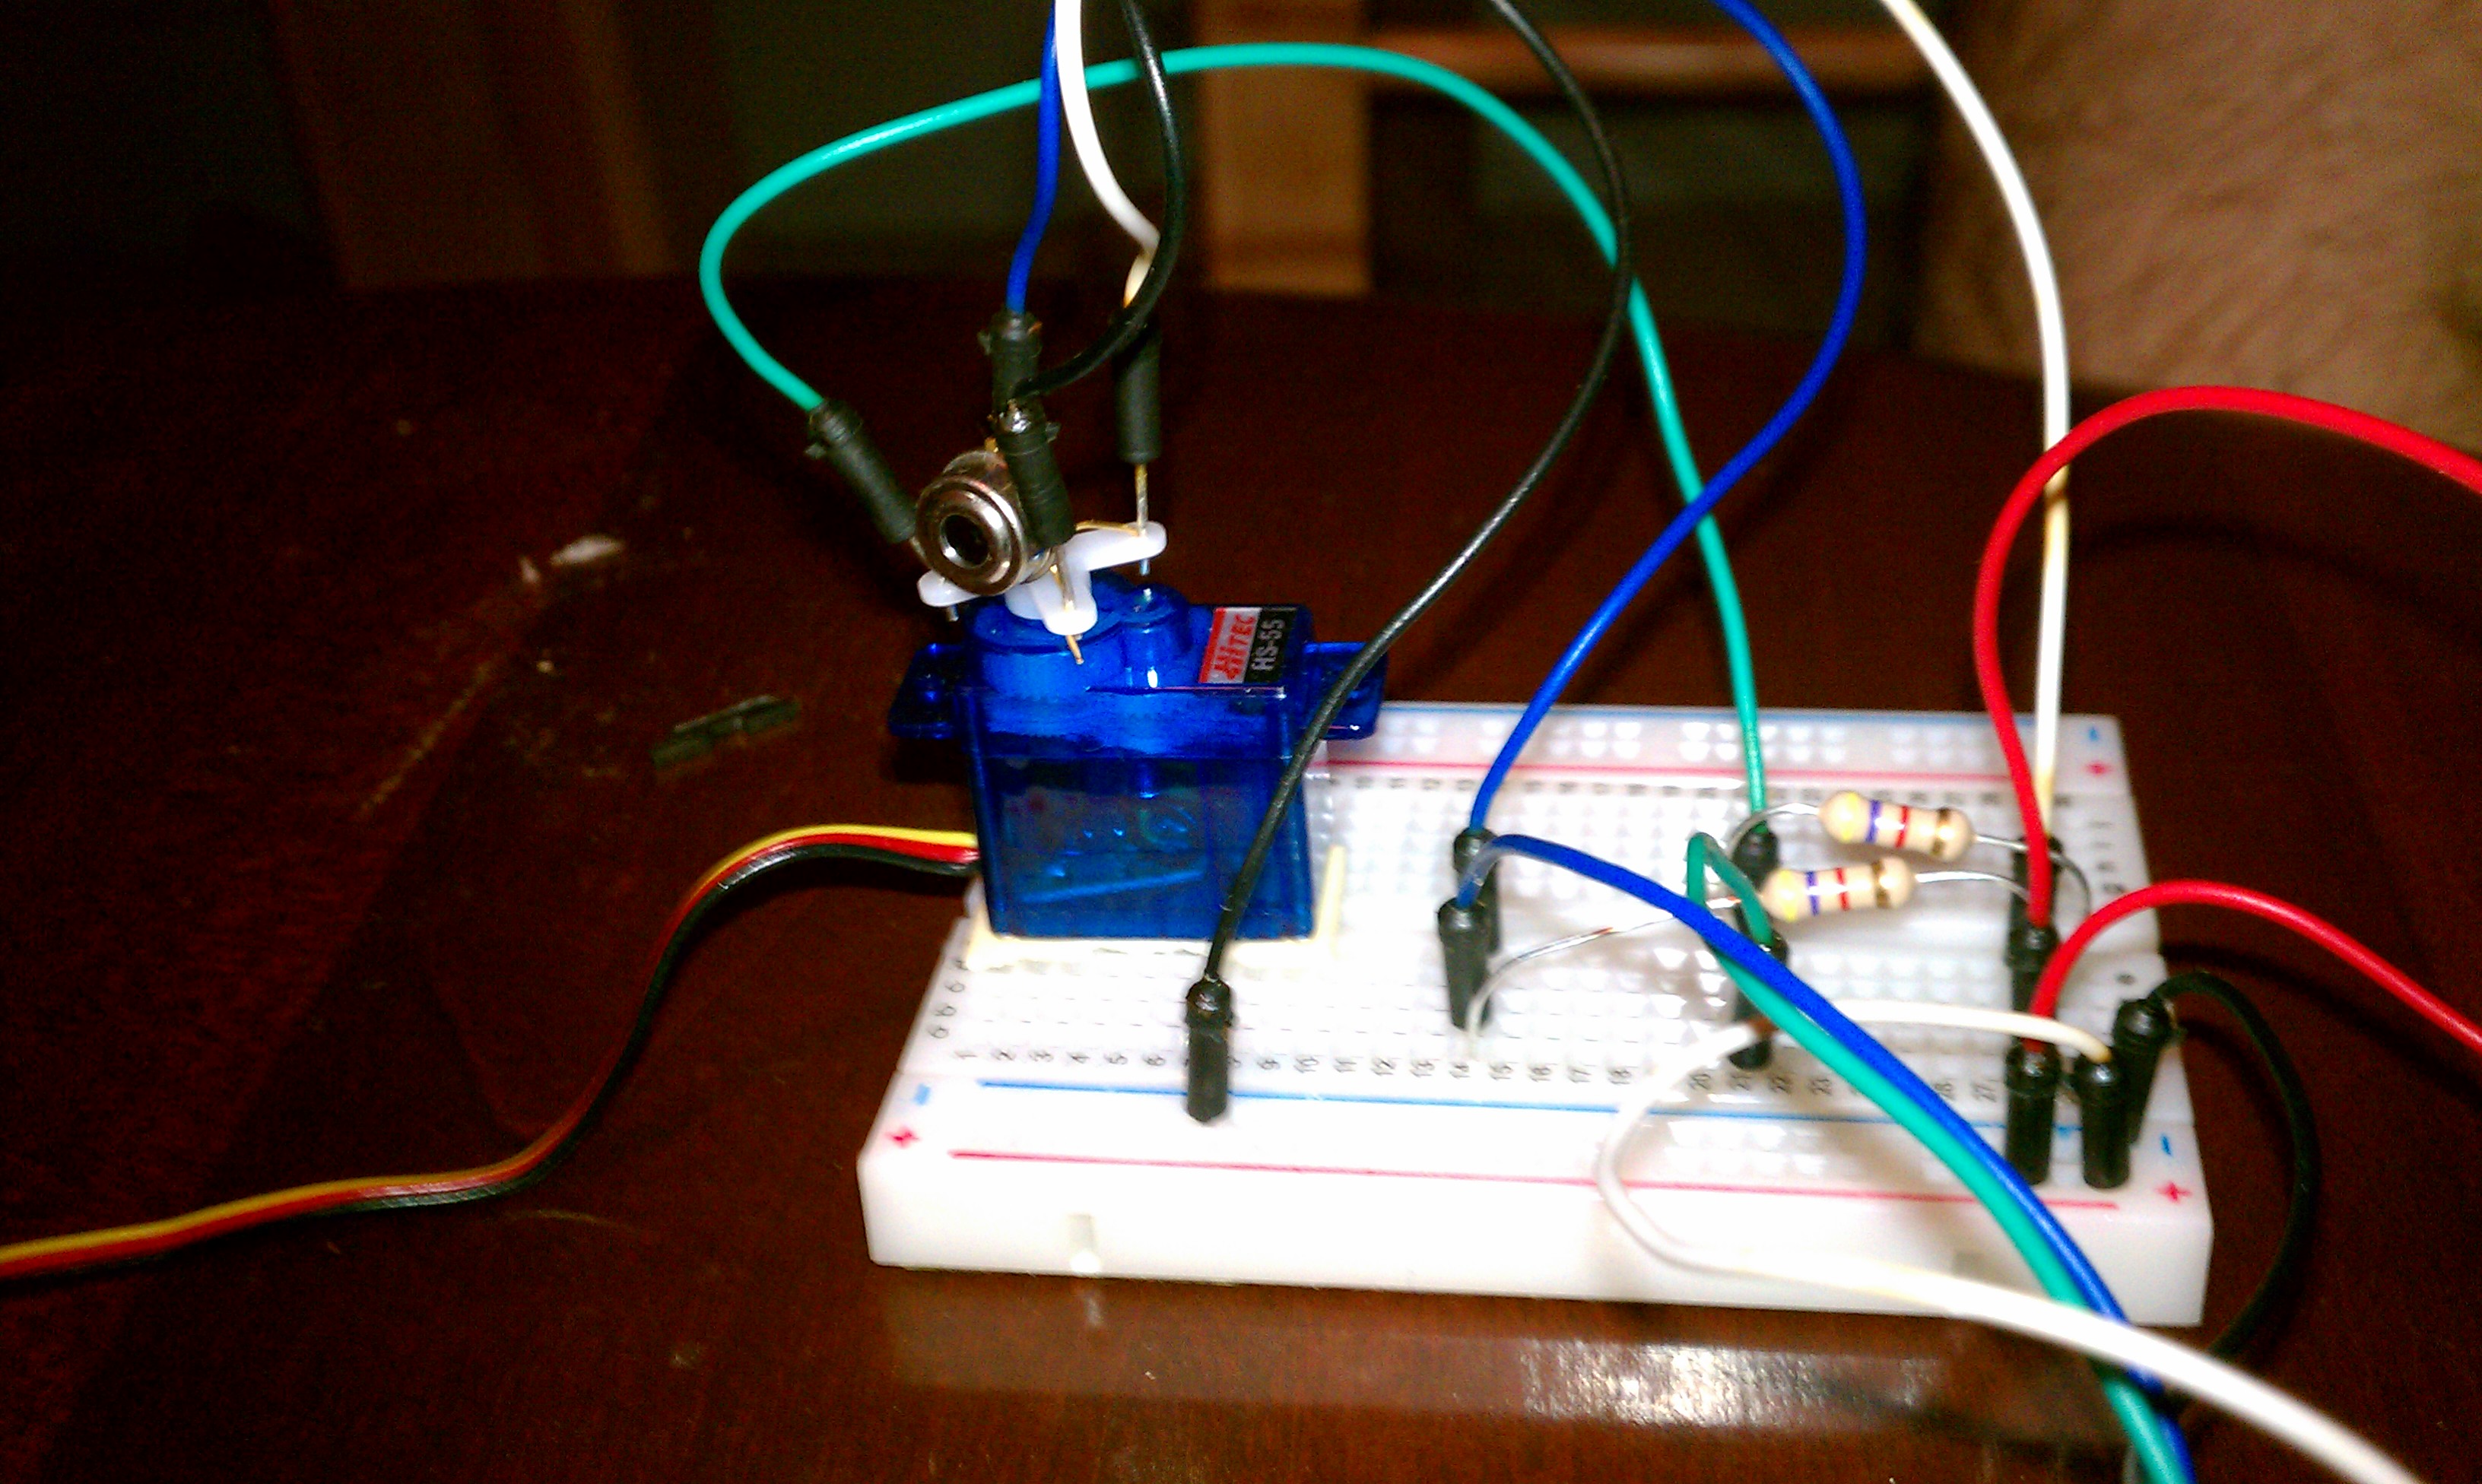
I then pushed the jumper wires into the same servo armatures, originally intending to solder the wires, but it's actually a pretty good connection! I wired up the servo and then combined the IR thermometer sketch with the example sketch 'sweep.' Sweep is a simple servo sketch that makes a servo turn back and forth. Now I could get temperature readings as the thermometer turned back and forth. Not bad so far.
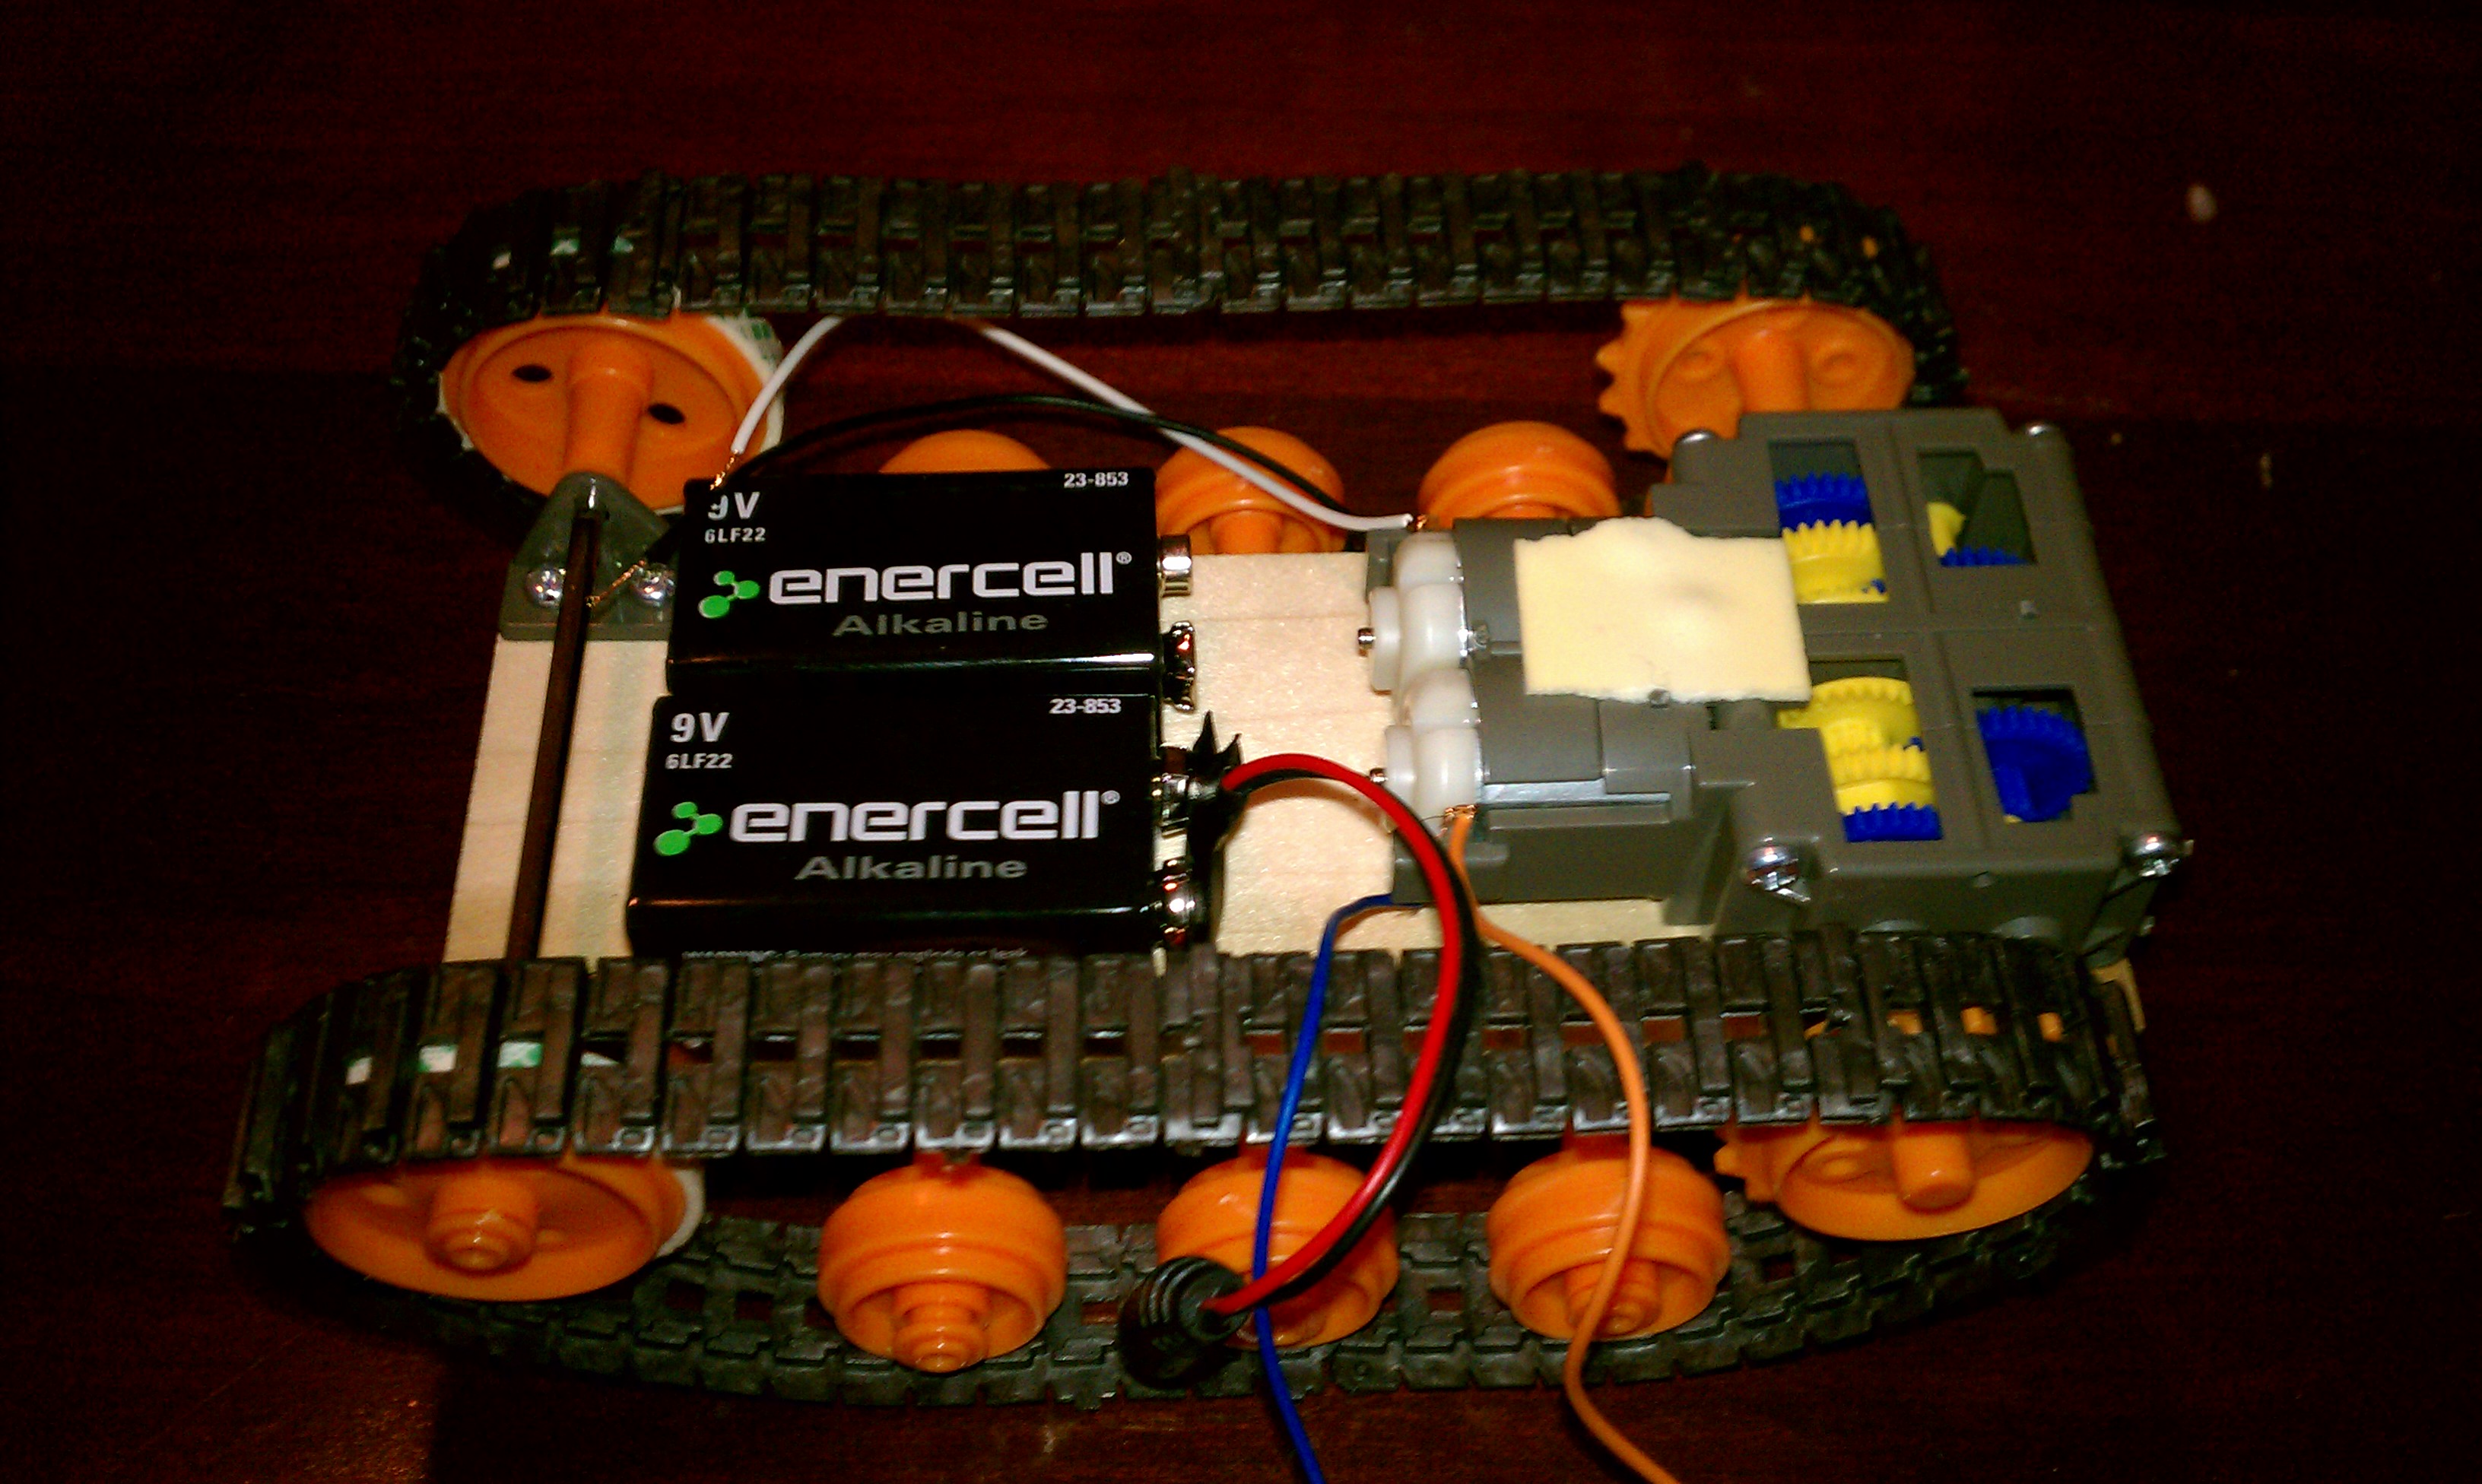
I assembled the Tamiya Tracked Chassis and the double gearbox (with a 37.5x1 gear ratio). The Tamiya chassis kit includes a battery mount for two AA batteries, but I used two 9v batteries instead for space-saving reasons. The battery mount is mounted in the middle of the chassis, which uses up a fair amount of space. By using 2 9v batteries sitting side by side, I got a simple and efficient way to have two mobile power supplies. I also attached some jumper wires to the two motors (two wires per motor, ground and positive; see the white and black wires on the top motor, blue and orange wires on the bottom motor).
Attached the DF Robot motor shield to the Arduino board. Keep in mind that our connections for the IR thermometer from Part 1 will have to plugged into the corresponding connections on the motor shield. The motor shield transparently connects to the Arduino for all of the analog slots, as well as the 5v, 3v3, and GND connections on the DC connection side of the board (as opposed to the ethernet connection side of the board). Black circuit board is the motor shield, blue board is the Arduino. The pink foam is some packaging foam I got when I ordered these supplies that I use to make sure the board doesn't get shorted when touching the metal battery exterior. May not be necessary, but hey, better safe than sorry.
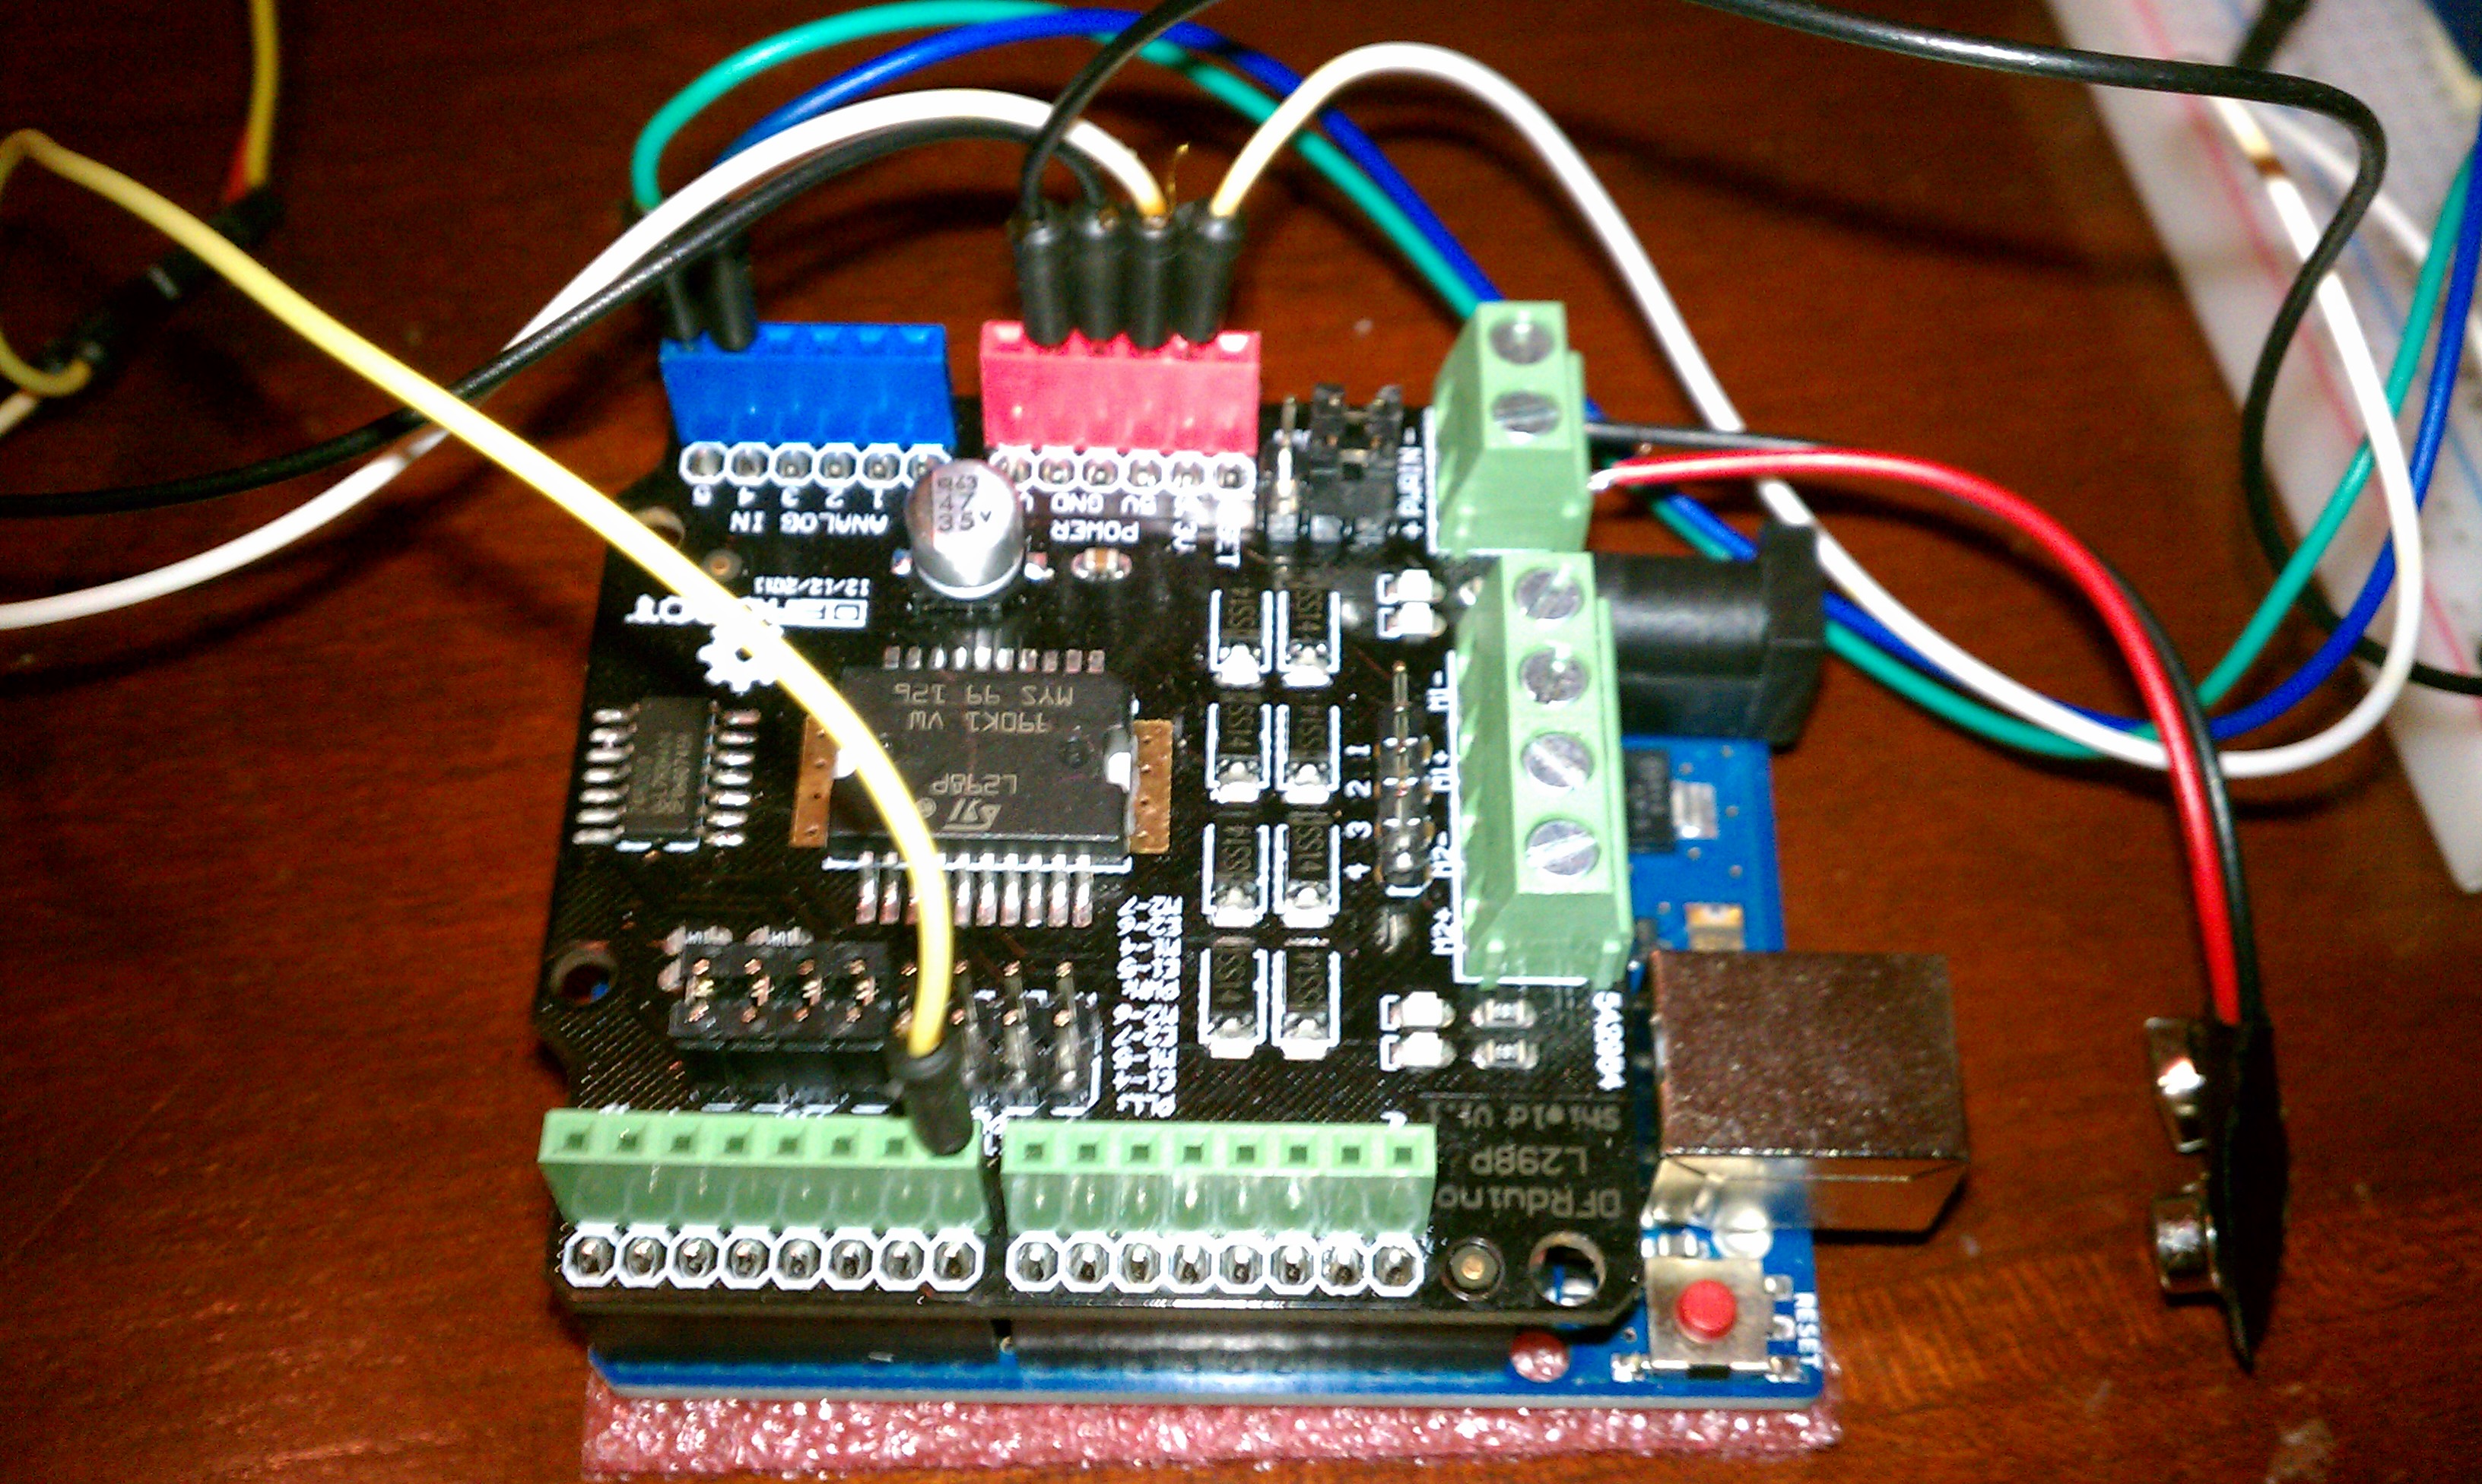
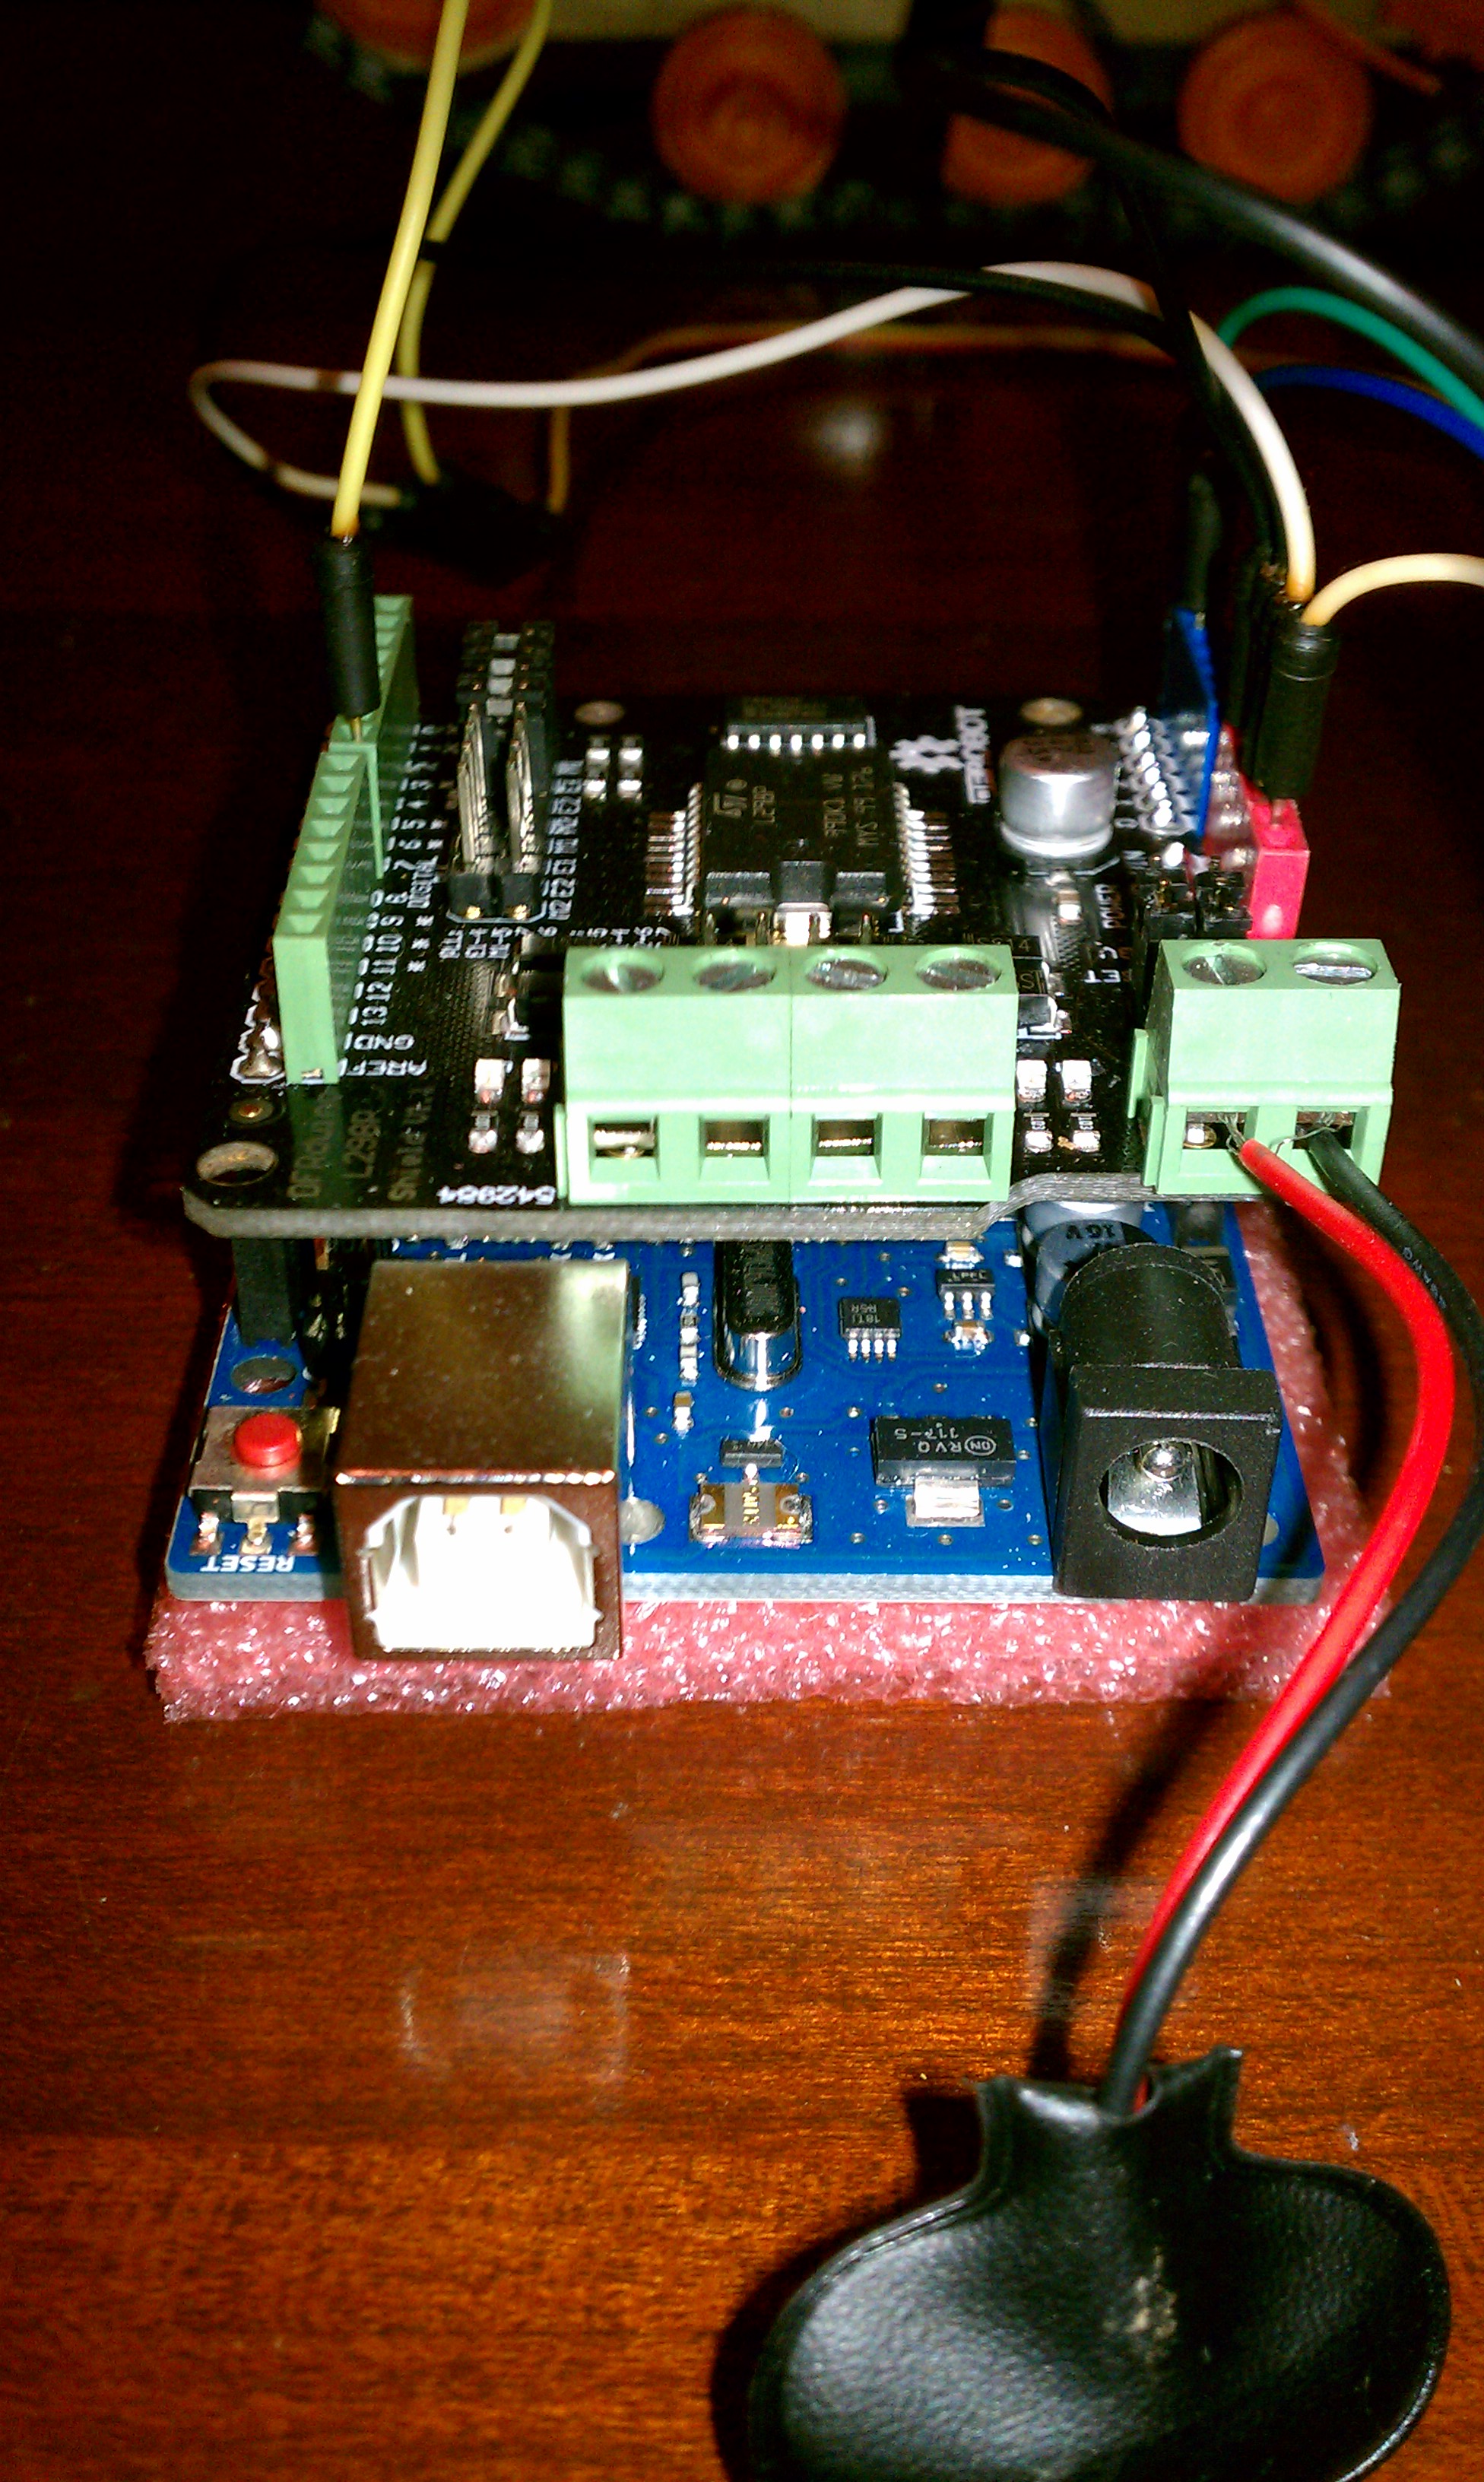
As you can see in the above picture, we're using mostly the same pins, just on the motor shield now and not directly on the Arduino. One thing I should have mentioned much much earlier: generally, when you have motors or other devices that consume a fair amount of power (relative to the Arduino), you will want two (or more) separate power sources, one specifically for the Arduino, and separate power sources for the motors. I used one of the male DC plug to 9v battery clips I bought to connect the Arduino and one of the 9v batteries. I used the other 9v battery to power the two DC motors. See the picture below; you'll need to connect your secondary power source (for the motors in this case) to the power-in connections you see on the right. Similarly, each AC motor needs to have a V-in and GND connected to the two green connection blocks in the middle of the picture.
Alright, so we've got all of the building blocks in place, let's assemble and see what we've got.
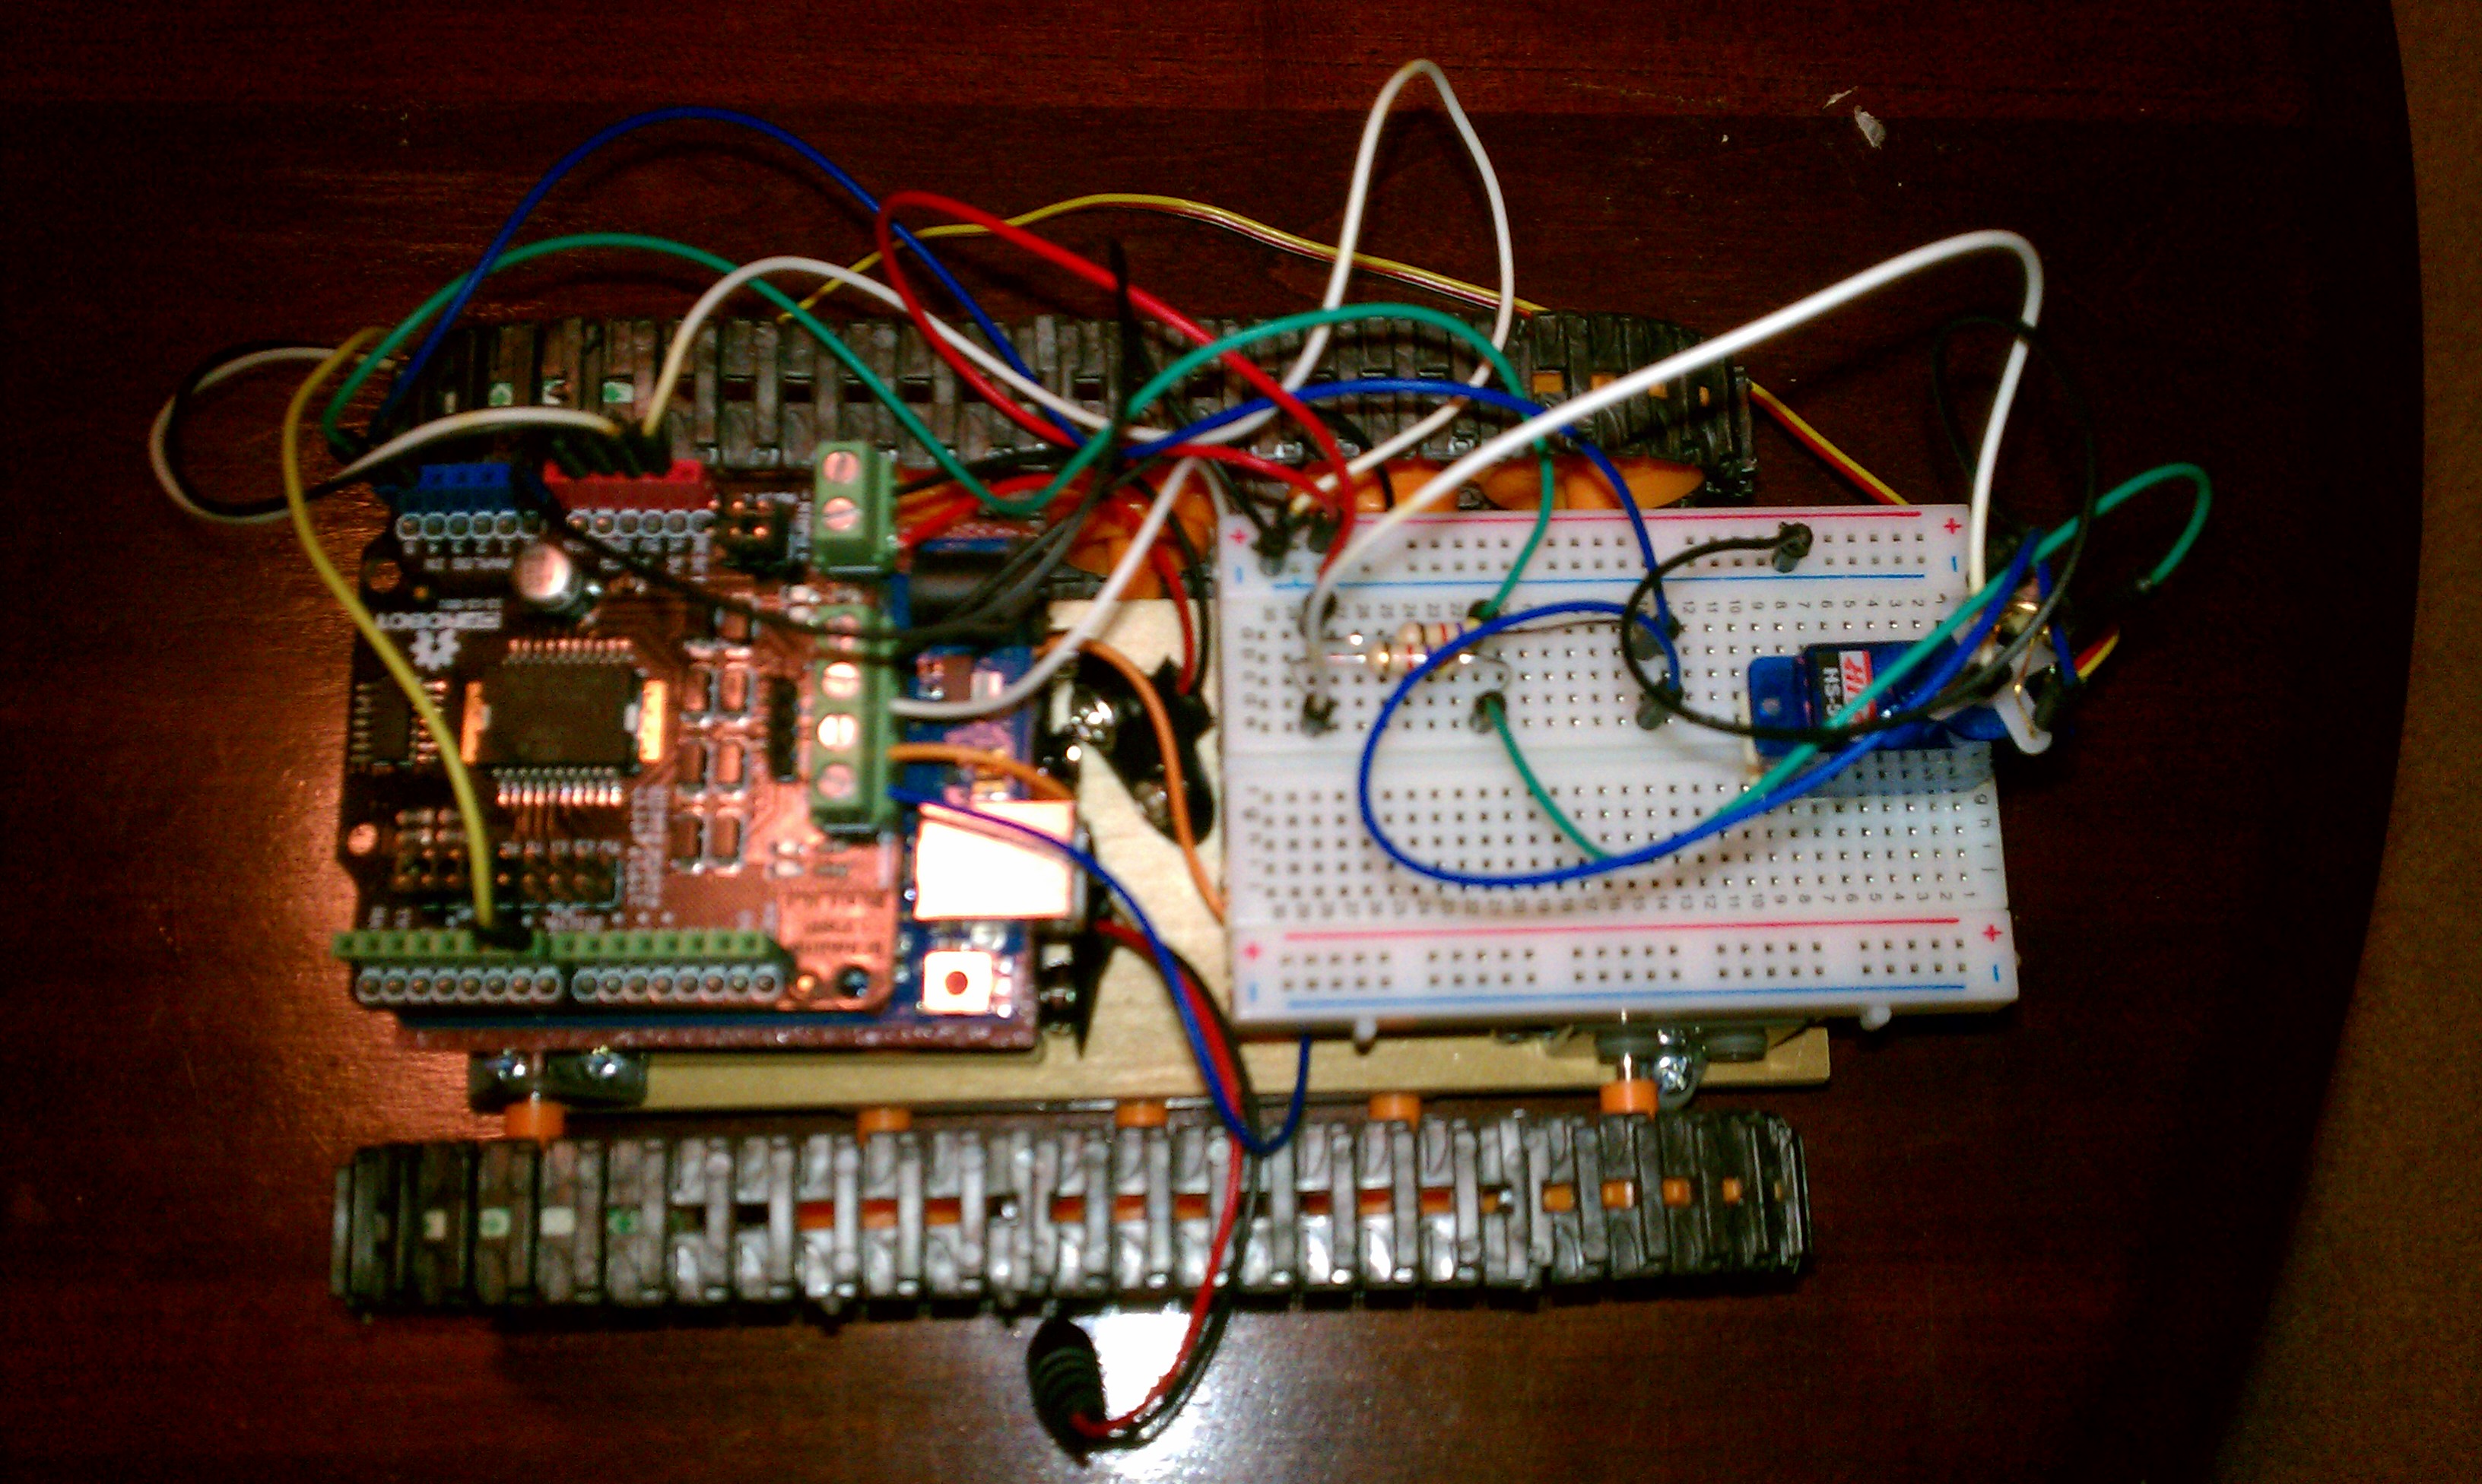
Alright, so I attached the bread board to the top of the gear box, again by cheating and using double sided tape. The Arduino/motor shield is sitting on top of the two 9v batteries, which I strapped down using a velcro strap (normally used for cable management).
Fast forward through some serious trial and error on writing the application, and voila! We've got... a robot that sort of heat seeks. The idea is simple - the IR thermometer moves back and forth, scanning a room for humans (or anything warmer than 80 degrees fahrenheit). It records the direction of the heat source relative to the direction the robot is facing. The robot should take that direction and adjust until the object is straight ahead of the robot, then drive forward. Heat seeking, at a primitive level.
My robot currently works, except that it has a fixed turn for course correction. In short, if you're 45 degrees left of the robot, the robot will turn left (as intended!) but too far left. So then the target is to the right, and it turns right (as intended!) but too far right. Since it is a static course correction, the robot never lines up perfectly with the target. Getting so close to completing the project took some of the wind out of my sails. So I hope you enjoyed this as an interim post, and I promise to finish the robot and post the sketch as well. Please comment, or feel free to share your ideas for improvements!
Here's the current (incomplete and very unpolished) version of the sketch:
// A lot of this code is borrowed from geniuses. I'm crediting all of them up top, as they should be.
// ***
// Sweep
// by BARRAGAN <http://barraganstudio.com>
// This example code is in the public domain.
// ***
// ***
// MLX90614 IR Thermometer code taken from http://bildr.org/2011/02/mlx90614-arduino/
// ***
// Instructions for wiring thermometer here: http://www.arduino.cc/cgi-bin/yabb2/YaBB.pl?num=1214872633
// RGB LED wiring and simple fading sketch: http://wiring.org.co/learning/basics/rgbled.html
// RGB+Arduino Project found here: http://publiclaboratory.org/es/node/593
#include <Servo.h>
#include <i2cmaster.h>
#include <AFMotor.h></code>
AF_DCMotor rMotor(3); // for M2 on Adafruit Motor Shield - not sure why
AF_DCMotor lMotor(4); // for M1 on Adafruit Motor Shield - not sure why
Servo myservo; // create servo object to control a servo
int pos = 0; // variable to store the servo position
int courseChange = 0; // variable to hold the value of how much of a course correction is needed - always less than 90
// set your thresholds for temperatures here - PROBABLY WON'T NEED ALL OF THESE IN MY APPLICATION
int cold = 60;
int normal = 80;
int hot = 100;
String tempLabel = " degrees F";
void setup()
{
myservo.attach(7); // attaches the servo on pin 9 to the servo object
// turn on motors
//lMotor.setSpeed(100);
lMotor.run(RELEASE);
//rMotor.setSpeed(100);
rMotor.run(RELEASE);
Serial.begin(9600); // Begin serial output at 9600 BAUD
Serial.println("Setup..."); // Print a quick note to terminal
i2c_init(); //Initialise the i2c bus
PORTC = (1 << PORTC4) | (1 << PORTC5);//enable pullups
}
void loop()
{
int highestTemp = 0; // integer to hold the value of the highest temperature reading so far - will be
int pointOfInterestCount = 0; //integer to hold the value of points of intersest; will divide total heading to get average heading
int pointOfInterest = 0; // integer, between 0 and 180, to indicate which direction the 'point of interest' is
int totalPointOfInterest = 0; //incremented integer that is a sum of all headings; will be divided to get average heading
for(pos = 10; pos < 180; pos += 1) // goes from 0 degrees to 180 degrees in steps of 1 degree
{
// Insane IR Thermometer handling code - I do not pretend to understand this code.
int dev = 0x5A<<1;
int data_low = 0;
int data_high = 0;
int pec = 0;
i2c_start_wait(dev+I2C_WRITE);
i2c_write(0x07);
// END Insane IR Thermometer handling code
myservo.write(pos); // tell servo to go to position in variable 'pos'
// IR Thermometer takes a reading
i2c_rep_start(dev+I2C_READ);
data_low = i2c_readAck(); //Read 1 byte and then send ack
data_high = i2c_readAck(); //Read 1 byte and then send ack
pec = i2c_readNak();
i2c_stop();
//This converts high and low bytes together and processes temperature, MSB is a error bit and is ignored for temps
double tempFactor = 0.02; // 0.02 degrees per LSB (measurement resolution of the MLX90614)
double tempData = 0x0000; // zero out the data
int frac; // data past the decimal point
// This masks off the error bit of the high byte, then moves it left 8 bits and adds the low byte.
tempData = (double)(((data_high && 0x007F) << 8) + data_low); tempData = (tempData * tempFactor)-0.01; float celcius = tempData - 273.15; float fahrenheit = (celcius*1.8) + 32; if(fahrenheit > normal){ // If the IR thermometer gets a reading greater than 60F
//Serial.println("above 80F"); // print to console for reference
if(fahrenheit > (highestTemp+1)){ // If the IR thermometer gets a reading that is the highest reading so far
//Serial.println("above 80F and the new highestTemp at"); // print to console for reference
highestTemp = fahrenheit; // Set the 'highestTemp' variable to the new temperature
pointOfInterest = pos; // Record the 'heading' that the servo is currently pointing
//Serial.println(pointOfInterest);
//Serial.println("degrees");
}
}
else if (fahrenheit <= cold){
Serial.println("below 60F"); // print to console for reference
}
delay(5); // waits 50ms for the servo to reach the position and for the IR thermometer to get a good reading
}
Serial.println(highestTemp + tempLabel);
Serial.println(pointOfInterest);
uint8_t i;
courseChange = 0;
if((pointOfInterest < 80) && (pointOfInterest != 0)){ /*courseChange = 90 - pointOfInterest; i = courseChange;*/ rMotor.run(FORWARD); Serial.println("to the left"); rMotor.setSpeed(255); delay(1000); rMotor.setSpeed(0); } else if(pointOfInterest > 100){
/*courseChange = 90 - pointOfInterest;
i = courseChange;*/
lMotor.run(FORWARD);
Serial.println("to the right");
lMotor.setSpeed(255);
delay(1000);
lMotor.setSpeed(0);
}
else if((pointOfInterest >= 80) && (pointOfInterest<=100)){ lMotor.run(FORWARD); rMotor.run(FORWARD); Serial.println("straight ahead"); lMotor.setSpeed(255); rMotor.setSpeed(255); delay(2000); lMotor.setSpeed(0); rMotor.setSpeed(0); /*digitalWrite(4,HIGH); digitalWrite(7, HIGH); analogWrite(5, 255); //PWM Speed Control analogWrite(6, 255); //PWM Speed Control delay(2000); analogWrite(5, 0); //PWM Speed Control analogWrite(6, 0); //PWM Speed Control */ } else if(pointOfInterest == 0){ Serial.println("No target - turning 90 degrees left"); rMotor.run(FORWARD); rMotor.setSpeed(255); delay(1000); rMotor.setSpeed(0); } delay(1000); for(pos = 180; pos>=10; pos-=1) // goes from 180 degrees to 0 degrees in steps of 1 degree
{
// Insane IR Thermometer handling code - I do not pretend to understand this code.
int dev = 0x5A<<1;
int data_low = 0;
int data_high = 0;
int pec = 0;
i2c_start_wait(dev+I2C_WRITE);
i2c_write(0x07);
// END Insane IR Thermometer handling code
myservo.write(pos); // tell servo to go to position in variable 'pos'
// IR Thermometer takes a reading
i2c_rep_start(dev+I2C_READ);
data_low = i2c_readAck(); //Read 1 byte and then send ack
data_high = i2c_readAck(); //Read 1 byte and then send ack
pec = i2c_readNak();
i2c_stop();
//This converts high and low bytes together and processes temperature, MSB is a error bit and is ignored for temps
double tempFactor = 0.02; // 0.02 degrees per LSB (measurement resolution of the MLX90614)
double tempData = 0x0000; // zero out the data
int frac; // data past the decimal point
// This masks off the error bit of the high byte, then moves it left 8 bits and adds the low byte.
tempData = (double)(((data_high && 0x007F) << 8) + data_low); tempData = (tempData * tempFactor)-0.01; float celcius = tempData - 273.15; float fahrenheit = (celcius*1.8) + 32; if(fahrenheit > normal){ // If the IR thermometer gets a reading greater than 60F
//Serial.println("above 80F"); // print to console for reference
if(fahrenheit > (highestTemp+1)){ // If the IR thermometer gets a reading that is the highest reading so far
//Serial.println("above 80F and the new highestTemp at"); // print to console for reference
highestTemp = fahrenheit; // Set the 'highestTemp' variable to the new temperature
pointOfInterest = pos; // Record the 'heading' that the servo is currently pointing
//Serial.println(pointOfInterest);
//Serial.println("degrees");
}
}
else if (fahrenheit <= cold){
Serial.println("below 60F"); // print to console for reference
}
delay(5); // waits 50ms for the servo to reach the position and for the IR thermometer to get a good reading
}
Serial.println(highestTemp + tempLabel);
Serial.println(pointOfInterest);
i = 0;
courseChange = 0;
if((pointOfInterest < 80) && (pointOfInterest != 0)){ /*courseChange = 90 - pointOfInterest; i = courseChange;*/ rMotor.run(FORWARD); Serial.println("to the left"); rMotor.setSpeed(255); delay(1000); rMotor.setSpeed(0); } else if(pointOfInterest > 100){
/*courseChange = 90 - pointOfInterest;
i = courseChange;*/
lMotor.run(FORWARD);
Serial.println("to the right");
lMotor.setSpeed(255);
delay(1000);
lMotor.setSpeed(0);
}
else if((pointOfInterest >= 80) && (pointOfInterest<=100)){
lMotor.run(FORWARD);
rMotor.run(FORWARD);
Serial.println("straight ahead");
lMotor.setSpeed(255);
rMotor.setSpeed(255);
delay(2000);
lMotor.setSpeed(0);
rMotor.setSpeed(0);
/*digitalWrite(4,LOW);
digitalWrite(7, LOW);
analogWrite(5, 255); //PWM Speed Control
analogWrite(6, 255); //PWM Speed Control
delay(2000);
analogWrite(5, 0); //PWM Speed Control
analogWrite(6, 0); //PWM Speed Control */
}
else if(pointOfInterest == 0){
Serial.println("No target - turning 90 degrees left");
rMotor.run(FORWARD);
rMotor.setSpeed(255);
delay(1000);
rMotor.setSpeed(0);
}
delay(1000);
}


Leave a Comment